In my last post I’ve mentioned connecting the JavaScript client-side code to various server data sources and have had a WCF HTTP service implemented as an example. Another –rather old fashioned but still viable, option is an ISAPI serving JSON data.
You can, of course, create the ISAPI DLL using a number of tools. What I’ve always had difficulty remembering though is the exact steps needed to host the DLL in IIS. If nothing else this post is a reminder on how to have an ISAPI hosted in a Virtual Directory under IIS 7.5, which ships with Windows 7.
Install IIS
Install IIS if you haven’t already done so. Besides the bare minimum make sure you have the ISAPI options (ISAPI Extensions and ISAPI Filters) checked as shown in the figure below.
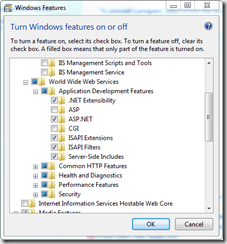
Configure for ISAPI DLL
- Open IIS Manager.
- Assuming you already have a Virtual Directory created under the Default Web Site node select it and double click the Handler Mappings icon.
- Click Edit Feature Permissions in Actions panel.
- Check Execute in the Edit Feature Permission dialogue.
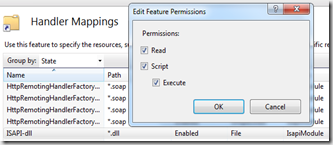
Enable ISAPI modules
- Click on the root node and double click the ISAPI and CGI Restrictions icon.
- Click Edit Feature Setting in Actions panel.
- Check Allow unspecified ISAPI modules option.
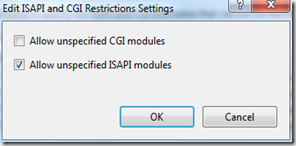
Set security permissions
Please note that the following steps must not be taken on a deployment server as is. I could use a helping hand on amending this part of the guide by providing the exact accounts and permissions that should be used on deployment servers (please email me or leave a comment if interested in helping).
- Select the Virtual Directory and double click the Authentication icon.
- Select the Anonymous Authentication item and click Edit in Actions panel.
- Check the Application pool identity option and close the dialogue.
- Right click on the Virtual Directory node and click Edit Permission in the popup menu.
- Use the Security tab to add the IIS_IUSRS or Everyone account and give sufficient permissions.
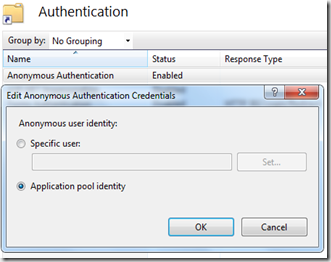
Enable 32bit ISAPI DLL on IIS 7 x64
If you are using IIS 7 x64 and would like to run 32 bit ISAPI DLL you need to follow the following steps:
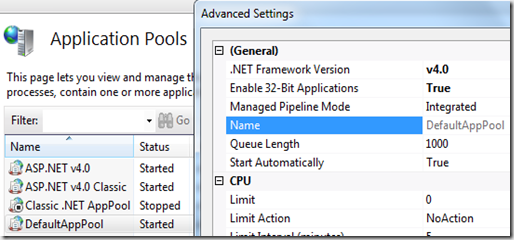
- Click the Application Pools node.
- Select the DefaultAppPool item and click Advanced Settings from the Actions panel.
- Set the Enable 32-Bit Applications to true.
You are good to go 