Παρουσίαση με Ετικέτες
Όλες οι Ετικέτε... »
asp.net (RSS)
In this post I will be looking into EF 6.0 using the Code First Workflow and its support for stored procedures and more particularly how to display data using a stored procedure. I have posted something similar in this post https://weblogs.asp.net/dotnetstories/using-stored-procedures-in-an-asp-net-mvc-5-0-application-using-entity-framework-6-0 but this post described in detail how to insert, update and delete data in an ASP.Net MVC 6.0 application using stored procedures but not how to display data using a stored procedure.
I will be building a simple ASP.Net MVC 5.0 application that will be the client application that will consume the Entity Framework data access layer.
I will be using Visual Studio 2015,C# 5.0 and LocalDb in this demo.
I will be leveraging the scaffolding functionality as much as possible.
I will also show you how to log queries sent to the database by Entity Framework 6.0.
With EF 6.0 we do have a mechanism to trace/profile everything EF sents to the data store.
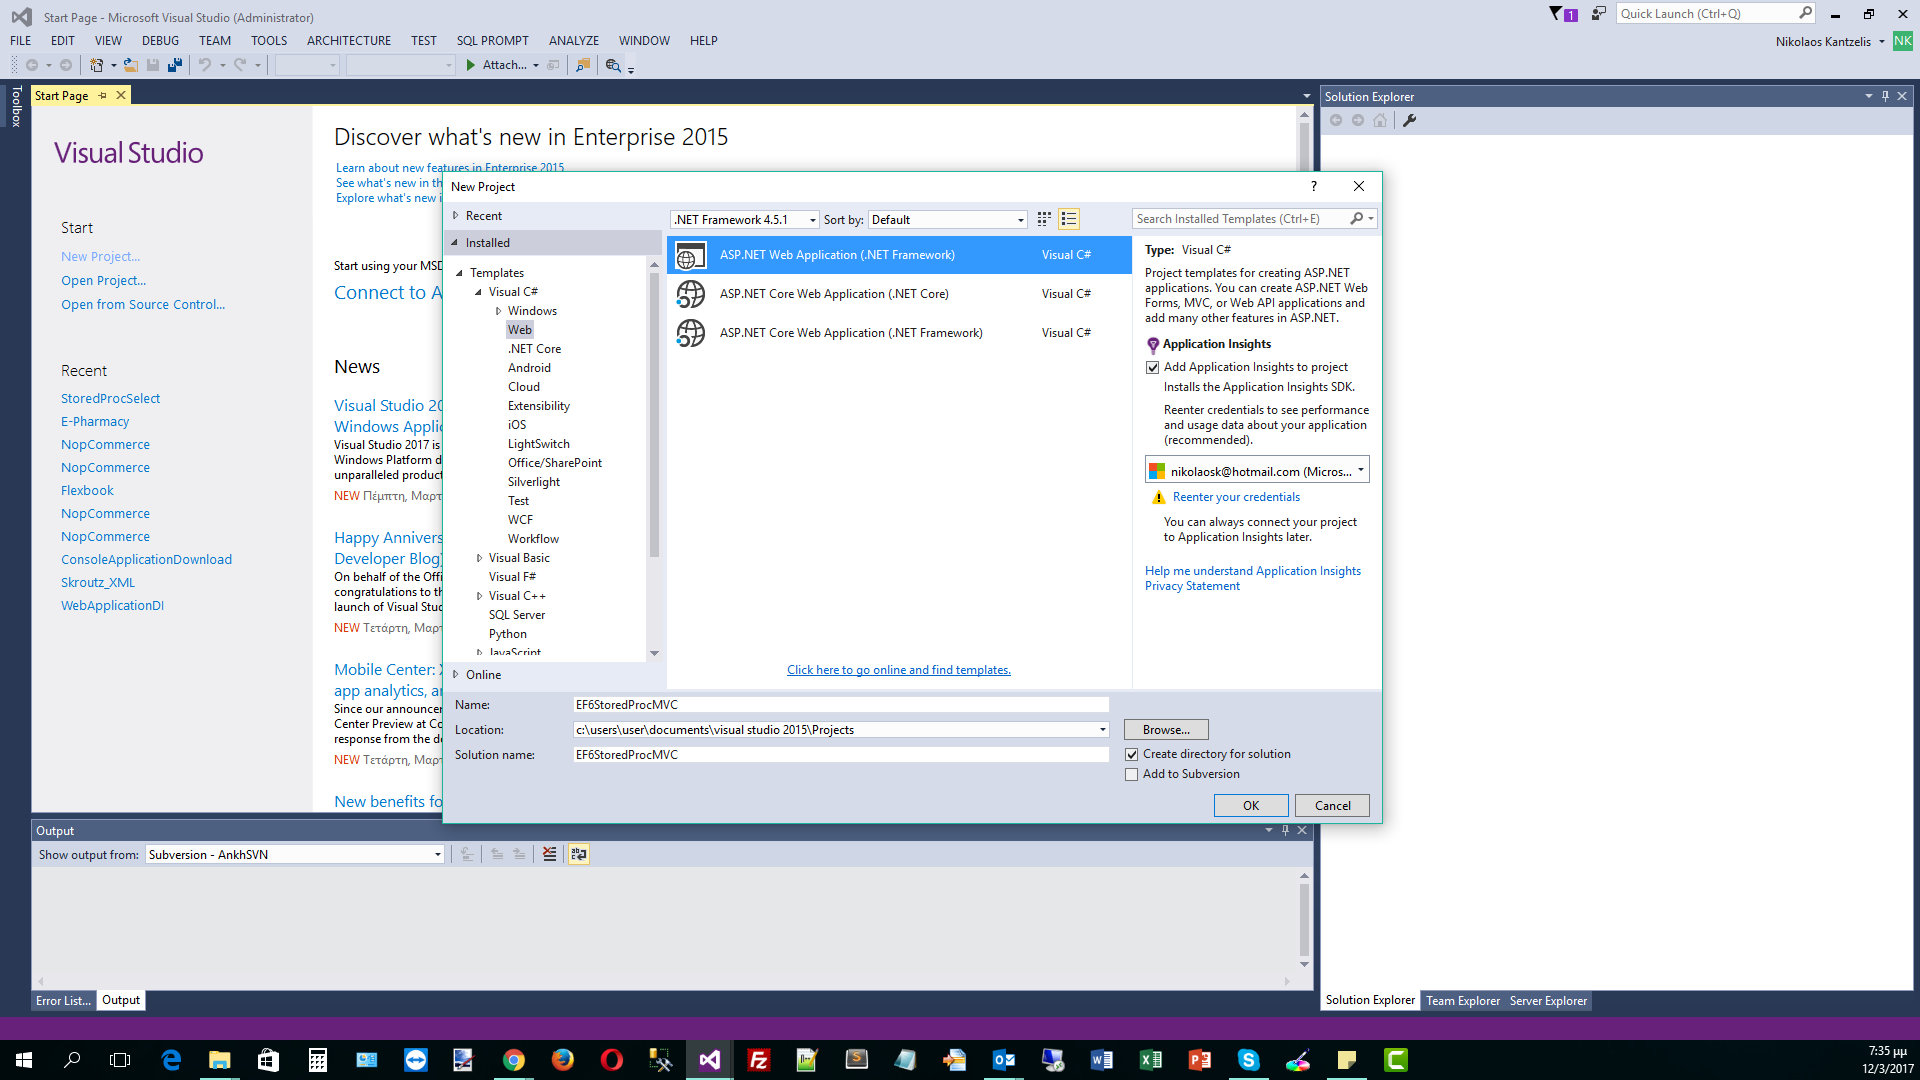
We will create the ASP.NET Web Application with the MVC 5 Project Template.
1) Launch Visual Studio 2015 and click on the "New Project". Select Web from the left pane and create the ASP.NET Web Application. Have a look at the picture below
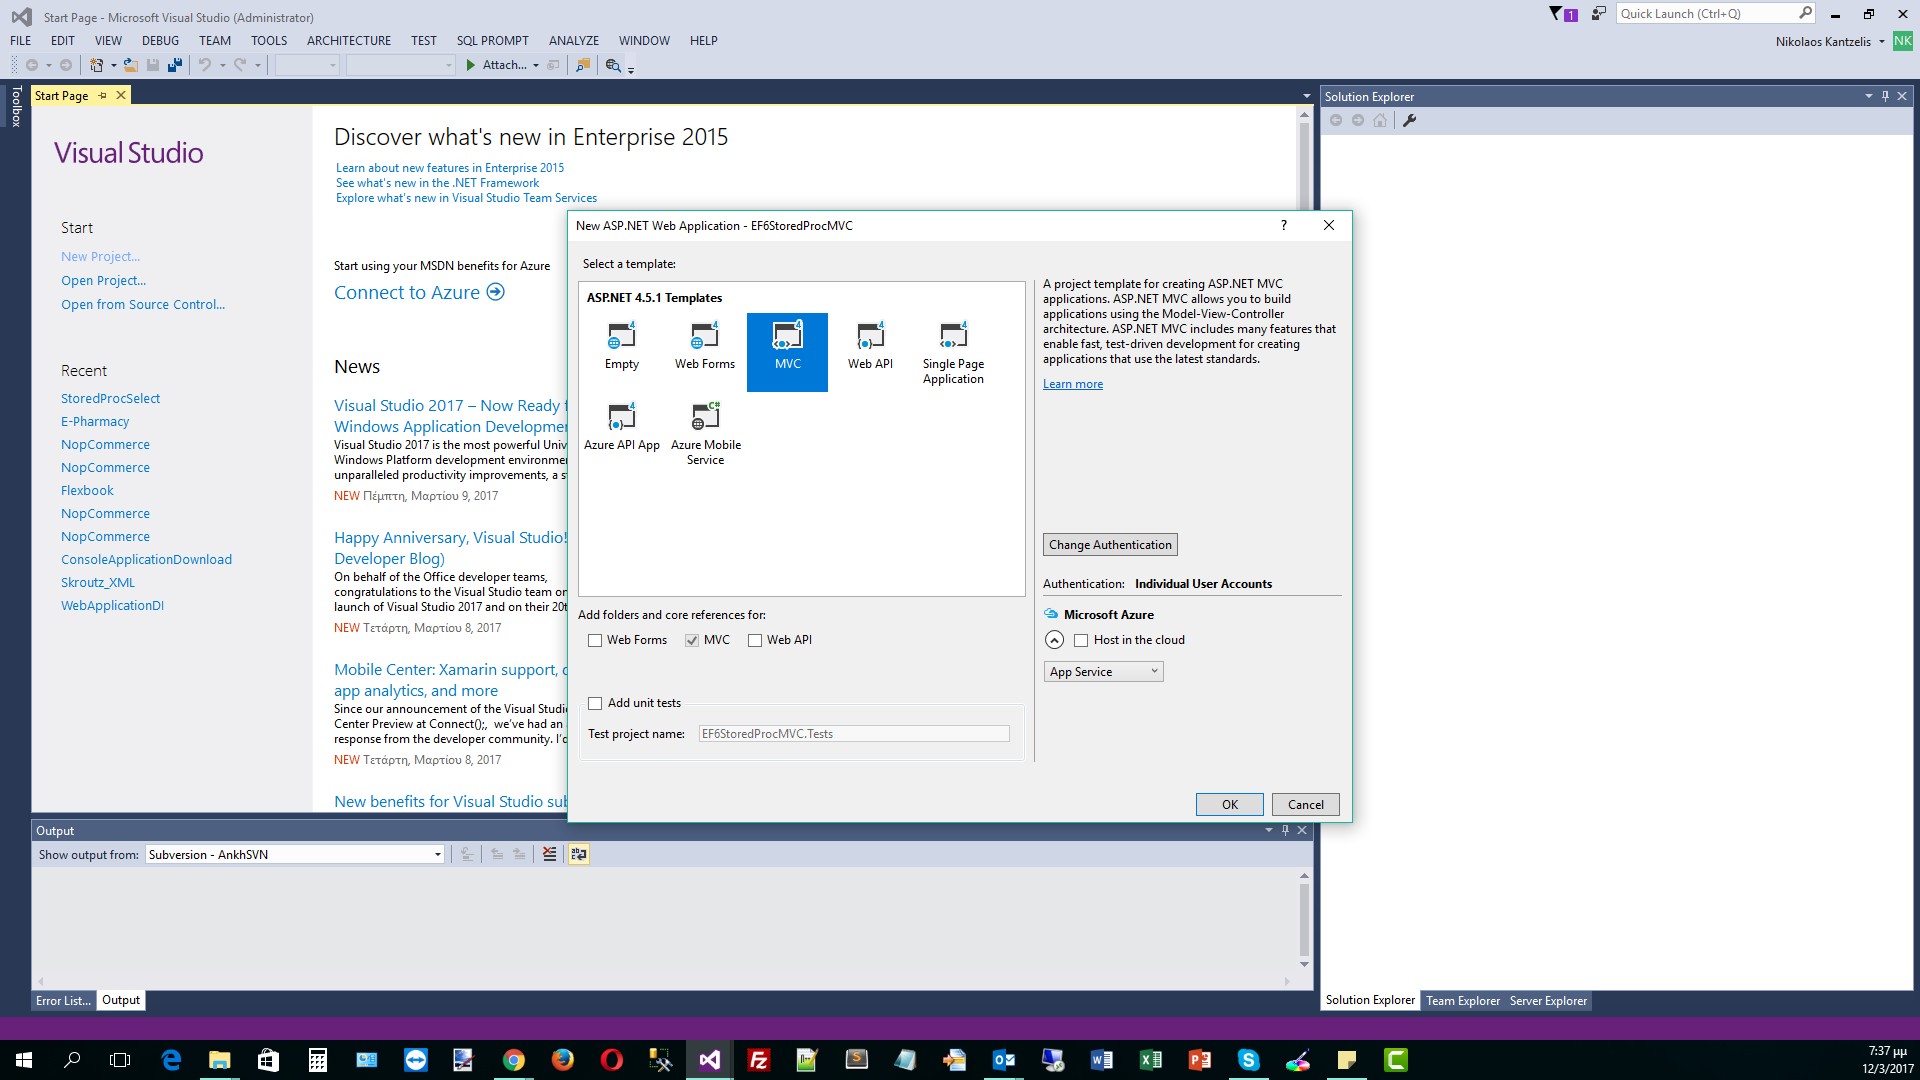
2) Select the MVC Project Template as shown below and then click OK.
3) Visual Studio 2105 will automatically create the ASP.Net MVC 5.0 application.In the Models folder we will add a new class file, Footballer.cs
Right-click on the Models folder and Add a new Class, Footballer.cs
public class Footballer
{
public int FootballerID { get; set; }
public string FirstName { get; set; }
public string LastName { get; set; }
public double Weight { get; set; }
public double Height { get; set; }
}
4) We will add declarative code in this simple class in order to define that we need the properties (columns in the database) to be required - not null fields in the database.
We need to reference the System.ComponentModel.DataAnnotations assembly. We will use Data Annotations and not the Fluent API. Have a look at the code below.
using System.ComponentModel.DataAnnotations;
namespace EF6StoredProcMVC.Models
{
public class Footballer
{
public int FootballerID { get; set; }
[Required]
public string FirstName { get; set; }
[Required]
public string LastName { get; set; }
[Required]
public double Weight { get; set; }
[Required]
public double Height { get; set; }
}
}
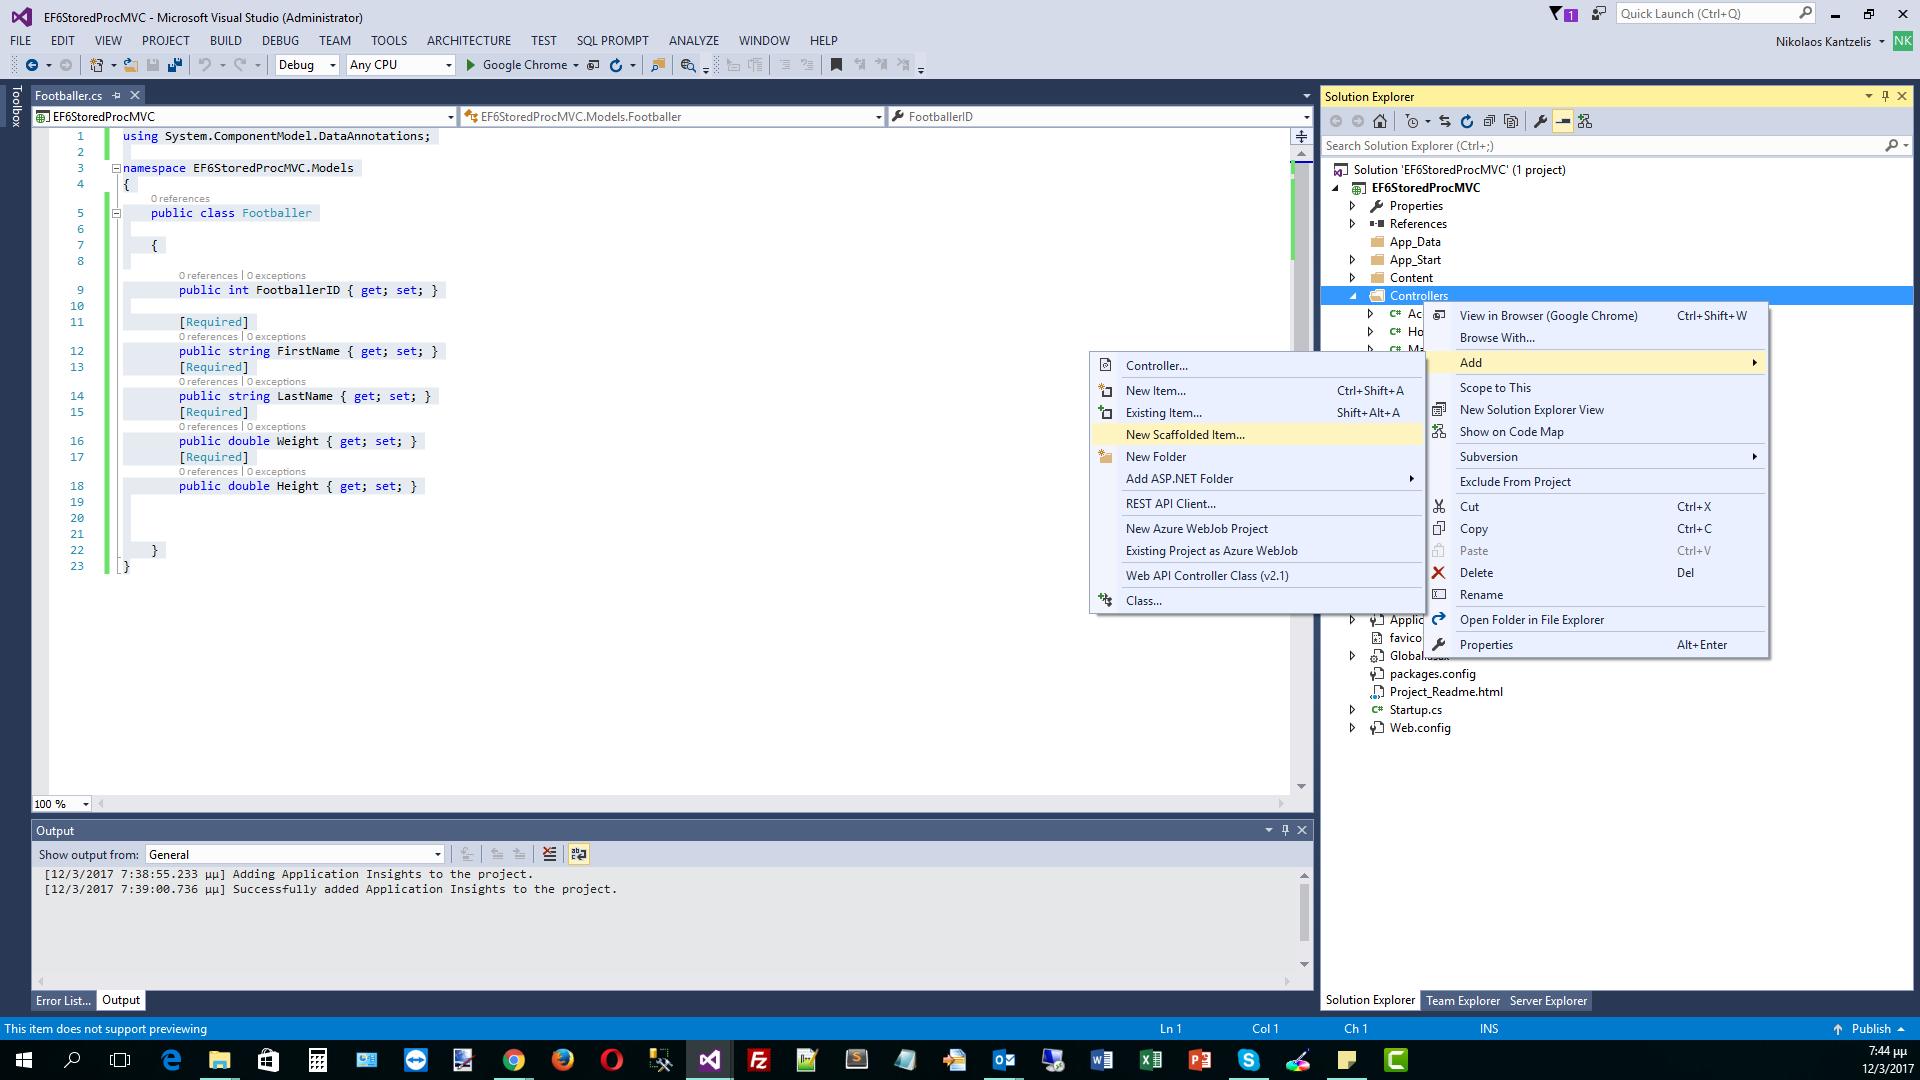
5) Now I am going to build the Controller. I am going to the Controllers folder and click Add --> New Scaffolded Item.
Have a look at the picture below
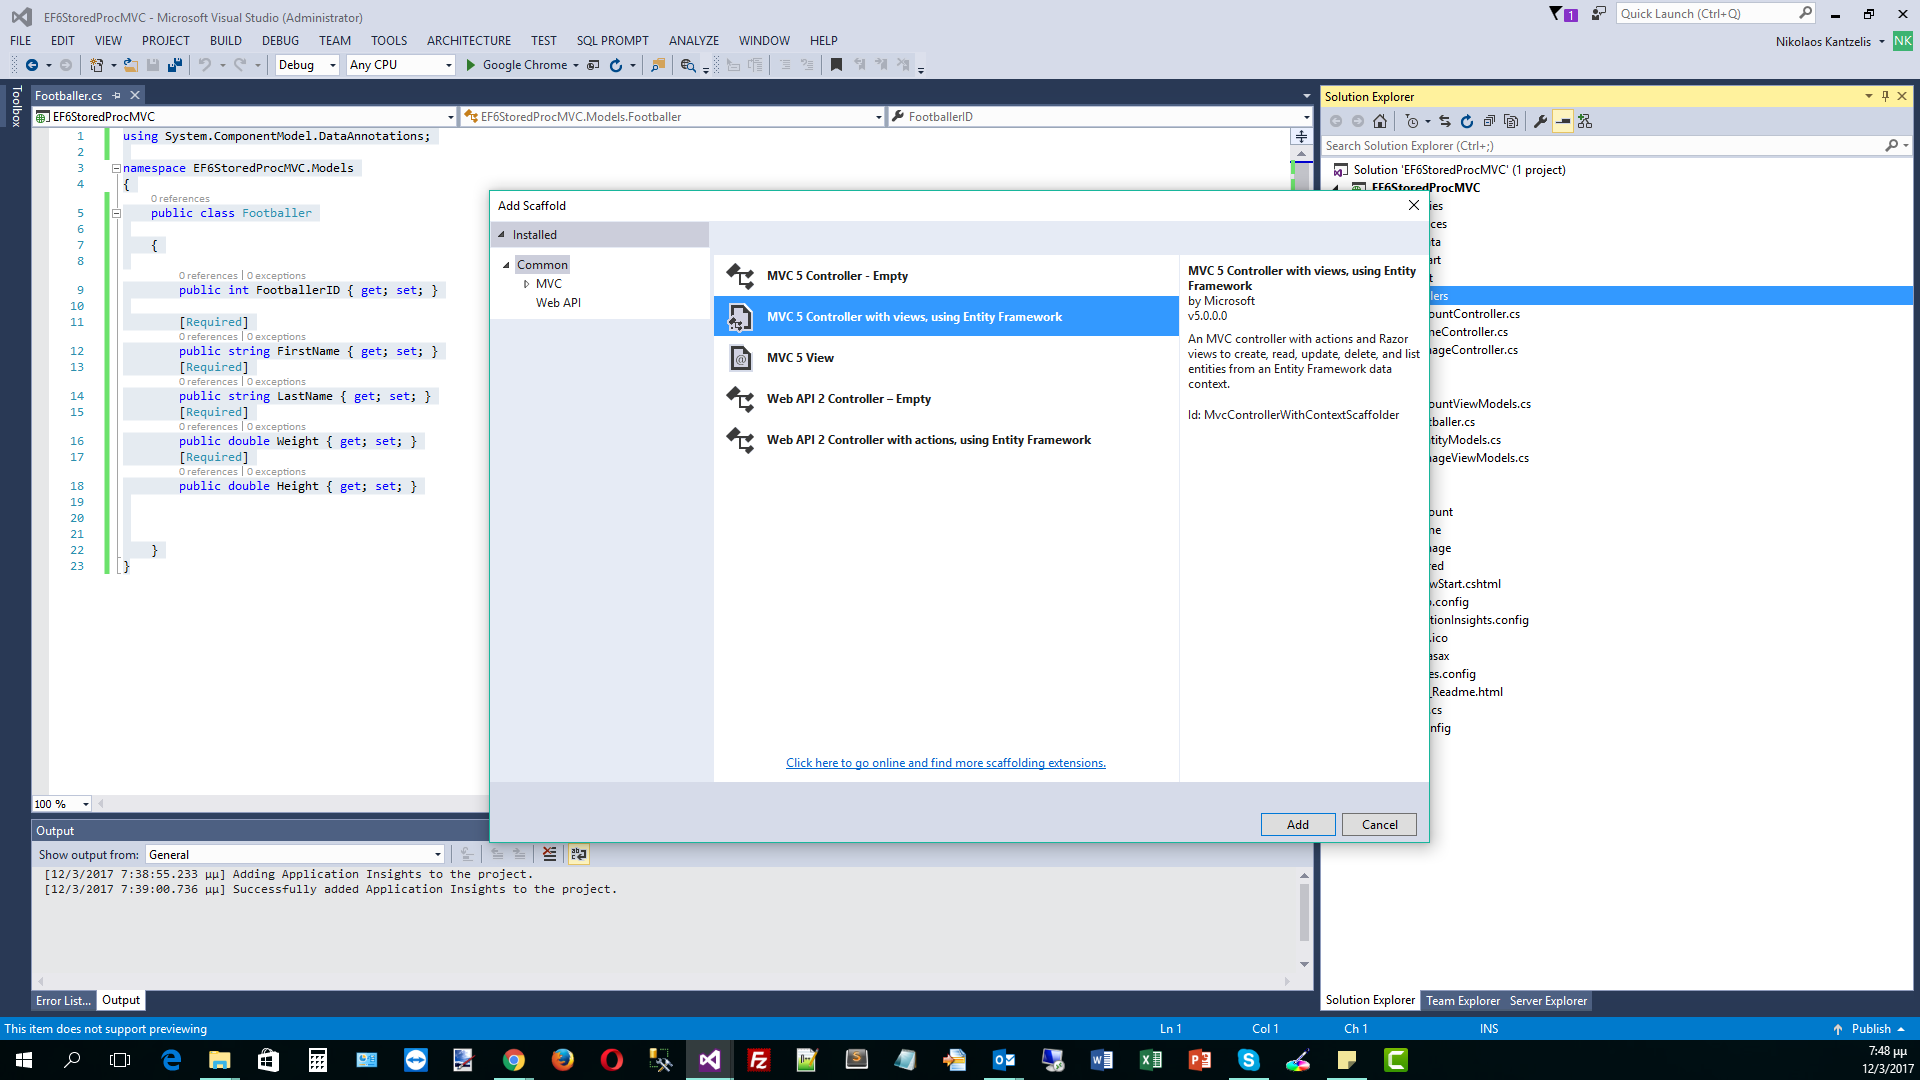
6) In the Add Scaffold wizard, select the MVC 5 Controller with views,using Entity Framework and click Add.
Have a look at the picture below
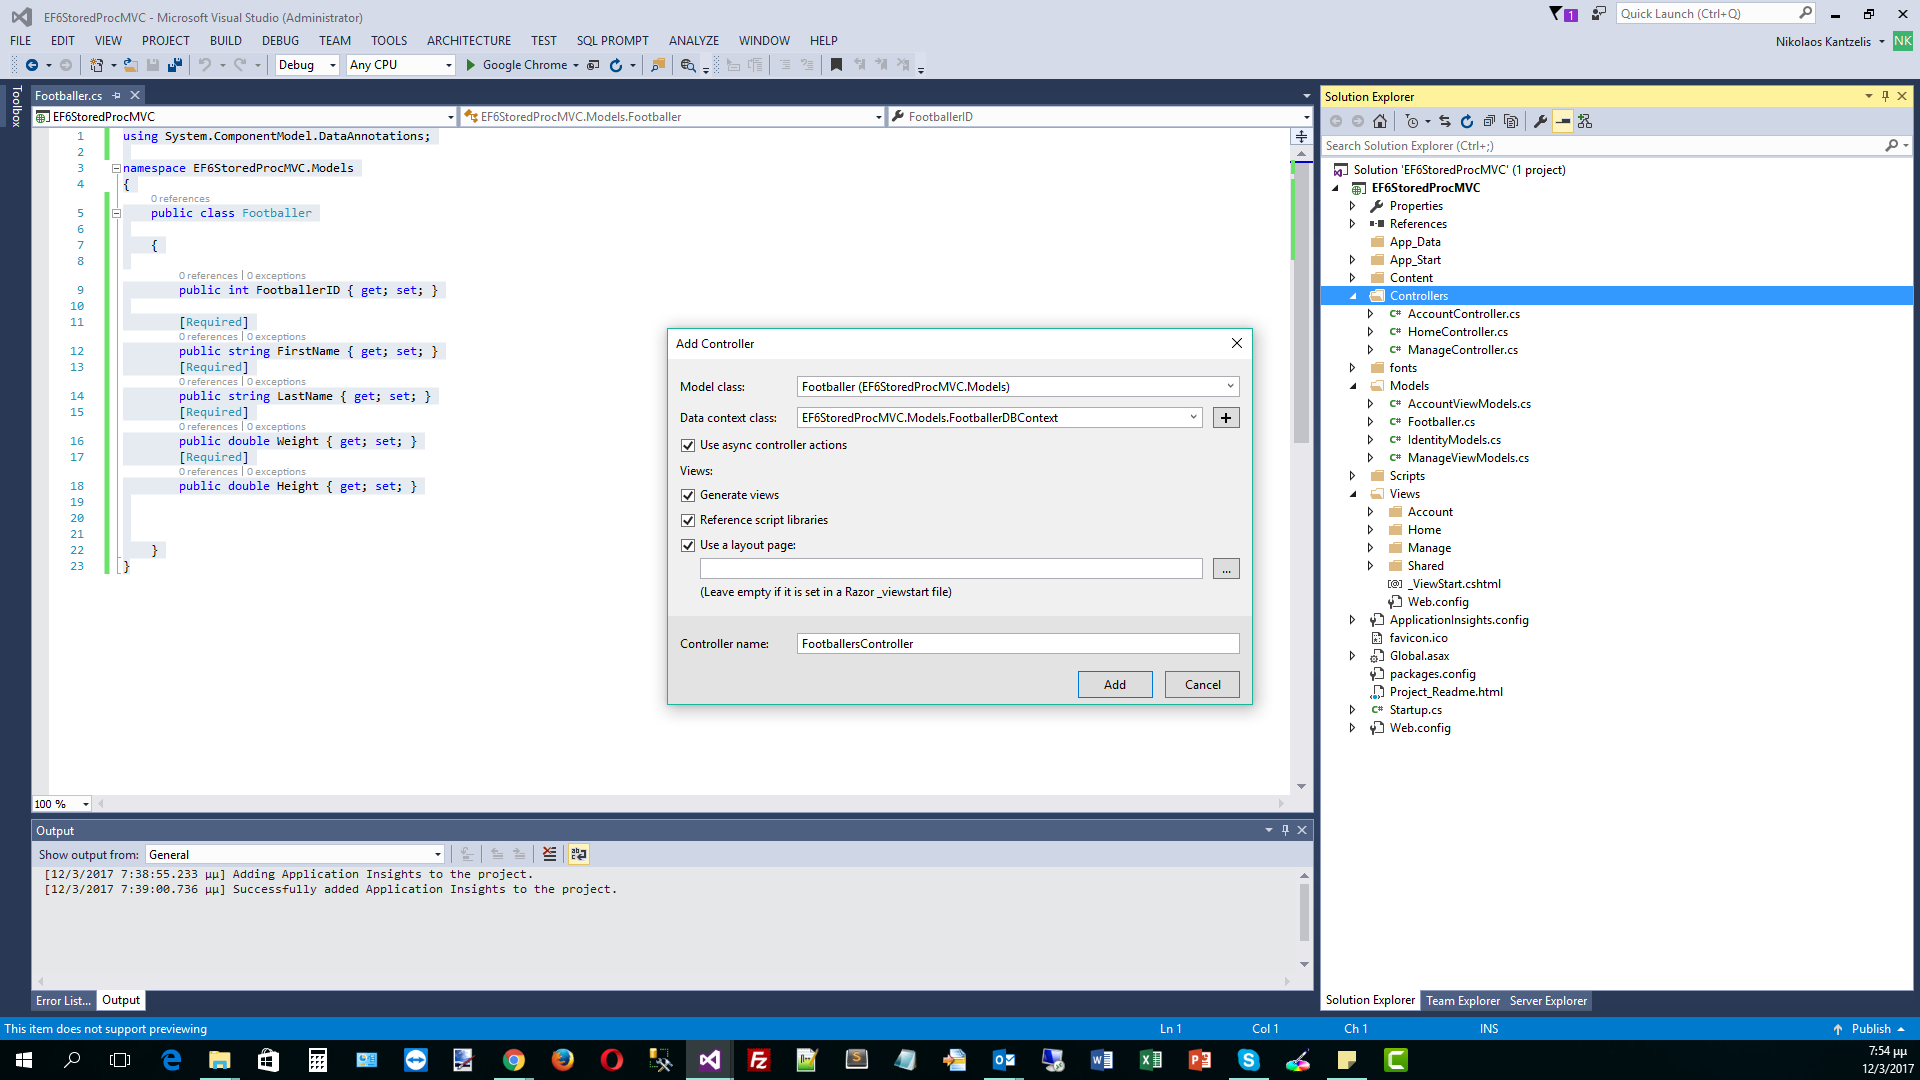
7) In the next Add Controller wizard window, select the Model Class (Footballer) and add the Data Context class.Create a Data Context class with a suitable name and select a name for the controller.Finally click Add.
I will use the async controller actions option.
Have a look at the picture below
8) Have a look at the generated FootballerDBContext.cs
using System.Data.Entity;
namespace EF6StoredProcMVC.Models
{
public class FootballerDBContext : DbContext
{
// You can add custom code to this file. Changes will not be overwritten.
//
// If you want Entity Framework to drop and regenerate your database
// automatically whenever you change your model schema, please use data migrations.
// For more information refer to the documentation:
// http://msdn.microsoft.com/en-us/data/jj591621.aspx
public FootballerDBContext() : base("name=FootballerDBContext")
{
}
public System.Data.Entity.DbSet<EF6StoredProcMVC.Models.Footballer> Footballers { get; set; }
}
}
9) Have a look at the FootballersController.cs that was also generated. Υou will see methods for displaing, adding, editing and deleting data. All this code was generated through the magic of scaffolding. Take your time to study the code below.
using System.Data.Entity;
using System.Threading.Tasks;
using System.Net;
using System.Web.Mvc;
using EF6StoredProcMVC.Models;
namespace EF6StoredProcMVC.Controllers
{
public class FootballersController : Controller
{
private FootballerDBContext db = new FootballerDBContext();
// GET: Footballers
public async Task<ActionResult> Index()
{
return View(await db.Footballers.ToListAsync());
}
// GET: Footballers/Details/5
public async Task<ActionResult> Details(int? id)
{
if (id == null)
{
return new HttpStatusCodeResult(HttpStatusCode.BadRequest);
}
Footballer footballer = await db.Footballers.FindAsync(id);
if (footballer == null)
{
return HttpNotFound();
}
return View(footballer);
}
// GET: Footballers/Create
public ActionResult Create()
{
return View();
}
// POST: Footballers/Create
// To protect from overposting attacks, please enable the specific properties you want to bind to, for
// more details see http://go.microsoft.com/fwlink/?LinkId=317598.
[HttpPost]
[ValidateAntiForgeryToken]
public async Task<ActionResult> Create([Bind(Include = "FootballerID,FirstName,LastName,Weight,Height")] Footballer footballer)
{
if (ModelState.IsValid)
{
db.Footballers.Add(footballer);
await db.SaveChangesAsync();
return RedirectToAction("Index");
}
return View(footballer);
}
// GET: Footballers/Edit/5
public async Task<ActionResult> Edit(int? id)
{
if (id == null)
{
return new HttpStatusCodeResult(HttpStatusCode.BadRequest);
}
Footballer footballer = await db.Footballers.FindAsync(id);
if (footballer == null)
{
return HttpNotFound();
}
return View(footballer);
}
// POST: Footballers/Edit/5
// To protect from overposting attacks, please enable the specific properties you want to bind to, for
// more details see http://go.microsoft.com/fwlink/?LinkId=317598.
[HttpPost]
[ValidateAntiForgeryToken]
public async Task<ActionResult> Edit([Bind(Include = "FootballerID,FirstName,LastName,Weight,Height")] Footballer footballer)
{
if (ModelState.IsValid)
{
db.Entry(footballer).State = EntityState.Modified;
await db.SaveChangesAsync();
return RedirectToAction("Index");
}
return View(footballer);
}
// GET: Footballers/Delete/5
public async Task<ActionResult> Delete(int? id)
{
if (id == null)
{
return new HttpStatusCodeResult(HttpStatusCode.BadRequest);
}
Footballer footballer = await db.Footballers.FindAsync(id);
if (footballer == null)
{
return HttpNotFound();
}
return View(footballer);
}
// POST: Footballers/Delete/5
[HttpPost, ActionName("Delete")]
[ValidateAntiForgeryToken]
public async Task<ActionResult> DeleteConfirmed(int id)
{
Footballer footballer = await db.Footballers.FindAsync(id);
db.Footballers.Remove(footballer);
await db.SaveChangesAsync();
return RedirectToAction("Index");
}
protected override void Dispose(bool disposing)
{
if (disposing)
{
db.Dispose();
}
base.Dispose(disposing);
}
}
}
10) You can also have a look at the generated views that were created by the Scaffold wizzard.
We choose to open the _Layout.cshtml view and add the following line of code in the navigation pane
<li>@Html.ActionLink("Footballers", "Index", "Footballers")</li>
the full code is
<ul class="nav navbar-nav">
<li>@Html.ActionLink("Home", "Index", "Home")</li>
<li>@Html.ActionLink("About", "About", "Home")</li>
<li>@Html.ActionLink("Footballers", "Index", "Footballers")</li>
<li>@Html.ActionLink("Contact", "Contact", "Home")</li>
</ul>
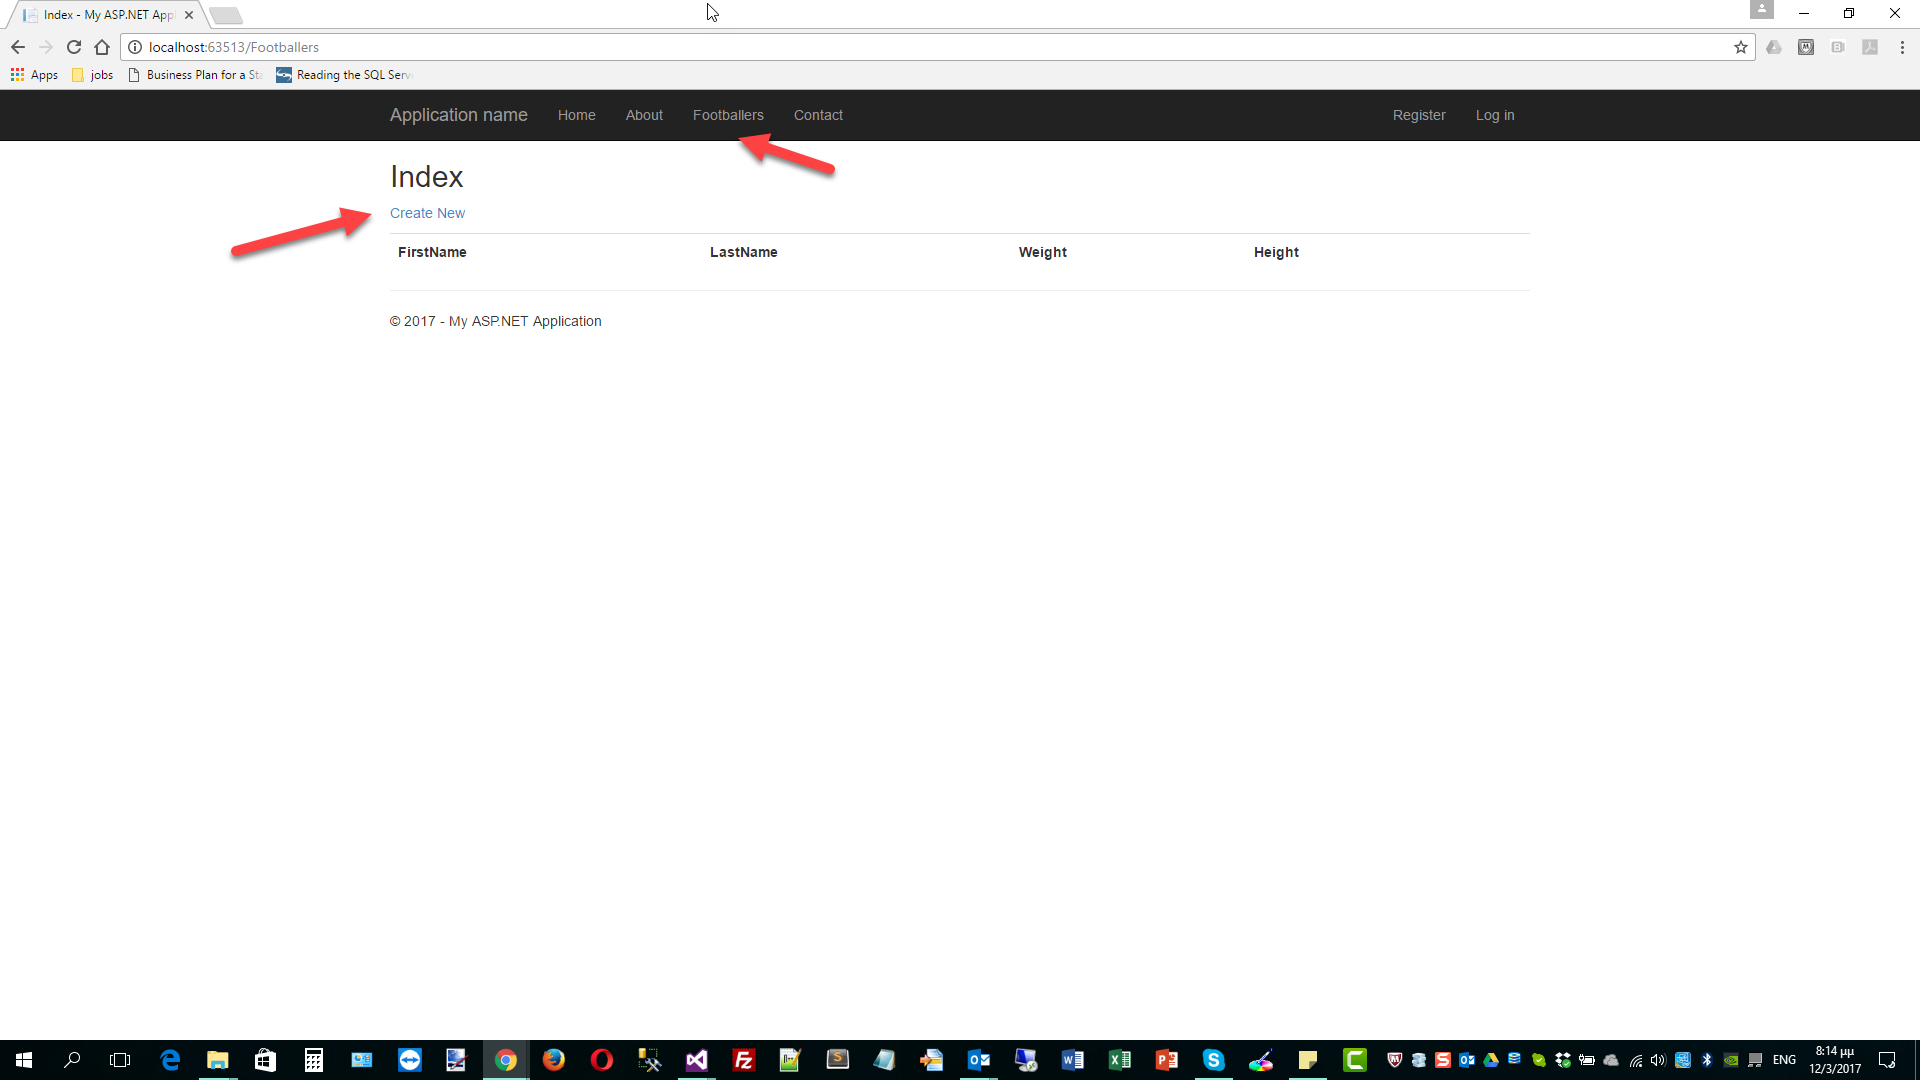
Now we can navigate to our page through the menu.
Build and run your application.It will take some time to appear in the first time since the database is created.The database is under the App_Data special folder.
Have a look at the picture below to see the created database.
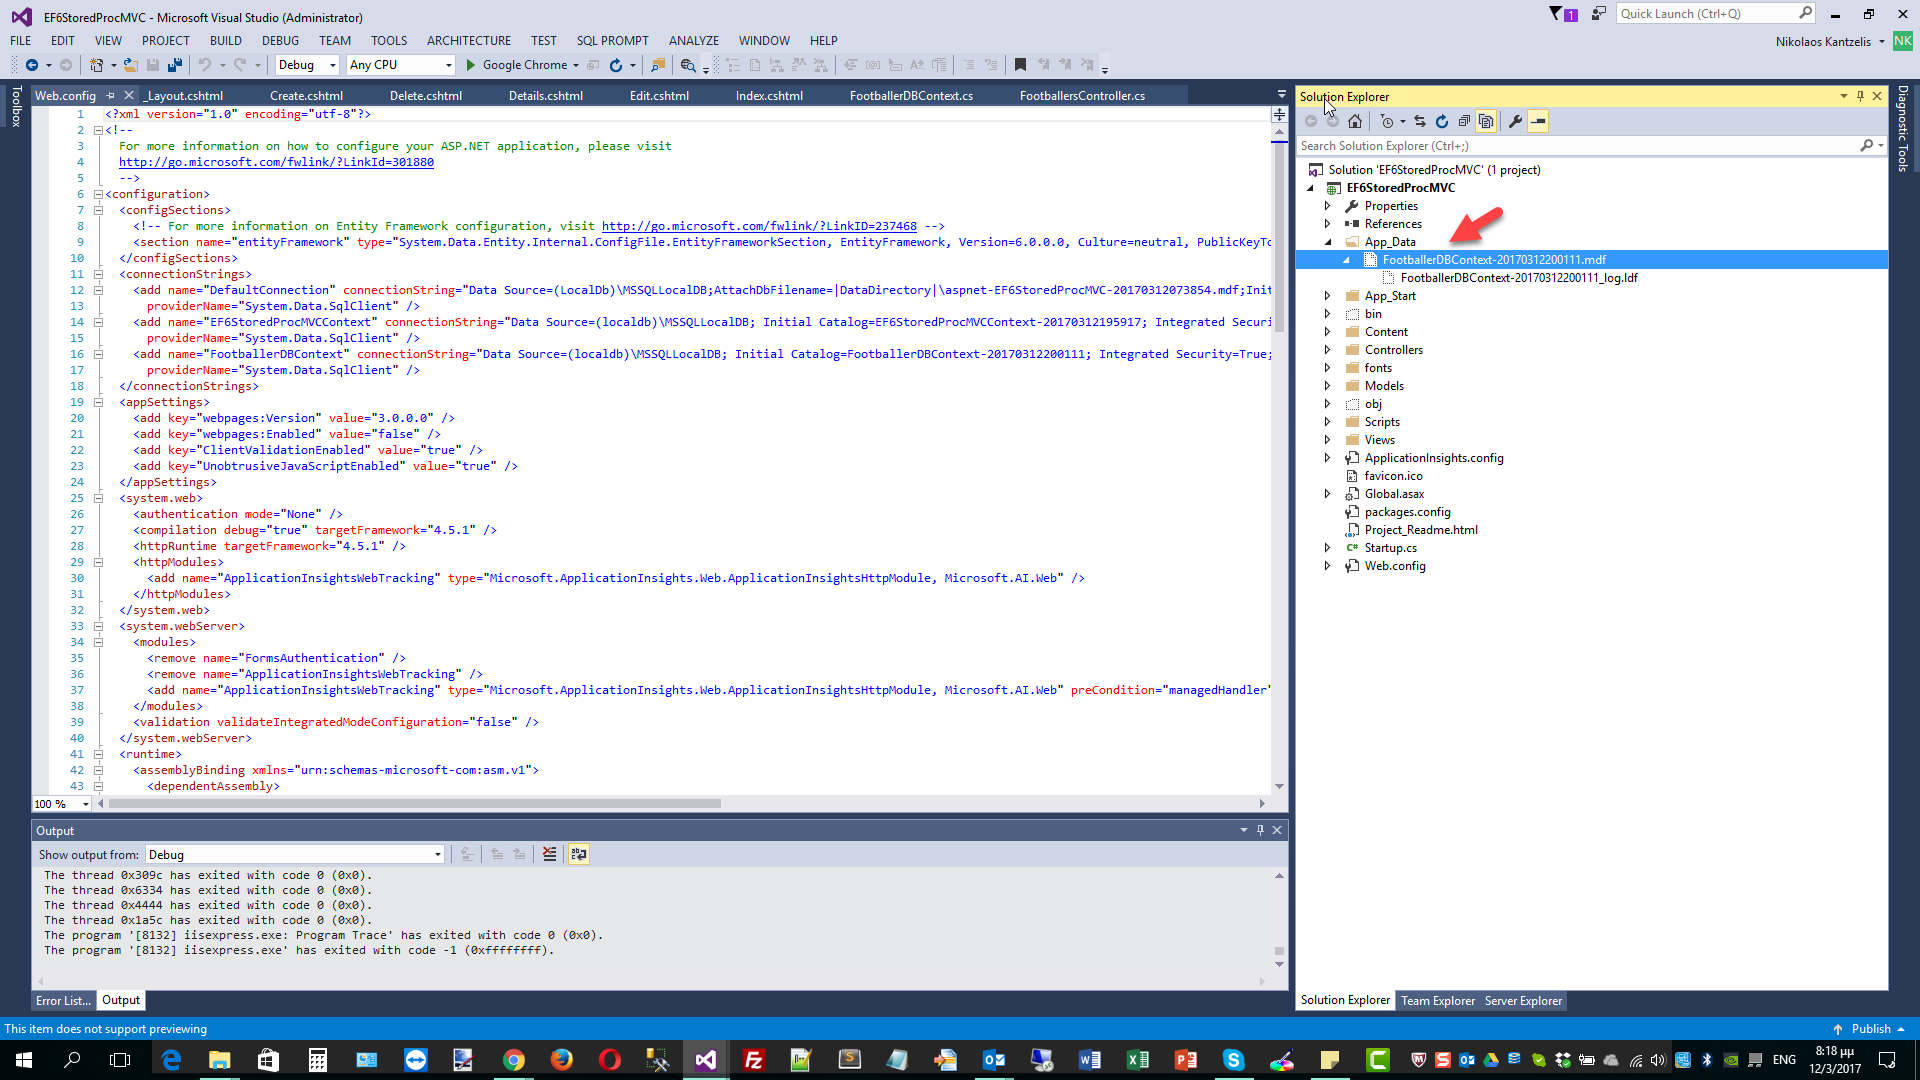
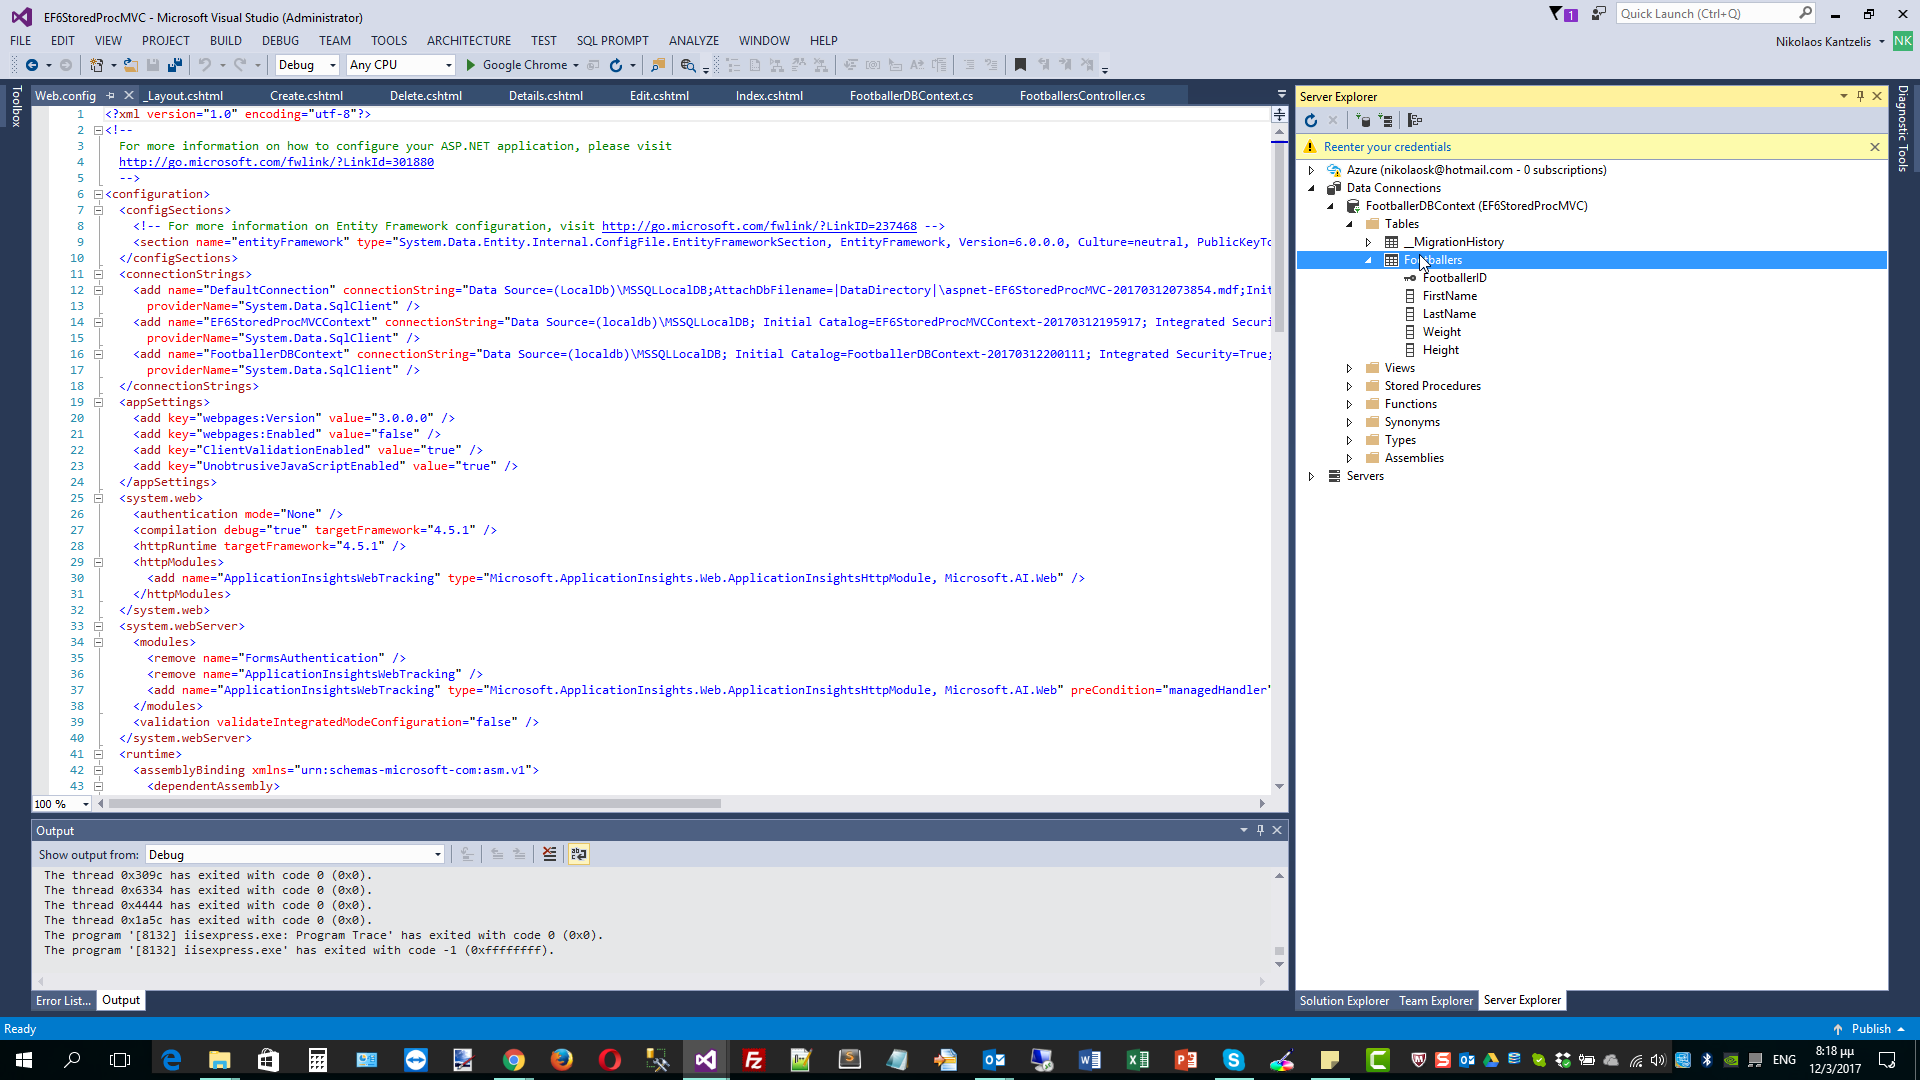
When you open the database, you will see the table with the appropriate columns created. Have a look at the picture below.
When you will see you application, click on Footballers from the menu and then add some sample data. Have a look at the picture below.
11) After you insert those records in the database then you would wonder what is the T-SQL that EF DBContext sends to the SQL Server LocalDb to execute.
There are various ways to profile the T-SQL statements that EF sends to the data store. Have a look here, here and here for some ways of profiling the data in earlier versions of EF.
You can always use the SQL Server Profiler. In EF 6.0 we can trace the T-SQL statements using the the Log property of DbContext.
I am going to add some code in the FootballersController.cs class file in order to intercept the T-SQL statements.
I am going to add inside the FootballersController constructor the following code.
public FootballersController()
{
db.Database.Log = T => Debug.Write(T);
}
Make sure you add a reference to the System.Diagnostics assembly.
Have a look below to see where above statement fits with everything.
using System.Data.Entity;
using System.Threading.Tasks;
using System.Net;
using System.Web.Mvc;
using EF6StoredProcMVC.Models;
using System.Diagnostics;
namespace EF6StoredProcMVC.Controllers
{
public class FootballersController : Controller
{
private FootballerDBContext db = new FootballerDBContext();
public FootballersController()
{
db.Database.Log = T => Debug.Write();
}
// GET: Footballers
public async Task<ActionResult> Index()
{
return View(await db.Footballers.ToListAsync());
}
// More code follows
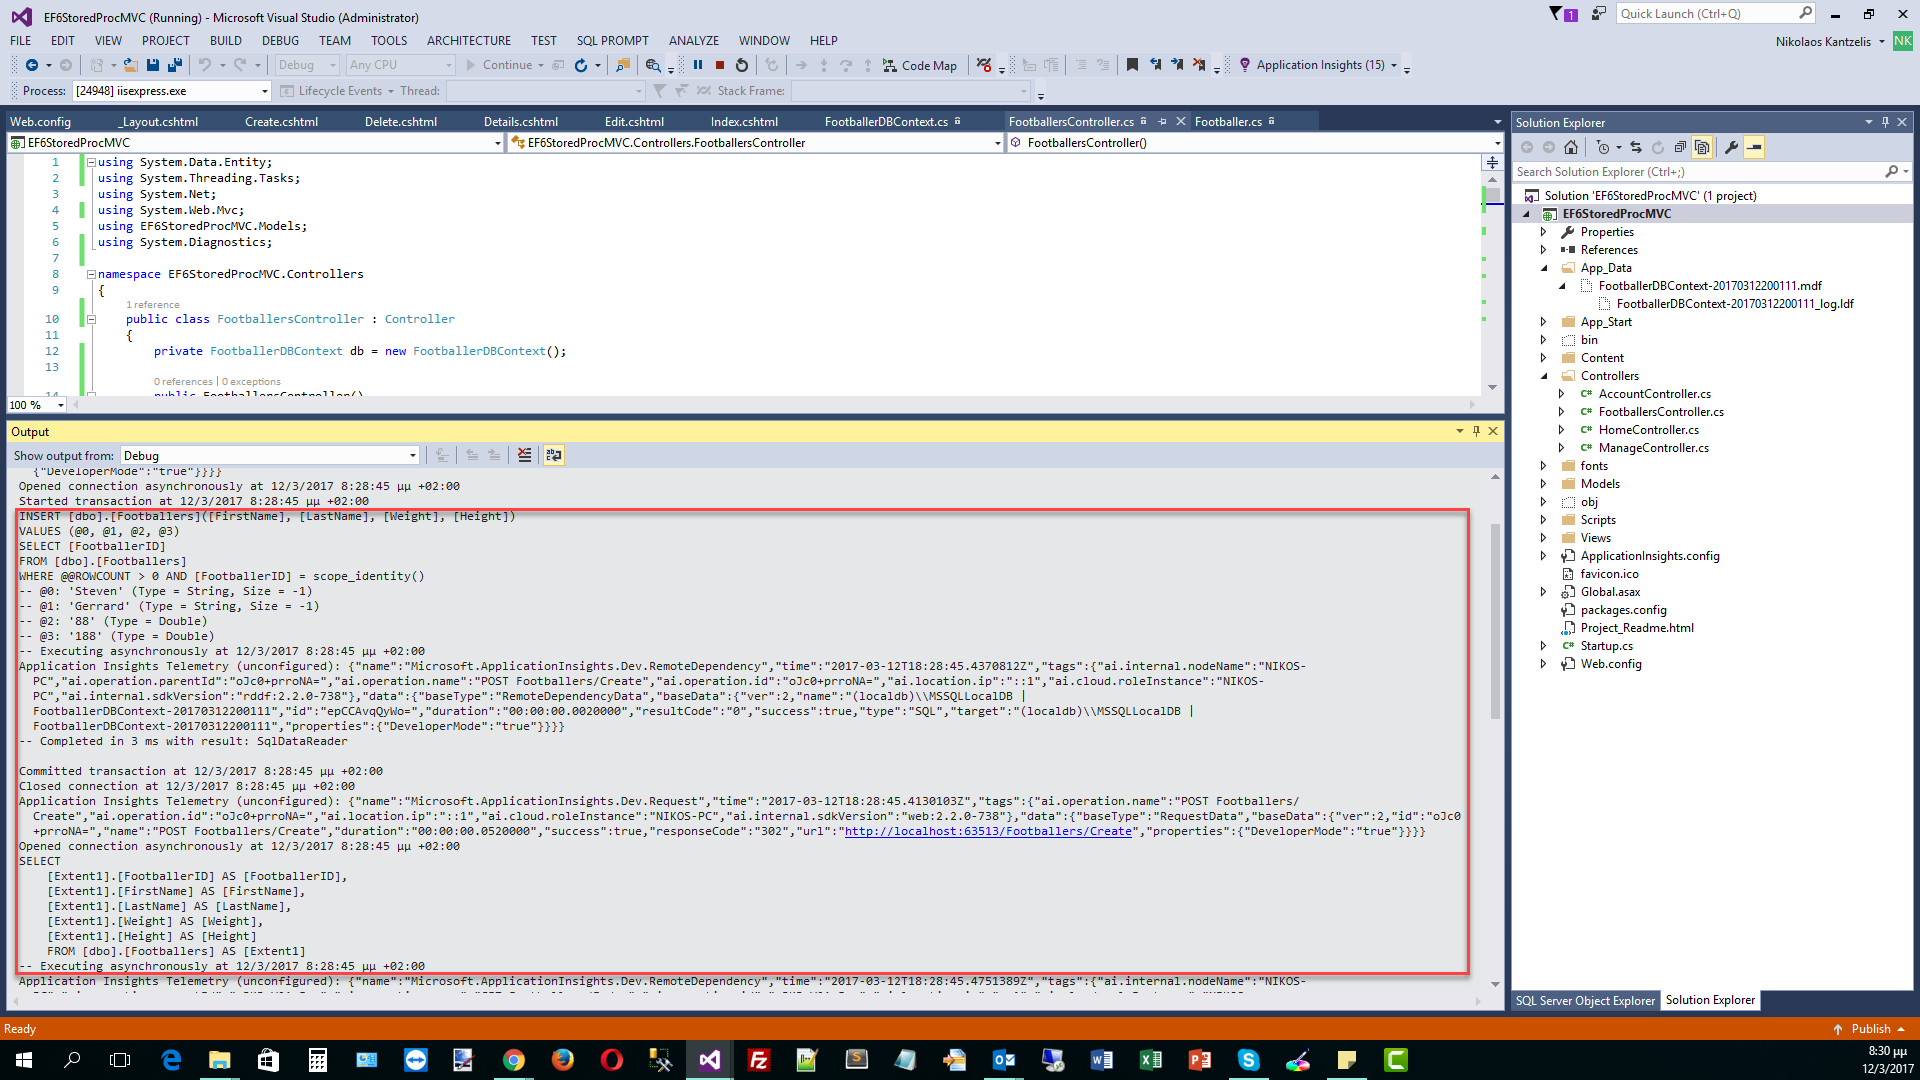
Now If I build and run my application again and try to insert more records and I have my Output window open i can see wha is sent to the database.
Have a look at the picture below. Αs you can see a transaction is opened and values are inserted using an Insert statement. Then the transaction is commited. So we can see the complete T-SQL code. Note that when we have an Insert statement EF engine starts a transaction.
12) Now we need to display the Footballers with a stored procedure.
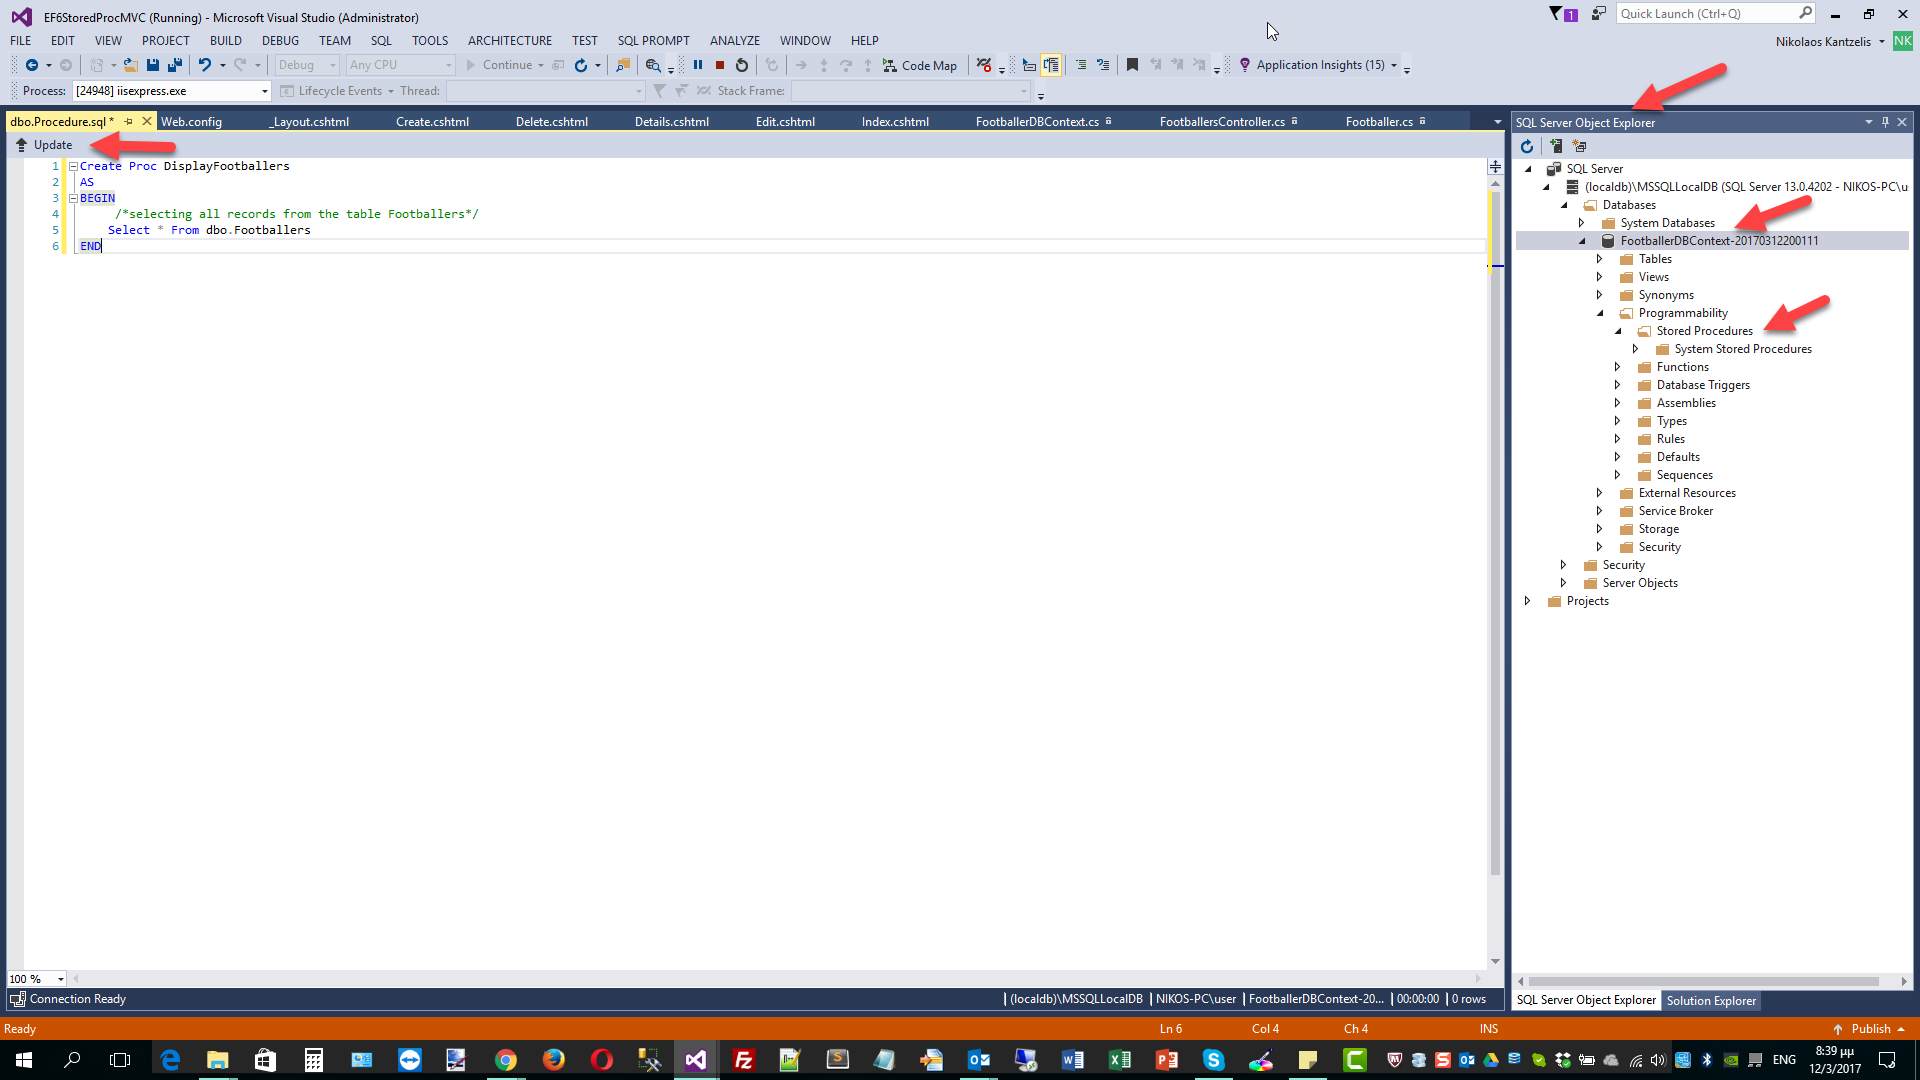
First we need to add the stored procedure to the database. Open the SQLServer Object Explorer. Select and expand the database and in the Programmability node, select Stored Procedures and then add a new stored procedure.
The stored procedure is really easy to code.
Create Proc DisplayFootballers
AS
BEGIN
/*selecting all records from the table Footballers*/
Select * From dbo.Footballers
END
After you type it , then click Update. The stored procedure will be created and will be part of the database.
Have a look at the picture below.
13) Now we need to make changes to the FootballersController.cs and more particularly in the Index() method.
I have commented out the code that was created automatically by the scaffolding mechanism.
// GET: Footballers
//public async Task<ActionResult> Index()
//{
// return View(await db.Footballers.ToListAsync());
//}
and replaced it with the code below.
// GET: Footballers
public async Task<ActionResult> Index()
{
string commandText = "DisplayFootballers";
return View(await db.Database.SqlQuery<Footballer>(commandText).ToListAsync());
}
As you can see, I just create a string variable with the name of the stored procedure. Then I call the SqlQuery (https://msdn.microsoft.com/en-us/library/system.data.entity.database.sqlquery(v=vs.113).aspx ) method passing the name of the stored procedure. The SqlQuery method will return elements of the given type (Footballer) after the execution of the stored procedure.
Build and run your application. Now when you add data to the application and click Save, this data is displayed on the screen through the stored procedure.
Have a look at the Output window below
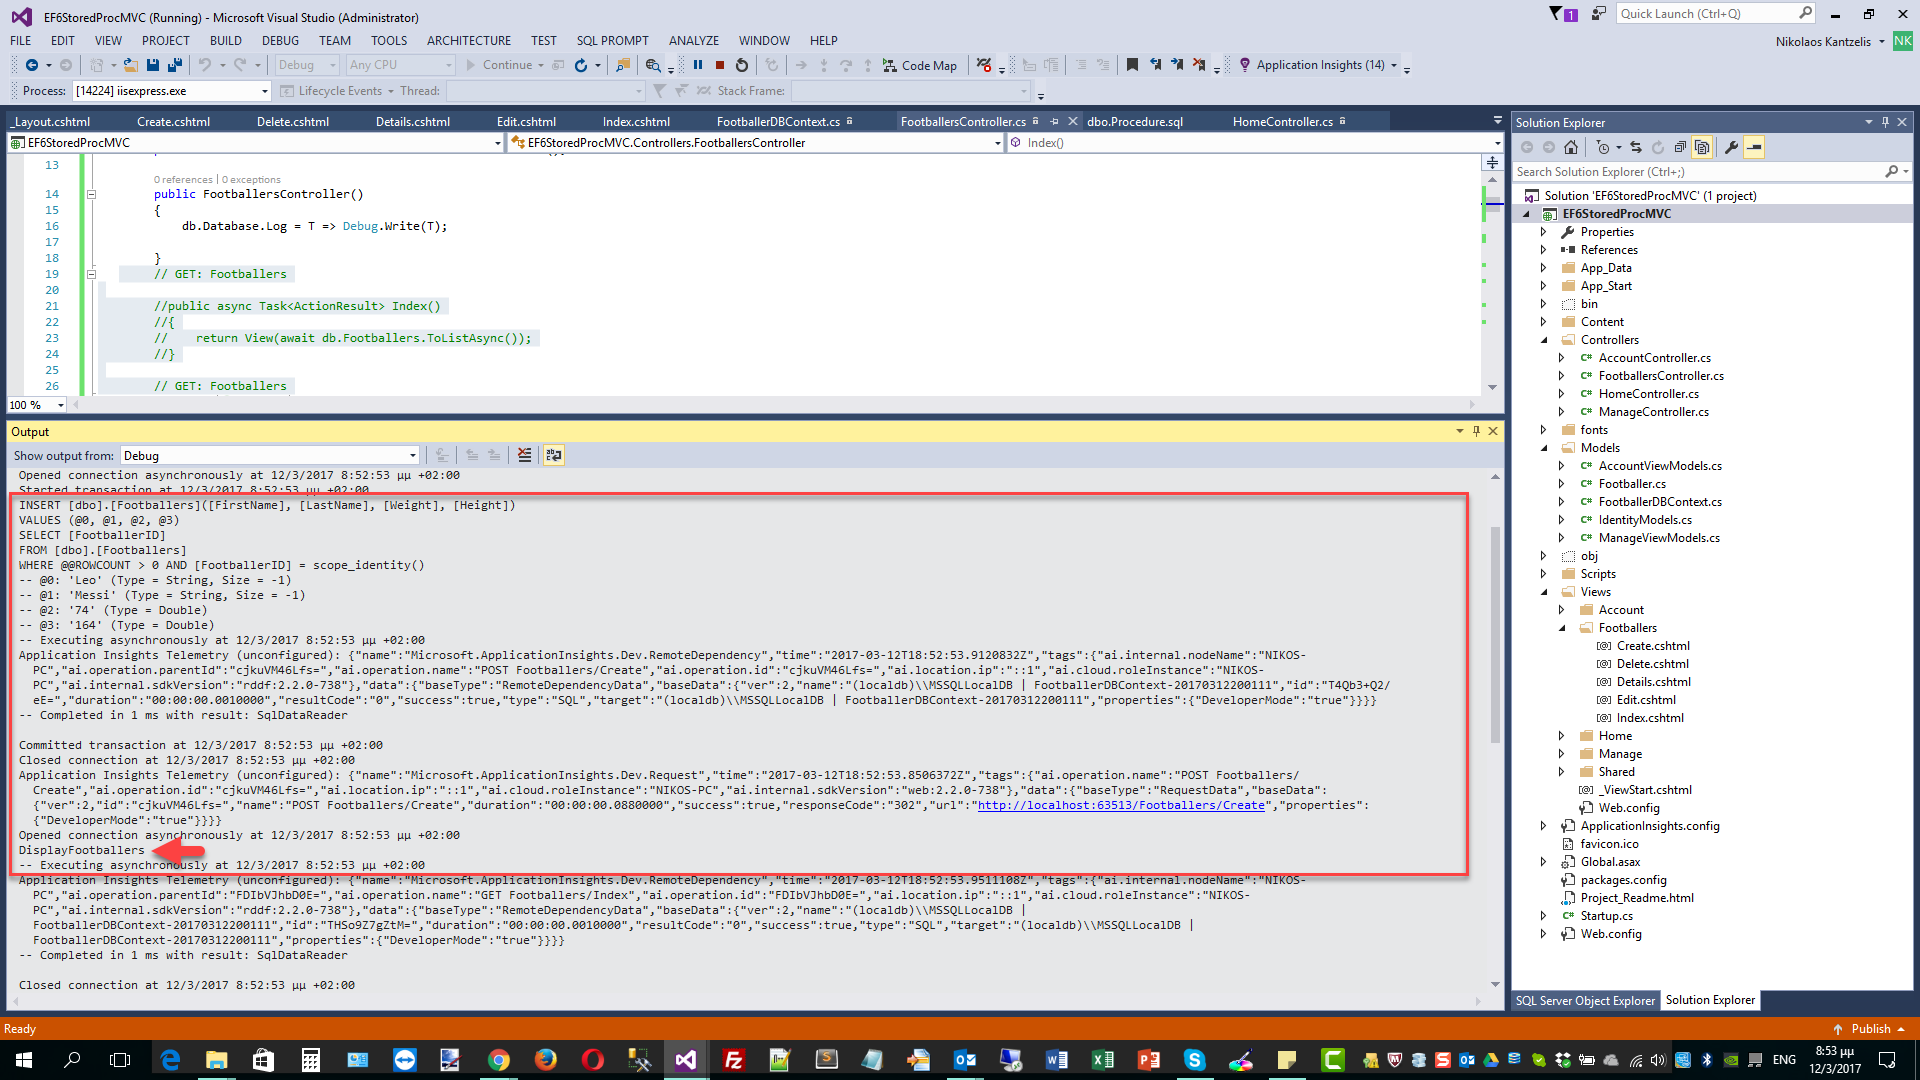
As you can see the data (the list of the Footballers) is displayed now through the stored procedure. More posts will follow regarding ASP.Net MVC 6 (ASP.Net MVC Core 1.0) applications and Entity Framework 7 (EF Core 1.0).
Hope it helps!!!
We do know that in any MVC applicatin we cannot pass multiple models from a controller to a single view.
In this post I will provide you with a workaround for passing multiple models in a single view in MVC.
There are several approaches to achieve this but I will use the List<object> and the object object.
I am going to use EF as my data access layer. More specifically I will use the Database First approach in EF.
Entity Framework is an object-relational mapping (ORM) framework for the .NET Framework.
EF addresses the problem of Object-relational impedance mismatch. I will not be talking about that mismatch because it is well documented in many sites on the Internet.
Through that framework we can program against a conceptual application model instead of programming directly against a relational schema-model.
1) I will create an empty ASP.Net Application (Empty MVC applicatin) and I give it the name .
I am using Visual Studio 2015 Enterprise edition, C# 5.0 and EF 5.0 version.
2) I will use the AdventureWorksLT2012 database. You can download it by visiting this link.
I have installed SQL Server 2014 Enterprise edition in my machine. SQL Express edition will work fine.
4) I will add an ADO.Net Entity data model using Database First. Follow the wizzard steps, create the connection string and then import into the conceptual model the ProductCategory and Product tables which will become two new entities in the domain model.
5) Add a new controller class in the Controllers Folder. Name it ProductController.cs
The code for the Controller (Index method) follows
public class ProductController : Controller
{
// GET: Product
AdventureWorksLT2012Entities ctx = new AdventureWorksLT2012Entities();
public ActionResult Index()
{
List<object> model = new List<object>();
model.Add(ctx.ProductCategories.ToList());
model.Add(ctx.Products.ToList());
return View(model);
}
}
We create an object of the AdventureWorksLT2012Entities class.
Then we create a List<object> object list. We add the Products collection and ProductCategories collection to that list.
6) Now we need to add a View in our application. Add a view, do not use scaffolding, and name it Index. Place the Index view in the Product folder inside the Views folder.
In the Index.cshtml we have the following code
@model IEnumerable<object>
@{
List<PassingMultipleModelsToAView.ProductCategory> lstPCategory = Model.ToList()[0] as List<PassingMultipleModelsToAView.ProductCategory>;
List<PassingMultipleModelsToAView.Product> lstProduct = Model.ToList()[1] as List<PassingMultipleModelsToAView.Product>;
}
<h3>Categories</h3>
<ul>
@foreach (var item in lstPCategory)
{
<li>@item.Name</li>
}
</ul>
<hr />
<h3>Products</h3>
<ul>
@foreach (var item in lstProduct)
{
<li>@[email protected]</li>
}
</ul>
The model we pass to the view is @model IEnumerable<object>.
Then we pass the first list of the model (ProductCategory) to a list of the same type and the second list of the model(Product) to a list of the same type.
Then we just create two foreach statements and iterate through the list of items.
7) Build and run your application. You will see data from ProductCategory and Product entities. So we still passed a model to the view (model IEnumerable<object>) but this model represented two entities/models so in reality we passed
PassingMultipleModelsToAView.ProductCategory, PassingMultipleModelsToAView.Product models to the view and achieved our goal.
Hope it helps!!!
This is the second post in a series of posts where I talk about good coding practices when it comes to using Entity Framework as our data access layer when building our applications.
You can read the first post of the series here. The main things to take away from that first post is to use projection whenever possible (do not query sql server for data that you do not want on the client) and to filter on the server (meaning SQL Server) which has a powerful engine to do that and not on the client.
In this post I am going to provide you with a hands-on example on how to avoid writing your LINQ to Entities queries in a way that will hinder performance of your application. The aim of this post (hopefully a series of posts on performance and Entity Framework) is to highlight bad coding practices when architecting an applications that uses EF as the ORM to fetch and manipulate data from the data store. I am going to point out some practises and patterns that very often developers use and cause EF to create poor-performing T-SQL statements.
First, a quick word on what Entity Framework is. Entity Framework is an object-relational mapping (ORM) framework for the .NET Framework.EF addresses the problem of Object-relational impedance mismatch. I will not be talking about that mismatch because it is well documented in many sites on the Internet.
Through that framework we can program against a conceptual application model instead of programming directly against a relational schema-model. By doing so we can decrease the amount of code we do write to access a data storage and thus decrease maintenance time. You can find many posts regarding Entity Framework in this blog.
A lot of people wonder why we should use Entity Framework in the first place. We could still keep using good old T-SQL in our applications.
The obvious answer is that EF addresses the Object Relation impedance mismatch and it bridges those two different worlds. Entity Framework creates an object oriented model for accessing the data tier. In an object oriented development environment, it makes working with the data tier much more seamless for the developer. It allows developers to spend time writing code for their application rather than dealing with the tedious tasks of opening connections to the database e.t.c. The abstraction that is offered by EF by generating the intermediate code, which in this case is T-SQL, it's much easier to migrate code to another platform, such as Oracle or Postgres or some other ODBC source. We get incredible flexibility by doing this.
Using EF does not mean we should forget about SQL Server, T-SQL, relationships, foreign keys and performance. We should keep in mind that SQL Server is based on set theory and relational algebra and it thrives when acting on sets of data, updating a set of rows rather than each row of data at the time.
1) Create an empty ASP.Net Application (Web Forms Application) and give it the name EFoptimisation2. I am using Visual Studio 2013 Ultimate edition.
2) Add a new web forms page in the application. Leave the default name. The application I am going to build is very simple web forms application. The user will enter a last name and will get back the first name(s) for that last name.
3) I will use the AdventureWorks2014 database (You can download it here) for this application and more specifically the Person.Person table. I have installed SQL Server 2014 Enterprise edition in my machine.
4) I will add an ADO.Net Entity data model using Database First paradigm. Follow the wizzard steps, create the connection string and then import into the conceptual model only the Person and EmailAddress tables which will become an entities in the domain model. If you want to look at those detailed steps if you are new to EF and Database First have a look at this post.
5) Add a textbox and a button to the page. The user will enter the first name in the textbox and will hit enter and then the results (the email addresses for that first name) will be printed on the page.We will navigate to the EmailAddress entity throug the navigation property EmailAddresses
This is the code inside the Page_Load event handling routine.
protected void Page_Load(object sender, EventArgs e)
{
using (var ctx = new AdventureWorks2014Entities())
{
string FirstName = TextBox1.Text;
var query = from p in ctx.People
where p.FirstName.Equals(FirstName)
select p;
foreach (var person in query)
{
foreach (var email in person.EmailAddresses)
{
Response.Write(email.EmailAddress1);
Response.Write("<br/>");
}
}
}
}
The code above is pretty straight forward.
6) Now we are ready to run the application. Before we do that I will launch SSMS and connect to my local instance of SQL Server. Then I will also launch the SQL Profiler and create a new trace. The trace will listen only for the RPC:Completed event. I activate te trace so the trace is running.
7) I build and run my web app. The results I get back when typing "Alex" as first name is 51 email addresses.
8) Let me see what the trace recorded in my SQL Profiler and the T-SQL that was generated.

We have an individual statement for every email address that we retrieved. This is a not a set based operation since we issue many transactions to the SQL Server.
9) Now we will rewrite our code above in order for EF to work better with the SQL Engine. I am going to use the "Include" method in my code.
We do inform Entity Framework that not only we want all the columns from the People object specified in the from clause, but also want all those columns in the path specified as a parameter of the include method-- EmailAddress in our scenario.
protected void Page_Load(object sender, EventArgs e)
{
using (var ctx = new AdventureWorks2014Entities())
{
string FirstName = TextBox1.Text;
var query = from p in ctx.People.Include("EmailAddresses")
where p.FirstName.Equals(FirstName)
select p;
foreach (var person in query)
{
foreach (var email in person.EmailAddresses)
{
Response.Write(email.EmailAddress1);
Response.Write("<br/>");
}
}
}
}
The Profiler is still running on the background.
I build and run my web app. The results I get back when typing "Alex" as first name is 51 email addresses.
This is what I get back from the Profiler.

Now as you notice it's a pretty extensive query but there is a problem with this approach.We are not allowed to use projection. We can only use the columns of the People object.
10) We need to rewrite our code again. I will use explicit joins this time.The code follows.
protected void Page_Load(object sender, EventArgs e)
{
using (var ctx = new AdventureWorks2014Entities())
{
string FirstName = TextBox1.Text;
var query = from p in ctx.People
join email in ctx.EmailAddresses
on p.BusinessEntityID equals email.BusinessEntityID
where p.FirstName.Equals(FirstName)
select new { email.EmailAddress1};
foreach (var item in query)
{
Response.Write(item.EmailAddress1);
Response.Write("<br/>");
}
}
}
The Profiler is still running on the background.
I build and run my web app. The results I get back when typing "Alex" as first name is 51 email addresses.
This is what I get back from the Profiler.

As we can see this is a T-SQL statement that we could type in an SSMS Query window. We have one query that results in one set based operation thus improving greatly the performance of our application by getting rid off the unecessary round trips.
11) We could rewrite the code above in a more object oriented way using lambda expressions.
protected void Page_Load(object sender, EventArgs e)
{
using (var ctx = new AdventureWorks2014Entities())
{
string FirstName = TextBox1.Text;
var query = ctx.People
.Where(p => p.FirstName.Equals(FirstName))
.SelectMany(email => email.EmailAddresses)
.Select(theemail => theemail.EmailAddress1);
foreach (var item in query)
{
Response.Write(item);
Response.Write("<br/>");
}
}
}
The Profiler is still running on the background.
I build and run my web app. The results I get back when typing "Alex" as first name is 51 email addresses.
This is the T-SQL statement I got back from the Profiler. This is what it was executed against the database.
EXEC sp_executesql N'SELECT
[Extent2].[EmailAddress] AS [EmailAddress]
FROM [Person].[Person] AS [Extent1]
INNER JOIN [Person].[EmailAddress] AS [Extent2] ON [Extent1].[BusinessEntityID] = [Extent2].[BusinessEntityID]
WHERE [Extent1].[FirstName] = @p__linq__0', N'@p__linq__0 nvarchar(4000)',
@p__linq__0 = N'Alex'
If we typed that query ourselves in an SSMS query window we would type something like this:
SELECT Person.EmailAddress.EmailAddress
FROM Person.EmailAddress
INNER JOIN Person.Person ON Person.EmailAddress.BusinessEntityID = Person.Person.BusinessEntityID
WHERE Person.Person.FirstName = 'Alex'
As you can see those two queries are pretty much the same.
Entity framework abstracts the T-SQL creation from us, the developers. Having said that we are still in charge of the overall performance of our application. Performance plays always a big role in any application. We do know that SQL Server thrives on set based operations.We should write our Linq to Entities queries in a way that set based T-SQL statements are generated.
Hope it helps!!!
In this post I am going to provide you with a hands-on example on how to avoid writing your LINQ to Entities queries in a way that will hinder performance of your application. The aim of this post (hopefully a series of posts on performance and Entity Framework) is to highlight bad coding practices when architecting an applications that uses EF as the ORM to fetch and manipulate data from the data store. I am going to point out some practises and patterns that very often developers use and cause EF to create poor-performing T-SQL statements.
Entity Framework will always create T-SQL, the thing to keep in mind is that we have to make sure that this T-SQL code (that we cannot write ourselves since it is abstracted by EF) if it is poor then when passed to the SQL Server engine (through the optimiser and the creation of the execution plan) will cause our applications to perform poorly especially under heavy load.
Let me talk a bit about query optimisation and T-SQL. T-SQL is declarative by nature. When we write T-SQL statements in a query window in SSMS and execute them,we just say to SQL Server “I want these results back”. We do not provide any details on how the results will be returned.If there was nothing else between our T-SQL code and the SQL Server Database engine, we simply would not get any results back.Luckily for us there is a very important component, the Query Optimizer that generates an imperative plan. By saying imperative I mean detailed. This plan that is called execution plan is what is actually executed by the relational engine.The query optimiser will not look for a perfect plan.It is a cost-based optimiser that must find an efficient plan.The optimiser when deciding upon the execution plan will take in to consideration the type of operations,statistics (must always be up to date),indexes,hardware resources (number of CPUs ,available memory),SQL Server edition,number of active concurrent connections and query hints. If the T-SQL that is generated by the EF is pooly written then the optimiser will not create an optimal plan hence the problems in performance.
Entity Framework is an object-relational mapping (ORM) framework for the .NET Framework.EF addresses the problem of Object-relational impedance mismatch. I will not be talking about that mismatch because it is well documented in many sites on the Internet.
Through that framework we can program against a conceptual application model instead of programming directly against a relational schema-model. By doing so we can decrease the amount of code we do write to access a data storage and thus decrease maintenance time. You can find many posts regarding Entity Framework in this blog.
1) Create an empty ASP.Net Application (Web Forms Application) and give it the name EFoptimisation. I am using Visual Studio 2013 Ultimate edition.
2) Add a new web forms page in the application. Leave the default name. The application I am going to build is very simple web forms application. The user will enter a last name and will get back the first name(s) for that last name.
3) I will use the AdventureWorks2014 database (You can download it here) for this application and more specifically the Person.Person table. I have installed SQL Server 2014 Enterprise edition in my machine.
4) I will add an ADO.Net Entity data model using Database First paradigm. Follow the wizzard steps, create the connection string and then import into the conceptual model only the Person.Person table which will become an entity in the domain model. If you want to look at those detailed steps if you are new to EF and Database First have a look at this post.
5) Add a textbox and a button to the page. The user will enter the last name in the textbox and will hit enter and then the results will be printed on the page.
This is the code inside the Page_Load event handling routine.
protected void Page_Load(object sender, EventArgs e)
{
using( var ctx = new AdventureWorks2014Entities())
{
string LastName = TextBox1.Text;
var query = from person in ctx.People
select person;
foreach (var p in query)
{
if (p.LastName==LastName)
{
Response.Write(p.FirstName);
Response.Write("<br/>");
}
}
}
}
The code above is pretty straight forward.
6) Now we are ready to run the application. Before we do that I will launch SSMS and connect to my local instance of SQL Server. Then I will also launch the SQL Profiler and create a new trace. The trace will listen only for the SQL:BatchStarting event. I activate te trace so the trace is running.
7) I build and run my web app. The results I get back when typing "Yuan" as last name is 92 first names.
8) Let me see what the trace recorded in my SQL Profiler and the T-SQL that was generated.

9) If I copy and paste the T-SQL in my SSSM and execute the query (Enable Actual Execution Plan and Client Statistics) I will get the following results - 19972 rows in total. Ηave a look at the piscture below

Now let's have a look at the execution plan created. Have a look at the picture below.

We have a Clustered Index Scan.The Clustered Index Scan means that SQL Server started at the very top of the table and scanned every row until it reached the bottom of the table. Not a very good scenario to have in terms of performance. Now lets have at the Client Statistics tab. Have a look at the picture below.

As you can see the bytes transfered from SQL Server is almost 26 mbytes.That is a huge amount of data to be transfered through the network back to the client to satisfy a single query.
10) We need to refactor our code in order to create more efficient T-SQL code.
protected void Page_Load(object sender, EventArgs e)
{
using( var ctx = new AdventureWorks2014Entities())
{
string LastName = TextBox1.Text;
var query = from person in ctx.People
where person.LastName.Equals(LastName)
select person;
foreach (var p in query)
{
Response.Write(p.FirstName);
Response.Write("<br/>");
}
}
}
As you can see from the code above I am doing now the filtering on the server.
Have a look below to see what the Profiler's trace output was.

The T-SQL now has a Where clause.It is a parametirised query.If I place this query in my SSMS and execute it I will get back 92 rows only and my execution plain will look like this

This is a by far more optimal executon plan(Index Seek & Lookup) that the Clustered Index Seek.
If I look at the Client Statistics tab (Bytes received from the server), I have only 145Kbytes of data compared with the 26Mbytes I had previously.
11) Now we can use projection to retrieve only the columns that we are interested in (FirstName) and get rid of the other ones.
I go back to the Page_Load routine and instead of
var query = from person in ctx.People
where person.LastName.Equals(LastName)
select person;
I rewrite my code to utilize projection
var query = from person in ctx.People
where person.LastName.Equals(LastName)
select new { person.FirstName };
Then I build and run the application with the Profiler running.
This is the T-SQL from the Profiler when I type "Yuan" in the textbox.
exec sp_executesql N'SELECT
1 AS [C1],
[Extent1].[FirstName] AS [FirstName]
FROM [Person].[Person] AS [Extent1]
WHERE [Extent1].[LastName] = @p__linq__0',N'@p__linq__0 nvarchar(4000)',@p__linq__0=N'Yuan'
As you can see from the T-SQL above I get only the FirstName column. If I place the T-SQL code in an SSMS query window (Enable Client Statistics & Actual Execution plan) I get back 92 rows of data and the following picture shows the actual exection plan. Now we see a Non Clustered Index Seek. We are seeking and not scanning which is a great thing.

Let's have a look at the client statistics.As you can see from the picture below the bytes received from the server is just 9183 bytes , 9 Kbytes. This is huge reduction compared to the 145 Kbytes and 26 Mbytes.

To recap, make sure that you do all the filtering on SQL Server and use projection when you do not want all the table columns in your application, when writing apps that use EF as the data access layer.It is always wrong to filter on the client when SQL Server has all the power to do that for us.
Hope it helps!!!
In this post I will demonstrate with a hands on demo how to localise your ASP.Net MVC applications.
The most important thing to point out is that in this
world we live in, we should expect our site to be visited by various
people from different cultures and languages.So we must be prepared to
have our site internationalised. Thankfully ASP.Net MVC simplifies the whole
internationalisation/localisation process.
I would like to talk about the Thread.CurrentCulture property that impacts formatting. That means that this property instructs the runtime how it should display strings e.g the currency in ($ or €) or how the date should be displayed.
The other imporant property is Thread.CurrentUICulture which is used by the Resource Manager to look up culture-specific resources at run-time.
I have installed VS 2012 Ultimate edition in my Windows 8 machine. Υou can use Visual Studio Express 2012 for Web. You can install Visual Studio Express 2012 for Web if you download Web Platform Installer.You can download this tool from this link.
1) I am launching VS 2012 and I will Visual C# as the programming language. I will also select ASP.NET MVC 4 Web Application from the available templates. Choose C# as the development language and Internet Application. I will name my application MvcLocalization.All the necessary files are created
2) In the Ιndex.chstml view in the Home folder add the following code
@{

    var mysalary = 2450.0m;

    var birthday = new DateTime(1980, 2, 17);

}

<div>
    @mysalary.ToString("c")

</div>


<br />


<div>

    @birthday.ToShortDateString()

</div>
I just declare two variables and output them back to the screen. I format the mysalary value as currency.
3) Now we need to change our settings in the web.config file.In the <system.web> section add
<globalization culture="auto" uiCulture="auto"/>
4) Build and run your application and you should will see something like the picture below

My default culture in this machine is US English. So everything is formatted accordingly.
I go to Internet Explorer ( I view my app in IE ) -> Tools ->Languages->Set Language Preferences and add another language (Greek)
Now I run again my application. Now I see the new culture format is applied in both my strings.
Have a look at the picture below

The way ASP.Net runtime managed to display everything in the new culture because it identified the Accept-Language HTTP Header and the globalization entry in the web.config.
5) Now let's move to the next step of localisation and localise some other strings.
To localise text I am going to use .resx files. These files are xml file and are capable of storing localised text per culture.
We need a .resx for every language we want to support.All these resources are compiled in strongly typed classes.
Ι change my language back to English.
I will add a string in the Index.cshml view
<div>Welcome</div>
Now I need to create my resource files.I go to Home (Views Folder) and I add a resource item - Resources.resx.
Now you will that there is Resources.resx.cs file created.Inside there, there is a strongly typed class. In the editor that pops up I will make a new entry.
Have a look at the picture below

Now I go back to the Index.cshtml file and
change this
<div>Welcome</div>
to
<div>@MvcLocalization.Views.Home.Resources.WelcomeText</div>
I add the namespace and then the name of the class (Resources) and the name of the string (WelcomeText).
Build and run your application. You will see the text "Welcome to you all!!!"
Now if I want to add another language I must add create another .resx file.Once more I go to Home (Views Folder) and I add a resource item - Resources.el.resx.
Then I add another entry for the greek language.
Have a look at the picture below

Now,I go to Internet Explorer ( I view my app in IE ) -> Tools
->Languages->Set Language Preferences and add another language
(Greek)
I build and run my application. Now I see the localised text "Kαλώς Ήλθατε"
Hope it helps!!!

I have been using JQuery for a couple of years now and it has helped me to solve many problems on the client side of web development.
You can find all my posts about JQuery in this link. In this post I will be providing you with a hands-on example on how to create a stylish tooltip using JQuery.
In this hands-on example I will be using Expression Web 4.0.This application is not a free application. You can use any HTML editor you like.You can use Visual Studio 2012 Express edition. You can download it here.
We need to download the latest version of JQuery. You can download it here.
We will need some markup first.This is the sample HTML 5 page
Type or (copy paste) the markup in your favorite HTML editor (VS, Expression Web,Notepad++)
<!DOCTYPE html>
<html lang="en">
<head>
<title>Liverpool Legends</title>
<script type="text/javascript" src="jquery-1.8.3.min.js"></script>
<link rel="stylesheet" type="text/css" href="mystyle.css">
<script type="text/javascript" src="tooltip.js"></script>
</head>
<body>
<header>
<h1>Liverpool Legends</h1>
</header>
<div id="main">
<a class="liverpool" href="http://en.wikipedia.org/wiki/John_Barnes_%28footballer%29" target="_blank" Tooltip="One of the greatest midfielders to wear the Liverpool shirt">John Barnes</a>
<br/>
<a class="liverpool" href="http://en.wikipedia.org/wiki/Kenny_Dalglish" target="_blank" Tooltip="The greatest ever player that has played for Liverpool">Kenny Dalglish</a>
<br/>
<a class="liverpool" href="http://en.wikipedia.org/wiki/Steven_Gerrard" target="_blank" Tooltip="A liverpool legend and the captain of the team">Steven Gerrard</a>
</div>
<footer>
<p>All Rights Reserved</p>
</footer>
</body>
</html>
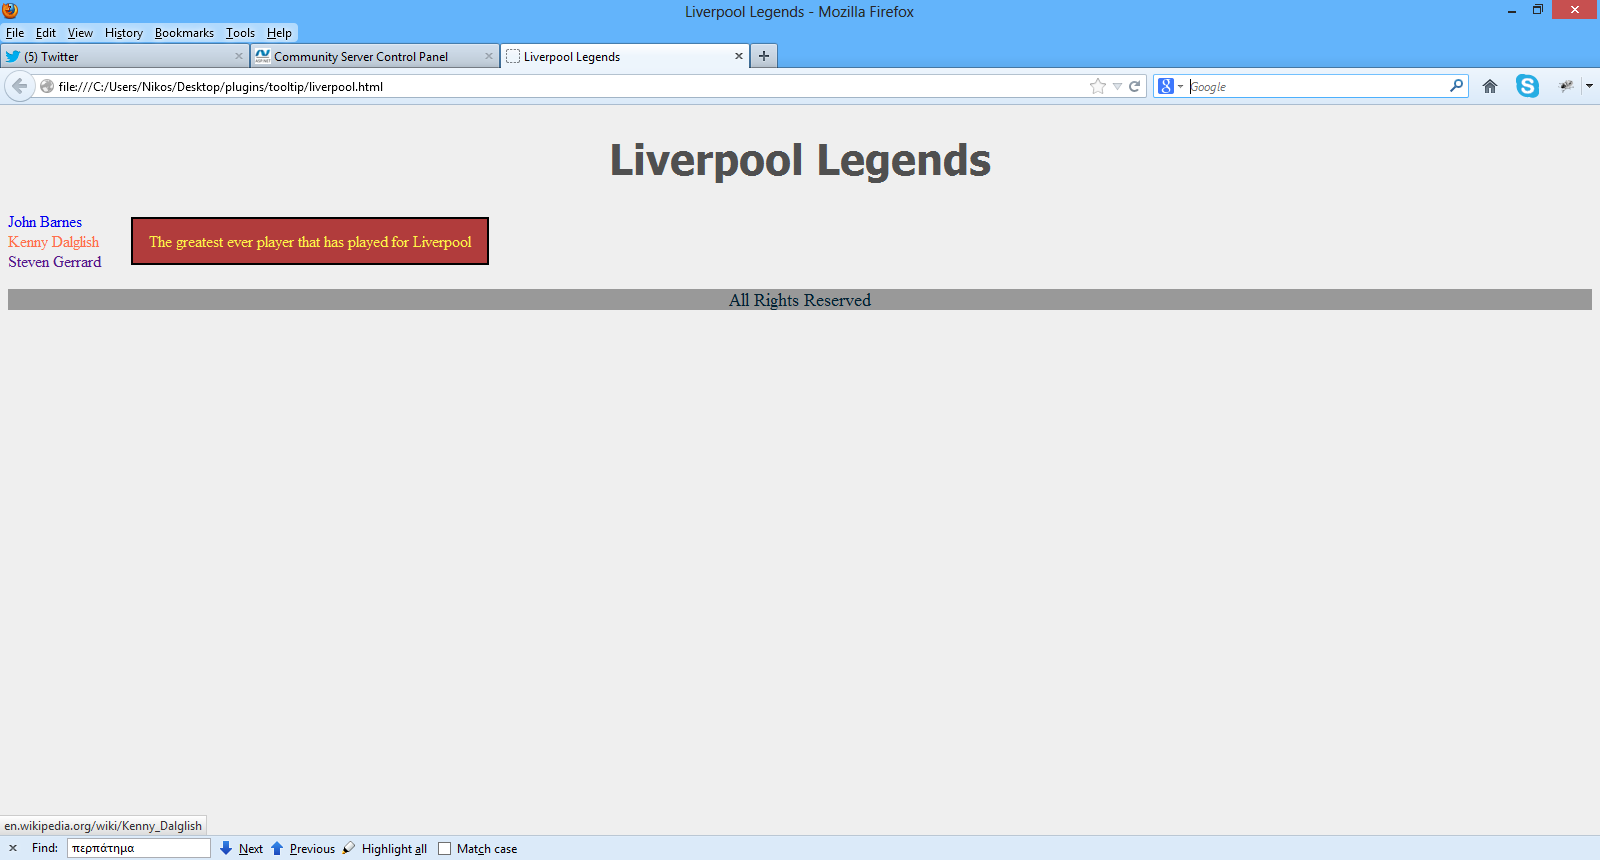
I have some links in this simple html page. When I hover over the links I want the the contents of the Tooltip attribute to appear on the right of the links as a tooltip. When I mouse out of the links then the tooltip contents should disappear.
I am including a link to the JQuery library in the head section of the HTML markup.
I will also include the external .css stylesheet file with the various styles for the HTML elements in the head section.
You must create another file first e.g mystyle.css and copy-paste in it the code below
body
{
background-color:#efefef;
}
header
{
font-family:Tahoma;
font-size:1.3em;
color:#505050;
text-align:center;
}
a:link {color:#64000; text-decoration:none;}
a:hover {color:#FF704D; text-decoration:none;}
.tooltip {
display: none;
font-size: 12pt;
position: absolute;
border: 2px solid #000000;
background-color: #b13c3c;
padding: 12px 16px;
color: #fff347;
}
footer
{
background-color:#999;
width:100%;
text-align:center;
font-size:1.1em;
color:#002233;
}
Have a look at the class tooltip above.
I have also included a link to the external .js javascript script (tooltip.js) file with the various styles for the HTML elements in the head section.
Type (copy-paste the following) javascript code in the tooltip.js
$(function() {
$('.liverpool').hover(function(event) {
var toolTipcontents = $(this).attr('Tooltip');
$('<p class="tooltip"></p>').text(toolTipcontents)
.appendTo('#main')
.css('top', (event.pageY - 40) + 'px')
.css('left', (event.pageX + 60) + 'px')
.fadeIn(4000);
}, function() {
$('.tooltip').remove();
}).mousemove(function(event) {
$('.tooltip')
.css('top', (event.pageY - 40) + 'px')
.css('left', (event.pageX + 60) + 'px');
});
});
Let me explain what I am doing with the code above.
- First I make sure that DOM has loaded before I do anything else.
- Then in the hover over event, I store in the variable toolTipcontents the contents of the Tooltip attribute.Have a look here for the attr() function.
- Then I create a p tag dynamically and assign the contents of the toolTipcontents variable to it.Have a look here for the text() function.
- Then I simply append this p tag to the main div of the page and then set the position (top,left) that the tooltip will appear.Have a look here for the appendTo() function. Also have a look here for the css() function.
- Then I use an effect to make the tooltip contents appear with a simple fading. .Have a look here for the fadeIn() function.
- Then in the hover out event I simply remove the p tag.Have a look here for the remove() function.
- Finally because I want the tooltip contents to move along as the mouse moves I add some code to the mousemove() event. Have a look here for the mousemove() event.
Make sure you view your page in you browser of preference.
Have a look at the picture below to see what I see when I view this page on the browser and hover over a link.
Hope it helps !!!

In this post I will demonstrate with a hands-on example the various ways content can be shared across many pages in a DotNetNuke site.
I will continue writing posts about DotNetNuke because it is my favourite CMS,based on ASP.Net and I use it a lot.
I have installed DNN 7.0 in a web server. You can see the default installation and site -http://dnn7.nopservices.com/
Bear in mind that this is the community edition of DotNetNuke
1) I am logging into my site as a host - power user.
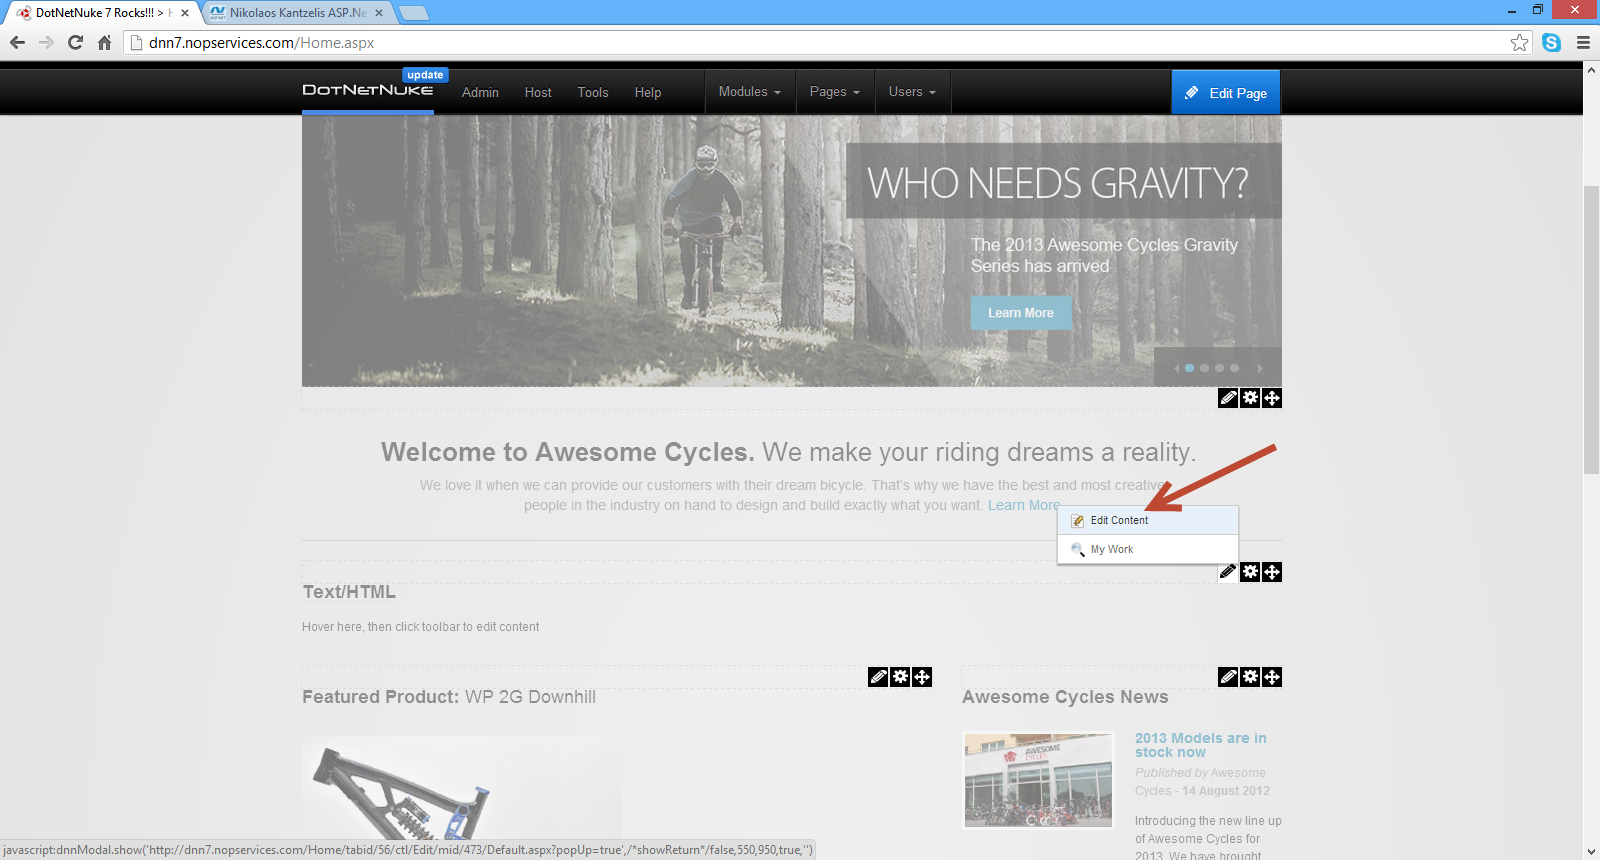
2) I am going to add a Text/HTML module to the Home.aspx page.
3) I am navigating to Modules -> Add New Module. From the available modules I choose HTML module.This is the most commonly used module in DNN sites. We can add content, images, flash files into this module.
4) I am adding this module to the ContentPane of the Home page
Have a look at the picture below

5) Now, that I have the module in my pane, I must add some content to it.I just click on the Edit Content
Have a look at the picture below
6) I add some sample content (inside the HTML editor) on the page and click Save.My content has been added.
Have a look at the picture below

7) Now what if I wanted to share the contents of the the Text/HTML module across other pages of the site?
I navigate to the http://dnn7.nopservices.com/AboutUs.aspx page,then Modules -> Add Existing module. Then I select the Home page, the Text/HTML module I added in the Home page (I have titled it DNN) and then I add it in the new page (AboutUs) in the ContentPane
Have a look at the picture below

8) The module and its contents are inserted in the AboutUs page. Have a look at the picture below

9) Now if I go back to the Home page and I add some more content.Have a look at the picture below

I have added "The main site where you can download everything is http://www.dotnetnuke.com". If you navigate to the AboutUs page you will see that those changes were reflected to that page as well.
10) But what if I did not want this to happen? I mean what if we wanted to copy a module across one or more pages but didn't want to have the content changes of one module reflected to the others in the other pages.
First I am going to delete the Text/HTML module (titled DNN) from the AboutUs page.
Have a look at the picture below

11) Now I am going to add the Text/HTML module (titled DNN) from the Home page to the AboutUs page again.I navigate to the http://dnn7.nopservices.com/AboutUs.aspx page,then Modules -> Add Existing module. Then I select the Home page, the Text/HTML module I added in the Home page (I have titled it DNN) and then I add it in the new page (AboutUs) in the ContentPane.Please note that I have checked the option Make a Copy
Have a look at the picture below

The Text/HTML module is added to this page as well. Now if I navigate to the Home page and add another line of content in the Text/HTML module e.g
You can download the latest version of DotNetnuke and very useful manuals.
and then move back to the AboutUs page, we will see that this new change did not reflect on the AboutUs page.
12) Finally I would like to show you another way to share content across multiple pages in a DNN site.
I am adding a new module to the Home page. I am navigating to Modules -> Add New Module from the control panel. From the
available modules I choose HTML module.I add some sample content to this module. You can add anything you like. I have titled this module DNN RoadMap by going to the module Settings.
Have a look at the picture below

Then I add the module title and in Advanced Settings, I check the option Display Module on All Pages. By doing that this module will appear in the same position in all pages of the site.
I have the option to add this module only to the pages ( Add to new pages only? ) that will be created in the future (new pages) but I will not do that right now.
Then I hit the Update button. This module will be added to all pages.
Have a look at the picture below.

Please note that by using this setting we have the following behavior
- If you change the contents of the module titled DNN RoadMap that was added to all pages, those changes will be reflected across the site.
- If you delete the module from one page, that does not mean that all modules from all the pages will be deleted.
- If you go to any page that the module DNN RoadMap was added and then go to Settings and then uncheck the option Display Module On All Pages , then this module will disappear from all the pages except the current one.
Hope it helps!!!

I have been using ASP.Net extensively to build web applications based on the .Net Framework. In this blog I have been demonstrating with hands-on examples how to use ASP.Net Web Forms and ASP.Net MVC to implement functionality commonly found on ASP.Net web sites.
I have also used DotNetNuke - DNN (the Open Source Web Application Framework of my choice) to build websites.I am also the co-admin of the greek DotNetNuke community and I decided that I will use this space to write a series of posts regarding DotNetNuke. I have decided to keep those posts short. I will provide tips and tricks and answers to questions I often get when I teach about DotNetNuke in open seminars.
I would like to introduce DotNetNuke to you before I move on.DotNetNuke is an Open Source Web Application Framework that is based on ASP.Net.
It is ideal for creating and deploying projects such as:
- Corporate Intranets and Extranets
- Online Publishing Portals
There are 3 DNN editions.DotNetNuke Professional edition,DotNetNuke Enterprise edition and DotNetNuke Community edition. Have a look at a comparison of the various editions here.
I will be using the community edition in all my posts.
In this short post I will show you how to remove the DotNetNuke copyright message from the View source (View -> Page Source) of your DNN site.
Before I move on I must have a working installation of DNN.
I have installed DNN 7.0 in a web server. You can see the default installation and site - http://dnn7.nopservices.com/
In another post of mine I will demonstrate how to install DotNetNuke 7.0 in your machine or a live web server.
Let's move on with our actual example.
When I view my website - http://dnn7.nopservices.com/ on the browser and right-click on the page (View --> Page Source) I see the following message.
Have a look at the picture below

One question I often get is how to remove that copyright message and the keywords (which certainly will be irrelevant with the keywords we want to add for our specific site)
We login as superuser to our DNN site and then choose Host->Host Settings
Have a look at the picture below

Then I choose Basic Settings, then Appearance.
There is a setting - Show Copyright Credits? - which is checked. We must uncheck this option and click Update.
Have a look at the picture below

When I view my website again and then right-click on the page (View --> Page Source) , I do not see either the DNN copyright message or the keywords which were specific to DNN.
Have a look at the picture below

Please note that you can follow these steps for your DNN 6.0 website.
Hope it helps

This is the second post discussing the ASP.Net Web API. I will continue building a small ASP.Net MVC 4.0 application that I started implementing in my last post.
You can have a look at the first post here. In this hands-on example I will show you how to create new footballer items,update a new footballer item,delete a new footballer item.
I will also refactor the implementation for the GET operations-methods from my last post.I will present you with a full CRUD hands-on example. This will be based in the RESTful WEB API paradigm and its four main HTTP methods. GET will retrieve the footballer items from the specified URI.PUT updates a resource (footballer item) at a specified URI.POST will create a new resource (footballer item).DELETE will delete a resource (footballer item) at a specified URI.
Let's move on to actually building the application.
1) Launch Visual Studio , I have named my application "WebApi", and open the application.
2) As I said earlier I will refactor the code I created in the first post.
Inside the Models folder my class file Footballer.cs looks exactly the same.
public class Footballer
{
public int FootballerID { get; set; }
public string FirstName { get; set; }
public string LastName { get; set; }
public double Weight { get; set; }
public double Height { get; set; }
public DateTime JoinedClub { get; set; }
public string PositionPlayed { get; set; }
public int GoalsScored { get; set; }
}
I need to create a collection of objects - footballer objects.I will use the Repository Pattern to separate the collection of objects from our service implementation.
In Solution Explorer, right-click the Models folder. Select Add, then select New Item. From the available Templates pane, select Installed Templates. Under C#, select Code. In the list of code templates, select Interface. Name the interface IFooballerRepository.cs.
The code for the interface implementation follows
public interface IFootballerRepository
{
IEnumerable<Footballer> GetPlayers();
Footballer GetFooballerById(int id);
Footballer AddFootballer(Footballer item);
void RemoveFootballer(int id);
bool UpdateFootballer(Footballer item);
}
3) Now, we obviously need to implement this interface. We need to add another class to the Models folder, named FootballerRepository.cs. This class will implement the IFootballerRepository interface. Add the following implementation:
public class FootballerRepository :IFootballerRepository
{
private List<Footballer> footballers = new List<Footballer>();
private int _nextId = 1;
public FootballerRepository()
{
footballers.Add(new Footballer { FootballerID = 1, FirstName = "Steven", LastName = "Gerrard", Height = 1.85, Weight = 85, JoinedClub = DateTime.Parse("12/12/1999"), PositionPlayed = "Attacking Midfielder", GoalsScored = 23 });
footballers.Add(new Footballer { FootballerID = 2, FirstName = "Jamie", LastName = "Garragher", Height = 1.89, Weight = 89, JoinedClub = DateTime.Parse("12/02/2000"), PositionPlayed = "Central Defender", GoalsScored = 2 });
footballers.Add(new Footballer { FootballerID = 3, FirstName = "Luis", LastName = "Suarez", Height = 1.72, Weight = 73, JoinedClub = DateTime.Parse("12/01/2012"), PositionPlayed = "Striker", GoalsScored = 27 });
}
public IEnumerable<Footballer> GetPlayers()
{
return footballers;
}
public Footballer GetFooballerById(int id)
{
return footballers.Find(f => f.FootballerID == id);
}
public Footballer AddFootballer(Footballer item)
{
if (item == null)
{
throw new ArgumentNullException("item");
}
item.FootballerID = _nextId++;
footballers.Add(item);
return item;
}
public void RemoveFootballer(int id)
{
footballers.RemoveAll(f => f.FootballerID == id);
}
public bool UpdateFootballer(Footballer item)
{
if (item == null)
{
throw new ArgumentNullException("item");
}
int index = footballers.FindIndex(f => f.FootballerID == item.FootballerID);
if (index == -1)
{
return false;
}
footballers.RemoveAt(index);
footballers.Add(item);
return true;
}
}
Let me explain the implementation above.
I create a generic collection of Fooballer objects (footballers)
private List<Footballer> footballers = new List<Footballer>();
Then I populate the list with objects that live in the computer's memory
public FootballerRepository()
{
footballers.Add(new Footballer { FootballerID = 1, FirstName =
"Steven", LastName = "Gerrard", Height = 1.85, Weight = 85, JoinedClub =
DateTime.Parse("12/12/1999"), PositionPlayed = "Attacking Midfielder",
GoalsScored = 23 });
footballers.Add(new Footballer {
FootballerID = 2, FirstName = "Jamie", LastName = "Garragher", Height =
1.89, Weight = 89, JoinedClub = DateTime.Parse("12/02/2000"),
PositionPlayed = "Central Defender", GoalsScored = 2 });
footballers.Add(new Footballer { FootballerID = 3, FirstName = "Luis",
LastName = "Suarez", Height = 1.72, Weight = 73, JoinedClub =
DateTime.Parse("12/01/2012"), PositionPlayed = "Striker", GoalsScored =
27 });
}
Well, I trust you have some knowledge of C# and collection initializers which is a C# 3.0 feature. Have a look here if you want to learn more about it.The individual object initializers are enclosed in braces and separated by commas.
Next, I implement two simple methods. GetPlayers() returns a list of players.GetFooballerById(int id) returns a single footballer by its ID.
public IEnumerable<Footballer> GetPlayers()
{
return footballers;
}
public Footballer GetFooballerById(int id)
{
return footballers.Find(f => f.FootballerID == id);
}
Next I am implementing the AddFootballer method which is pretty straightforward method. If there is no item-object we throw an exception. If there is an item we give it a new ID and add the object to the collection.
public Footballer AddFootballer(Footballer item)
{
if (item == null)
{
throw new ArgumentNullException("item");
}
item.FootballerID = _nextId++;
footballers.Add(item);
return item;
}
Next I am implementing the RemoveFootballer method.I just remove an object from the collection with a specific id.
public void RemoveFootballer(int id)
{
footballers.RemoveAll(f => f.FootballerID == id);
}
Finally I implement the UpdateFootballer method.If there is no item-object we throw an exception. Then I find the index of the object in the collection array according to its ID and then remove it and add the new one.
public bool UpdateFootballer(Footballer item)
{
if (item == null)
{
throw new ArgumentNullException("item");
}
int index = footballers.FindIndex(f => f.FootballerID == item.FootballerID);
if (index == -1)
{
return false;
}
footballers.RemoveAt(index);
footballers.Add(item);
return true;
}
4) Now we need to change the code we have written for our controller FootballerController.cs in the Controllers folder.
Comment everything inside this class and just leave the code below
public class FootballerController : ApiController
{
}
The complete implementation follows
public class FootballerController : ApiController
{
static readonly IFootballerRepository repository = new FootballerRepository();
public IEnumerable<Footballer> GetPlayers()
{
return repository.GetPlayers();
}
public Footballer GetFooballerById(int id)
{
var footballer = repository.GetFooballerById(id);
if (footballer == null)
{
throw new HttpResponseException(HttpStatusCode.NotFound);
}
return footballer;
}
public HttpResponseMessage PostFootballer(Footballer footballer)
{
footballer = repository.AddFootballer(footballer);
var response = Request.CreateResponse<Footballer>(HttpStatusCode.Created, footballer);
string uri = Url.Link("DefaultApi", new { id = footballer.FootballerID });
response.Headers.Location = new Uri(uri);
return response;
}
public void PutFootballer(int id, Footballer footballer)
{
footballer.FootballerID = id;
if (!repository.UpdateFootballer(footballer))
{
throw new HttpResponseException(HttpStatusCode.NotFound);
}
}
public void DeleteFootballer(int id)
{
Footballer footballer = repository.GetFooballerById(id);
if (footballer == null)
{
throw new HttpResponseException(HttpStatusCode.NotFound);
}
repository.RemoveFootballer(id);
}
}
In ASP.NET Web API, a controller is a class that handles HTTP requests from the client.Now I will explain what I have implemented in this class and what methods have been created.
I am adding a field that holds an IFootballerRepository instance.
static readonly IFootballerRepository repository = new FootballerRepository();
This is the method to get a list of footballers.Well, nothing really to explain here.
public IEnumerable<Footballer> GetPlayers()
{
return repository.GetPlayers();
}
This is the method to get a footballer item by id.This method name also starts with Get.This method has a parameter named id. This parameter is mapped to the id segment of the URI path.
The method will throw an exception of type HttpResponseException if id is not valid. This exception will be translated by Web API as a 404 (Not Found) error.
public Footballer GetFooballerById(int id)
{
var footballer = repository.GetFooballerById(id);
if (footballer == null)
{
throw new HttpResponseException(HttpStatusCode.NotFound);
}
return footballer;
}
Now I would like to explain again how the ASP.NET Web API knows how to map URIs to our controller methods.
The ASP.NET Web API framework for each HTTP message decides which controller receives the request by consulting a route table. The Web API project contains a default route that you can find in the WebApiConfig.cs file.
/api/{controller}/{id}
The {controller} and {id} are just placeholders.
{controller} is matched to the controller name. {controller} in my case is footballer.
The HTTP request method is matched to the method name. (This rule applies only to GET, POST, PUT, and DELETE requests.)
/api/footballer will match the GetPlayers() method
/api/footballer/1 will match the GetFooballerById(1) method
Next I am implementing the PostFootballer method.This will create a new footballer item.The new item is created when the client sends a HTTP POST request to the server with the new footballer object in body of the request message.
public HttpResponseMessage PostFootballer(Footballer footballer)
{
footballer = repository.AddFootballer(footballer);
var response = Request.CreateResponse<Footballer>(HttpStatusCode.Created, footballer);
string uri = Url.Link("DefaultApi", new { id = footballer.FootballerID });
response.Headers.Location = new Uri(uri);
return response;
}
The way POST requests are getting handled, we define a method whose name starts with Post. The method takes a parameter of type Footballer. The clients to sends to the server a serialized representation of a footballer object, using either XML or JSON for the serialization.
Next we must think of the response code.The Web API framework sets the response status code to 200 (OK). HTTP/1.1 protocol dictated that when a POST request results in the creation of a resource, the server should reply with status 201 - Created.When the server creates a resource, it should include the URI of the new resource in the Location header of the response.
Next I am implementing the PutFootballer method.This method will update a footballer item.This method name starts with Put which makes the Web API to match it to PUT requests. The method takes two parameters, the footballer Id and the updated footballer object. The id parameter is taken from the URI path, and the footballer parameter is deserialized from the request body. The ASP.NET Web API framework takes simple parameter types from the route. Complex types are taken from the request body.
public void PutFootballer(int id, Footballer footballer)
{
footballer.FootballerID = id;
if (!repository.UpdateFootballer(footballer))
{
throw new HttpResponseException(HttpStatusCode.NotFound);
}
}
Next I am implementing the DeleteFootballer method.We define a method whose name starts with Delete so the Web API matches it to DELETE requests.
Τhe method has a parameter named id. This parameter is mapped to the "id" segment of the URI path. Ιf the footballer object is not found an exception is thrown. If the deletion is successful then status code 204 (No Content) will be returned.
public void DeleteFootballer(int id)
{
Footballer footballer = repository.GetFooballerById(id);
if (footballer == null)
{
throw new HttpResponseException(HttpStatusCode.NotFound);
}
repository.RemoveFootballer(id);
}
In the next and final post in this series I will build the Index.cshtml using Knockout which is a JavaScript library that helps developers to create rich, responsive displays when a
clean underlying data model exists.
I think that this is enough material for one post and before I implement Index.cshtml I must introduce Knockout library to you.
Hope it helps!!!

In this post I would like to show you a hands on example on ASP.Net Web API by building a small ASP.Net application. I am going to build an ASP.Net MVC 4.0 Web application to create a Web API that returns a list of football players. I will also use the popular Javascript library JQuery to issue requests to the server.In the second part of this blog post I will show you how to support more operations in an HTTP service like create,update,delete players using a REST architectural style.
Before I go on with the actual example I will talk a little bit about REST. In 2000, Roy Fielding introduced REpresentational State Transfer in his P.H.D Thesis.
It describes a scalable architecture for building services that build on HTTP.REST is fundamentally different from SOAP.SOAP defines a transport-neutral model that is focused on defining custom services contracts with custom operations.You can invoke those operations over a variety of different transports using different message encodings.REST defines a transport-specific (HTTP) model focused on resources.
In REST we build services around a uniform interface and common data formats.HTTP methods are GET,POST,PUT,DELETE also known as verbs.Data formats supported in REST inculde HTML,XML,JSON.
REST is also known as a Resource Orientated Architecture.The main focus is on identifying and naming resources (URIs). We also focus on how to represent them (XML Format) .We use uniform interface to interact with those URIs through HTTP verbs (GET,POST,PUT,DELETE ). Through this model we can achieve interoperability and scalability for our applications.
Web API is a fully extensible framework for building HTTP based endpoints on top of ASP.Net.It was released with ASP.Net MVC 4.0. It is based on ASP.Net Routing and but is not linked only to ASP.Net MVC. You can use it in a Web Forms project as well. You can download it through NuGet so you can have the latest version.
The most important thing right now is to download and install all the tools,libary,software in your computer so you can follow along. You can download all the necessary software (tools-Visual Studio 2012 Web Edition along with a web server- , a Sql Server instance, libraries,binaries) if you download Web Platform Installer.You can download this tool from this link.
After you install it, you must search for Visual Studio Express 2012 for Web
Have a look at the picture below

Then click Add and then Install.Everything you need will be installed. Maybe you need to reboot the machine so do not worry if you will have to do this.
I have installed Visual Studio 2012 Ultimate edition in my machine which is Windows 8
by the way. I have also installed the latest version of .Net Framework
and I will show you later how to download more libraries when needed.I
have installed SQL Server 2012 Enterprise Edition in my machine.
As a Microsoft Certified Trainer I have access to this software but as
explained earlier you need only to download Web Platform Installer and then download the Visual Studio Express 2012 for Web and install it.
Let's start building our ASP.Net MVC 4.0 Web application
1) I am launching VS 2012 and I will Visual C# as the programming language. I will also select ASP.NET MVC 4 Web Application from the available templates.Have a look at the picture below
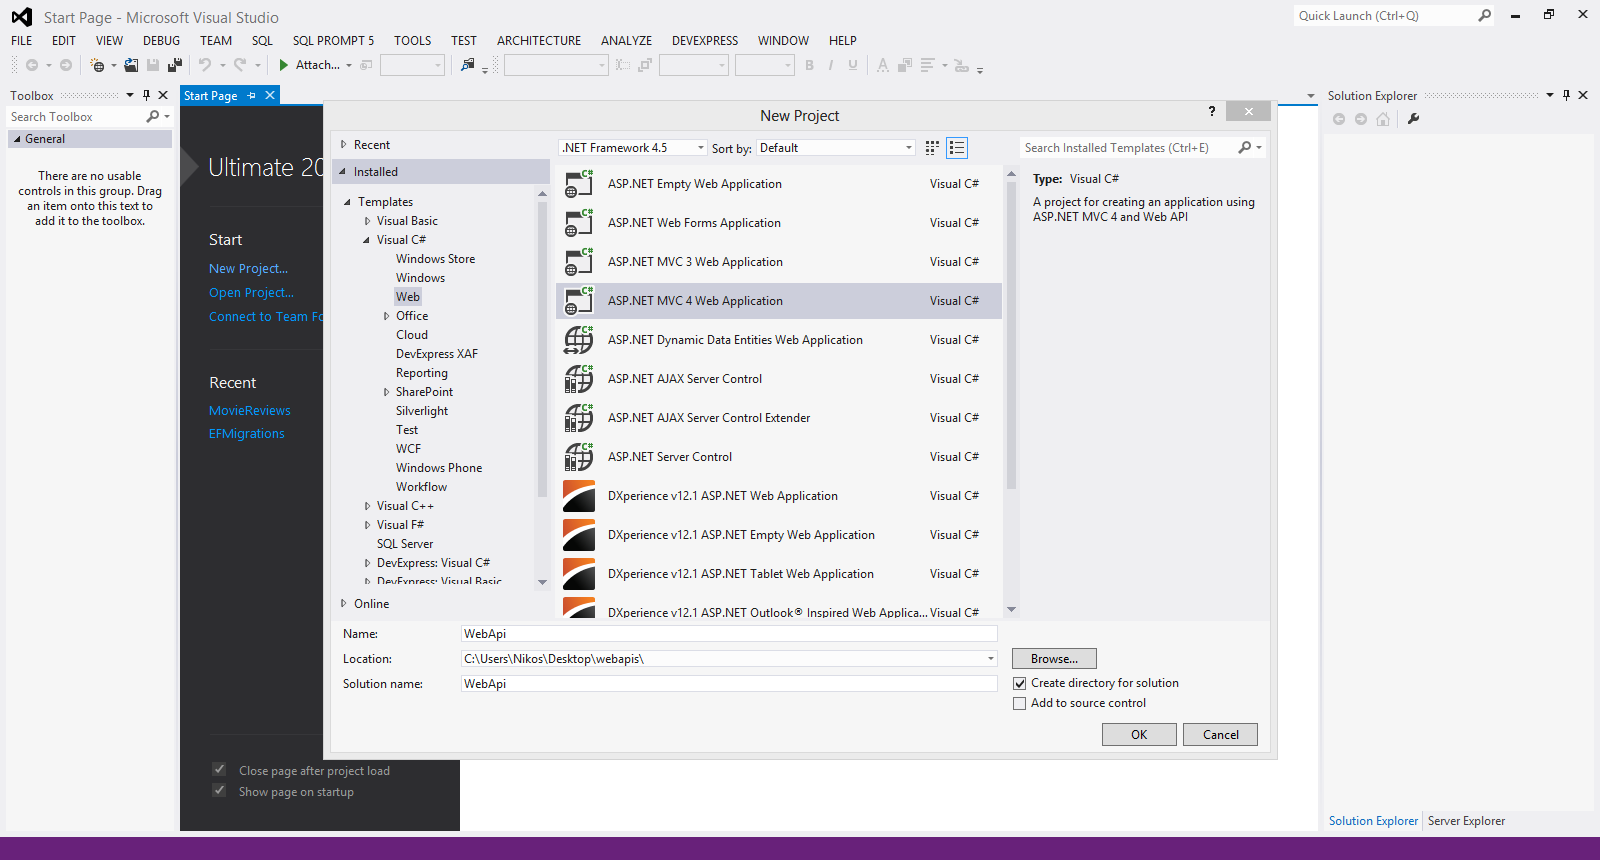
I have named my application "WebApi" and then clicked OK.
2) From the available templates in the next screen I select Web API. This template will create all the necessary files in order to build the application. Click OK.
Have a look at the picture below.

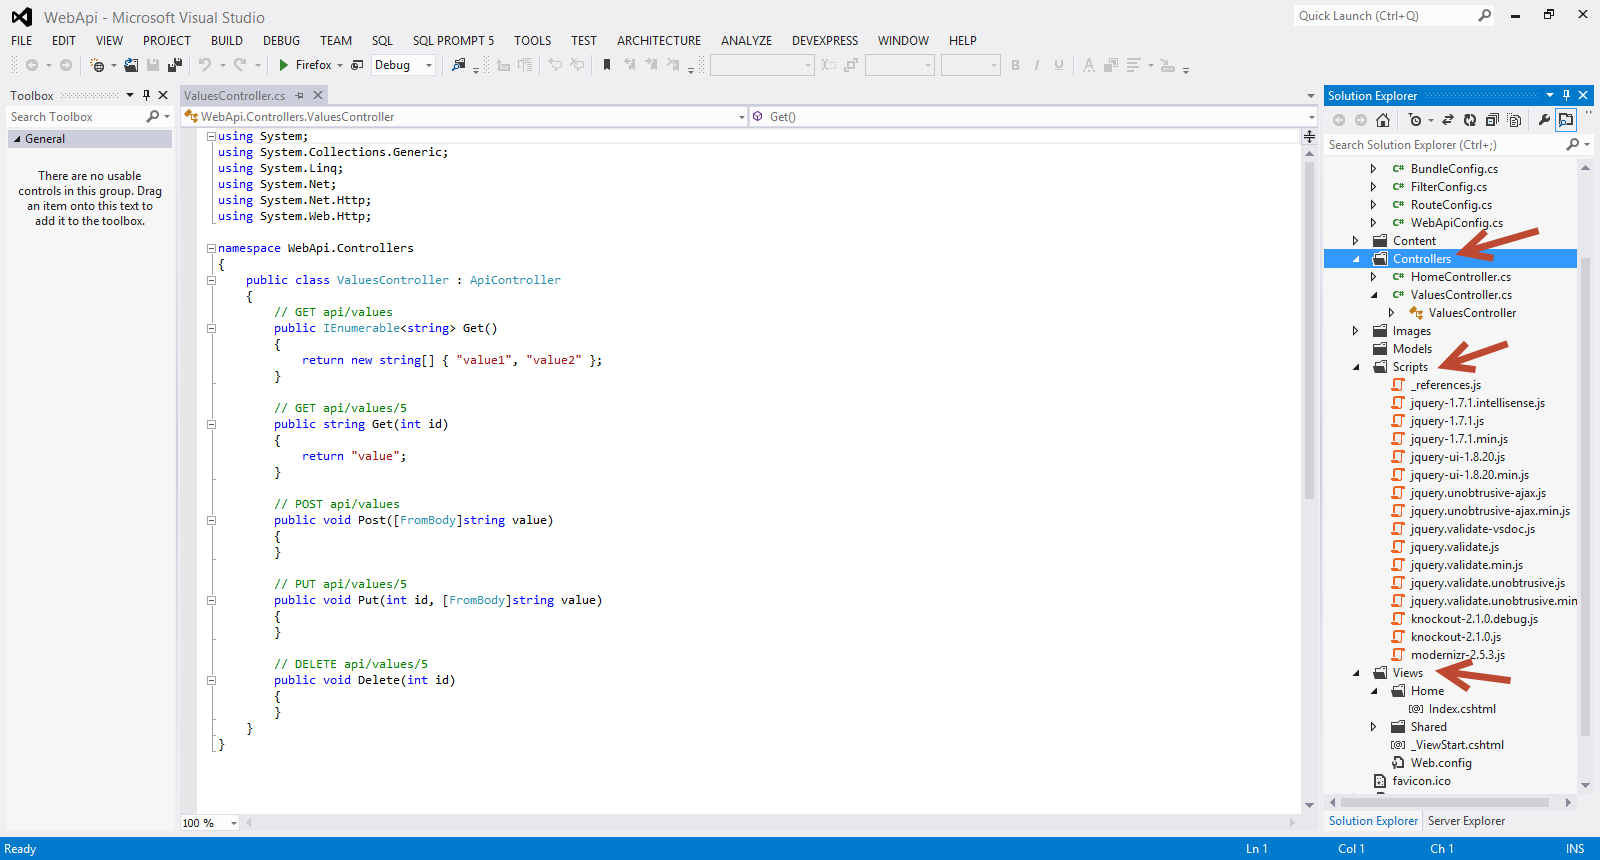
3) Have a look at the Solution Explorer to get a feeling of the files being created and the structure of the web application. Have a look at the picture below
4) Now we need to add a model that will basically be the data in our application. The way everything works is the following
- We will pass a request to the server, an HTTP request message to the server, then the server will respond with an HTTP response serializing the model to JSON or XML or any other format.
- On the client side serialized data can be parsed and deserialized.Most clients can parse XML and JSON.
Have a look at the picture below to see the how I add a new model to my application. I simply add a class file to my model in the Models folder.

I name the class Footballer.cs
The code follows
public class Footballer
{
public int FootballerID { get; set; }
public string FirstName { get; set; }
public string LastName { get; set; }
public double Weight { get; set; }
public double Height { get; set; }
public DateTime JoinedClub { get; set; }
public string PositionPlayed {get;set;}
public int GoalsScored {get;set;}
}
5) We need to add a new controller that basically will handle the HTTP request. Add a new controller, as follows:
In Solution Explorer, right-click the the Controllers folder. Select Add and then select Controller.
Have a look at the picture below
In the Add Controller wizard, name the controller "FootballerController". In the Template drop-down list, select Empty API Controller. Then click Add.

The FootballerController will inherit from the ApiController class and not the Controller class.
I will add the following methods to the class.
public class FootballerController : ApiController
{
Footballer[] footballers = new Footballer[]
{
new Footballer {
FootballerID=1,
FirstName = "Steven",LastName="Gerrard", Height=1.85,
Weight=85, JoinedClub=DateTime.Parse("12/12/1999"),
PositionPlayed="Attacking Midfielder",GoalsScored=23},
new Footballer {
FootballerID=2,
FirstName = "Jamie",LastName="Garragher", Height=1.89,
Weight=89, JoinedClub=DateTime.Parse("12/02/2000"),
PositionPlayed="Central Defender",GoalsScored=2},
new Footballer {
FootballerID=3,
FirstName = "Luis",LastName="Suarez", Height=1.72,
Weight=73, JoinedClub=DateTime.Parse("12/01/2012"),
PositionPlayed="Striker",GoalsScored=27},
};
public IEnumerable<Footballer> GetPlayers()
{
return footballers;
}
public Footballer GetFooballerById(int id)
{
var footballer = footballers.FirstOrDefault((f) => f.FootballerID == id);
if (footballer == null)
{
throw new HttpResponseException(HttpStatusCode.NotFound);
}
return footballer;
}
public IEnumerable<Footballer> GetFooballersByPosition(string position)
{
return footballers.Where(
(f) => string.Equals(f.PositionPlayed, position,
StringComparison.OrdinalIgnoreCase));
}
}
All my data is stored in an array in memory.We have 3 methods that return data and not view inside the controller class.
GetPlayers() returns a list of players.GetFooballerById(int id) returns a single footballer by its ID.GetFooballersByPosition(string position) returns all football players according to their playing position.
Each method on the controller will map to a URI.The client (in this case the web browser) will send an HTTP GET request to the URI.
6) Build and run you application. The IIS Express will start, and a notification will appear in the bottom corner of the screen showing the port number that it is running under. A random port number will be selected.
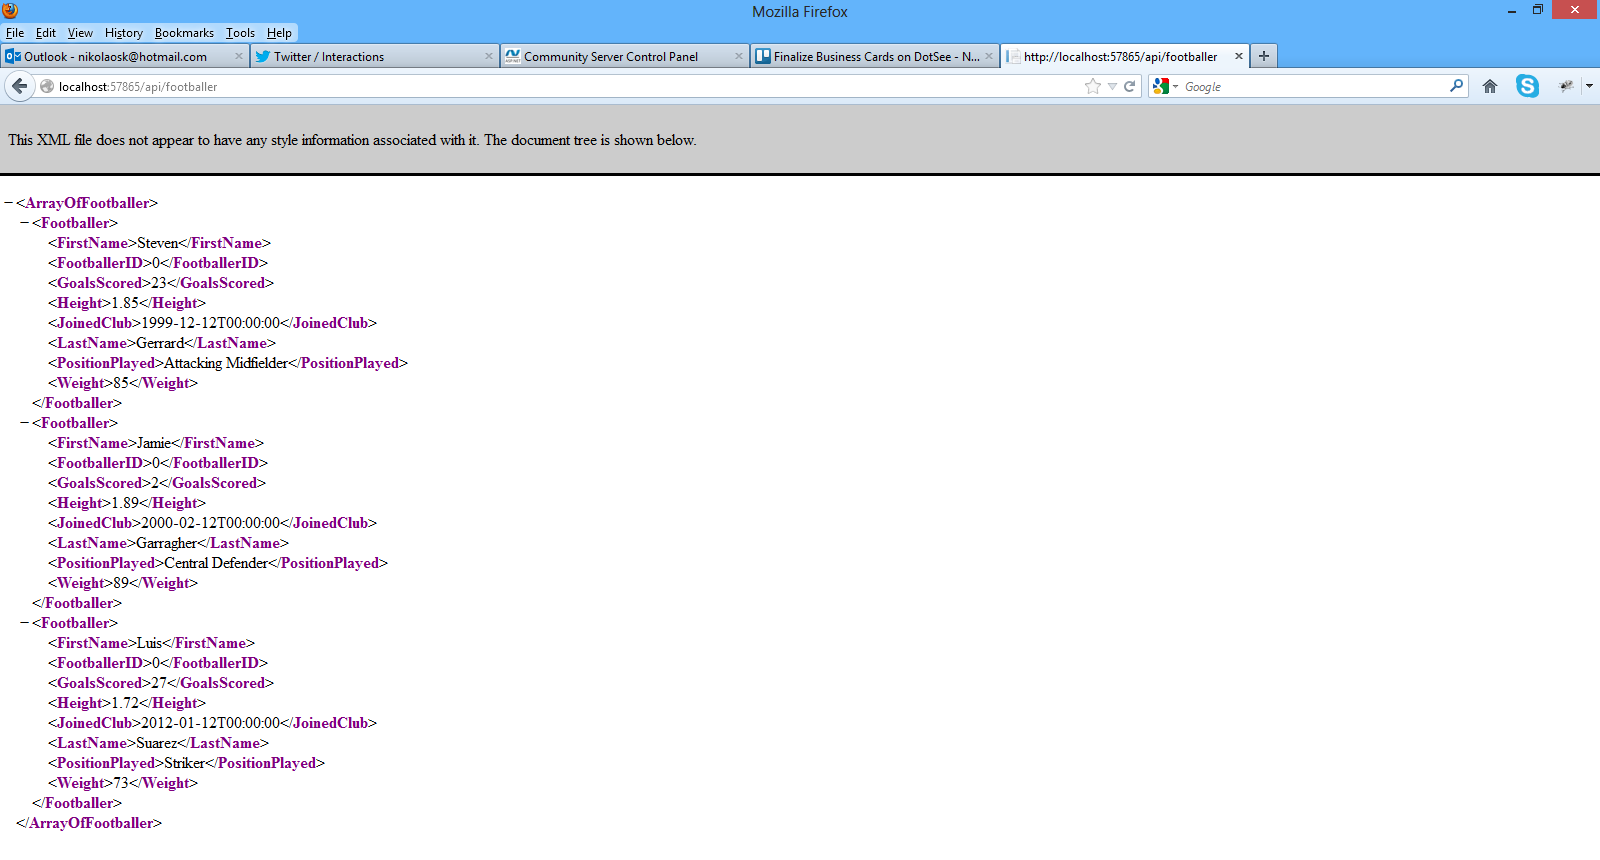
You will see the default page. In my case is http://localhost:57865.Now I must invoke the web API, so must use the following URI http://localhost:57865/api/footballer
Have a look below to see what I see when I view the page in Firefox.It is displayed in XML in the browser.
7) Now we need to test the other two methods. The first one will return a footballer by ID and the second one will return data based on the player's playing position.
While my application is still running I type in the browser http://localhost:57865/api/footballer/1 and hit enter.
Have a look at the picture below to see the results I get in Firefox

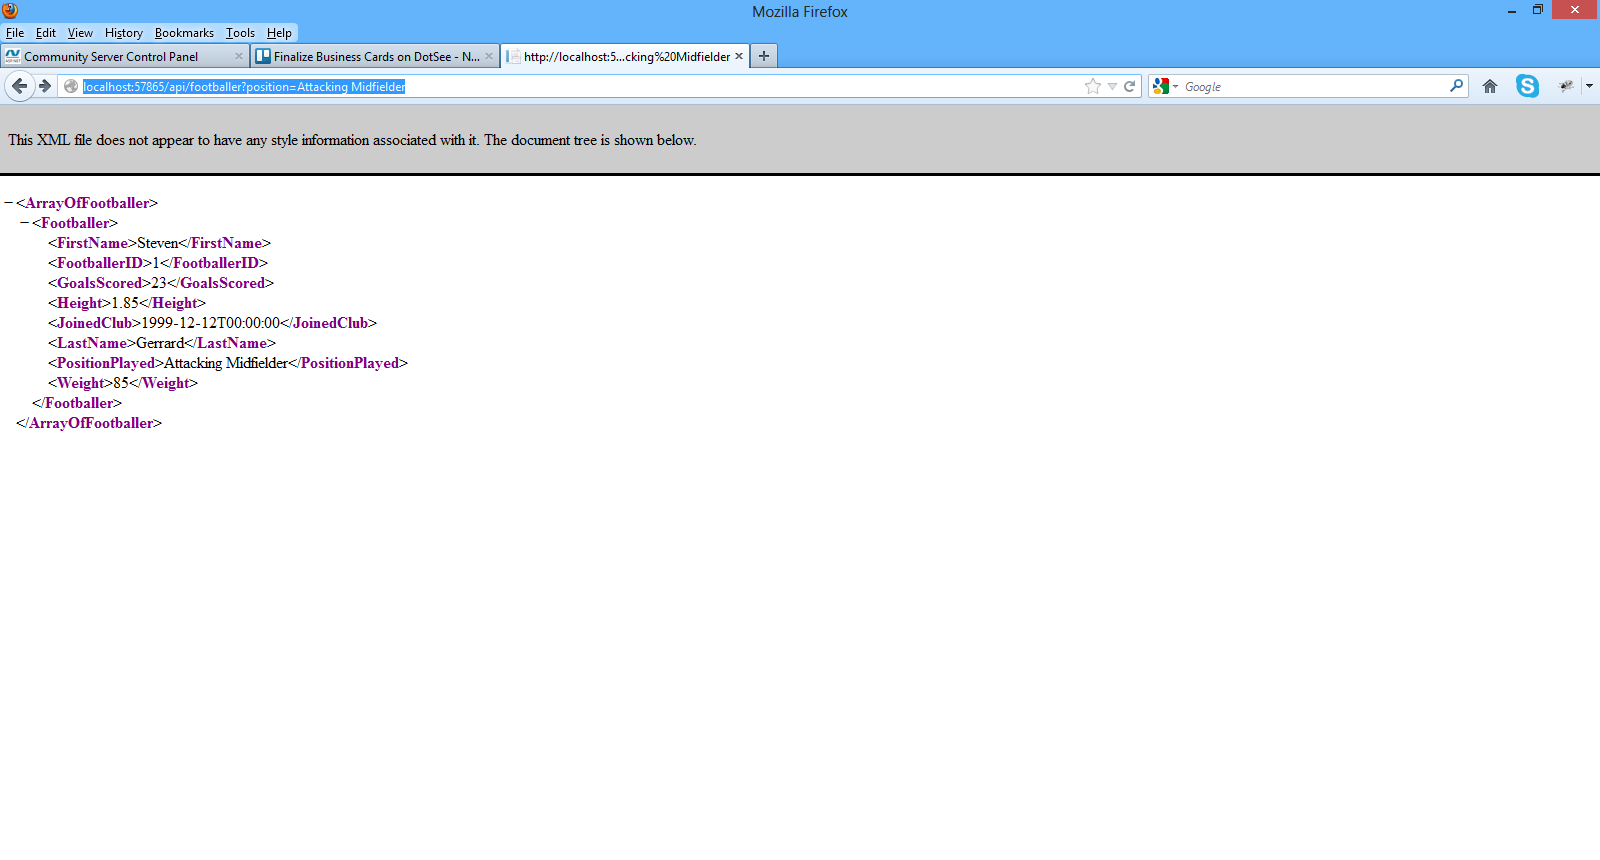
While my application is still running I type in the browser http://localhost:57865/api/footballer?position=Attacking%20Midfielder and hit enter.
Have a look at the picture below to see the results I get in Firefox.
8) I will write a small client application , a javascript client in order to consume the APIs.I will modify the Index.cshtml file in the Views folder.I will not be using Razor in this post. I will only use plain HTML 5 and Javascript
The contents of the Index.chstml follow
<!DOCTYPE html>
<html lang="en">
<head>
<title>ASP.NET Web API</title>
<link href="../../Content/Site.css" rel="stylesheet" />
<script src="../../Scripts/jquery-1.7.1.min.js" type="text/javascript">
</script>
<script type="text/javascript">
$(document).ready(function () {
$.getJSON("api/footballer/",
function (data) {
$.each(data, function (key, val) {
var str = val.FirstName + " " + val.LastName;
$('<li/>', { text: str })
.appendTo($('#footballers'));
});
});
});
</script>
</head>
<body id="body" >
<div class="main">
<div>
<h1>All Footballers</h1>
<ul id="footballers"/>
</div>
<div>
<label for="FootballerId">ID:</label>
<input type="text" id="FootballerId" size="5"/>
<input type="button" value="Search" onclick="find();" />
<p id="footballer" />
</div>
</div>
</body>
</html>
Let me explain what I am doing here. There is a link to JQuery library at the top of the script.
I have an HTML 5 markup where I will present the footballers eventually.
With the command below I am sending an Ajax request to the server.The getJSON command does that. The response will be an array of JSON objects. When the request successfully completes, (see code below)
$.each(data, function (key, val) {
var str = val.FirstName + " " + val.LastName;
$('<li/>', { text: str })
.appendTo($('#footballers'));
$.getJSON("api/footballer/",
the data will be returned formatted.
When I build and run the application this is what I get.

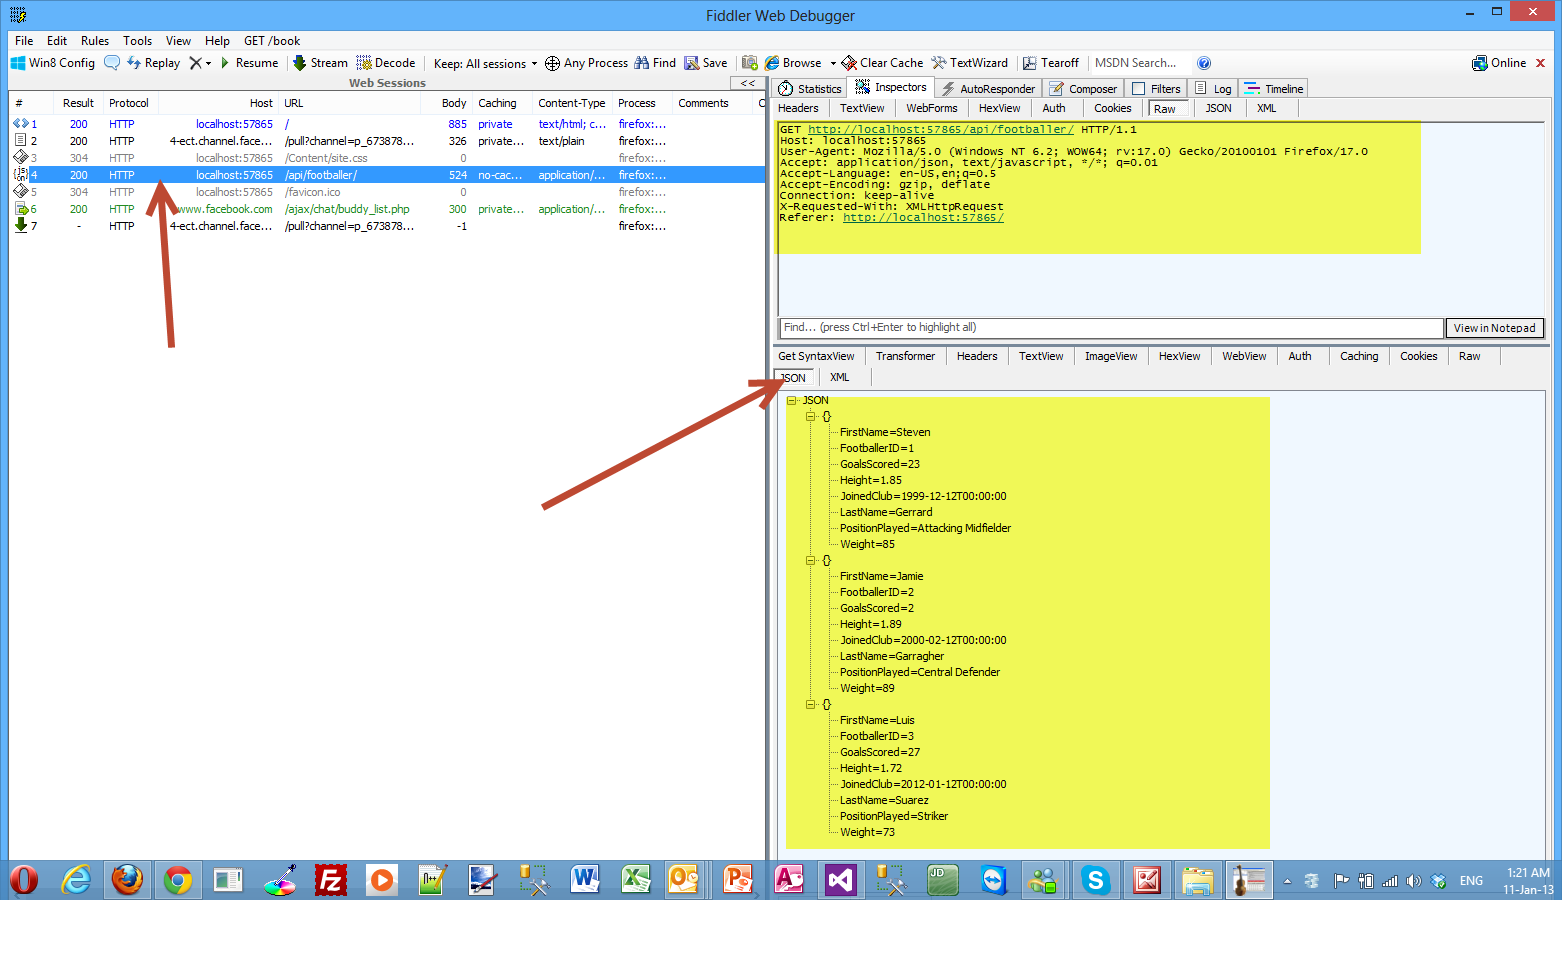
My application works. I can see what actually is going on behind the scenes if I have the right tool.
Fiddler is a web debugging proxy tool and you can use it to see all useful information the clients and servers exchange.
You can download Fiddler here.
In my case I am mostly interested in the JSON objects returned from the server.
Have a look at the picture below
 9) Now I will show you how to find a footballer by id.
The code for the find() method is
function find() {
var id = $('#FootballerId').val();
$.getJSON("api/footballer/" + id,
function (data) {
var str = data.FirstName + " " + data.LastName;
$('#footballer').text(str);
})
.fail(
function (jqXHR, textStatus, err) {
$('#footballer').text('Error: ' + err);
});
We make a call to the jQuery getJSON function to send the AJAX request.We use the ID to construct the request URI. The response from this request is a JSON representation of a single Footballer object.
Have a look at the picture below

If I enter an invalid ID in the search box, then I get back an HTTP error.
Have a look at the picture below

Now I need to explain how the ASP.NET Web API knows how to map URIs to our controller methods.
The ASP.NET Web API framework for each HTTP message decides which controller receives the request by consulting a route table. The Web API project contains a default route that you can find in the WebApiConfig.cs file.
/api/{controller}/{id}
The {controller} and {id} are just placeholders.
{controller} is matched to the controller name. {controller} in my case is footballer.
The HTTP request method is matched to the method name. (This rule applies only to GET, POST, PUT, and DELETE requests.)
/api/footballer will match the GetPlayers() method
/api/footballer/1 will match the GetFooballerById(1) method
We have a GET request, so the framework looks for a method on FootballerController controller. So there will be a call to the FootballerController controller and for a method whose name starts with "Get...". The FootballerController::GetPlayers() method will execute.
When we pass a parameter (id) to the controller the frameworks call the GetFooballerById, which takes the parameter and returns the footballer object.
The complete code for the Index.cshtml follows
<!DOCTYPE html>
<html lang="en">
<head>
<title>ASP.NET Web API</title>
<link href="../../Content/Site.css" rel="stylesheet" />
<script src="../../Scripts/jquery-1.7.1.min.js" type="text/javascript">
</script>
<script type="text/javascript">
$(document).ready(function () {
$.getJSON("api/footballer/",
function (data) {
$.each(data, function (key, val) {
var str = val.FirstName + " " + val.LastName;
$('<li/>', { text: str })
.appendTo($('#footballers'));
});
});
});
function find() {
var id = $('#FootballerId').val();
$.getJSON("api/footballer/" + id,
function (data) {
var str = data.FirstName + " " + data.LastName;
$('#footballer').text(str);
})
.fail(
function (jqXHR, textStatus, err) {
$('#footballer').text('Error: ' + err);
});
}
</script>
</head>
<body id="body" >
<div class="main">
<div>
<h1>All Footballers</h1>
<ul id="footballers"/>
</div>
<div>
<label for="FootballerId">ID:</label>
<input type="text" id="FootballerId" size="5"/>
<input type="button" value="Search" onclick="find();" />
<p id="footballer" />
</div>
</div>
</body>
</html>
In the second part (next blog post) I will be extending the application to insert,update and delete information.
Hope it helps!!!

I have decided to write a series of posts on how to write a small ASP.Net MVC 4.0 application.I will develop this application step by step and I will explain everything that you need to know in order to develop ASP.Net MVC 4.0 applications. This is the sixth post in this series. You can find the first one here , the second one here , third one here , the fourth one here and the fifth one here. Make sure you read and understand those posts.
In this post I will add some validations to our application through Code First Data Annotations and migrate those changes to our database through EF Code First Migrations.
Right now there is no validation for the fields Rating and Comment of the MovieReview entity. I want to have a validation rule applied to the Rating field that will accept only values 1 to 10 and it will be mandatory. The Comment field will only be 100 characters long and also mandatory.We also want to have the characters for the Name property of the Movie entity restricted to 70 and the name of the Director restricted to 50 characters.
Both of these properties should be mandatory.
I am going briefly to introduce Data Annotations and how to use them in our Code First Entity framework applications. I have developed my data access layer with EF. We have 3 development paradigms in EF. We have Database First,Model First and Code First. The last one (Code First) is the one I have used for this application and frankly speaking it is gaining in popularity amongst developers.
I will use another post also found in this blog to demonstrate Data Annotations.In order to fully understand what I am talking about, you need to read this post titled Using the Code First approach when building ASP.Net applications with Entity Framework . It will take some time to create this application but it is necessary in order to follow along.
With Data Annotations we can configure our domain-entity classes so that they can take best advantage of the EF. We can decorate our entity classes with declarative attributes.Let me give you an insight on how EF Code First works.EF Code First at run time, looks at the entity-domain classes and infers from them the in-memory data that it needs to interpret the queries and interact with the database.For example it assumes that any property named ID represents the key property of the class.Data Annotations "live" inside the System.ComponentModel.DataAnnotations. We do add Data Annotations to our domain classes declaratively using attributes. You can also do that imperatively using the Fluent API.
1) Launch Visual Studio and launch the ASP.Net MVC 4.0 application we have been developing so far.
2) Have a look at my entity class Movie
public class Μovie
{
public int Id { get; set; }
public string Name { get; set; }
public string Director { get; set; }
public DateTime YearReleased { get; set; }
public virtual ICollection<MovieReview> Reviews { get; set; }
}
If I go to the entity above and make one little change renaming the
public string Name { get; set; }
to
[Required, MaxLength(70)]
public string Name { get; set; }
my application will get an error if compile and view it in a browser. It will compile but when I click on the Movie link on the menu I get the results shown in the following picture

3)
Make sure you add a reference to the System.ComponentModel.DataAnnotations namespace in the class file
using System.ComponentModel.DataAnnotations;
Both entities after applying the data annotation attributes follow:
public class Μovie
{
public int Id { get; set; }
[Required, MaxLength(70)]
public string Name { get; set; }
[Required, MaxLength(50)]
public string Director { get; set; }
public DateTime YearReleased { get; set; }
public virtual ICollection<MovieReview> Reviews { get; set; }
}
public class MovieReview
{
public int Id { get; set; }
[Required,Range(1,10)]
public int Rating { get; set; }
[Required, MaxLength(50)]
public string Comment { get; set; }
public int MovieId { get; set; }
}
}
There are other data annotation attributes like Key,ConcurrencyCheck,[Table("MyTable",Schema="guest")] but it is impossible to cover everything in this post.
Now I am compiling again my application and then when I click on the Movie link on the menu I get the results shown in the following picture

So we receive an error. Well, there is an explanation for that behavior. The Entity Framework always checks the model that is in effect, that we just configured against the model it used originally to create the database.
4) The Entity Framework detected that there is something different in this model. When we apply the Required attribute to an property in the entity then this field in the database should be not null.
In order to solve that problem we must apply Code First Migrations
Code First Migrations is an Entity Framework feature introduced in version 4.3 back in February of 2012.
Before the addition of Code First Migrations (4.1,4.2 versions), Code First database initialisation meant that Code First would create the database if it does not exist (the default behaviour - CreateDatabaseIfNotExists).
The other pattern we could use is DropCreateDatabaseIfModelChanges which means that Entity Framework, will drop the database if it realises that model has changes since the last time it created the database.
The final pattern is DropCreateDatabaseAlways which means that Code First will recreate the database every time one runs the application.
That is of course fine for the development database but totally unacceptable and catastrophic when you have a production database. We cannot lose our data because of the way that Code First works.
Migrations solve this problem.With migrations we can modify the database without completely dropping it.We can modify the database schema to reflect the changes to the model without losing data.
5) EF Code First Migrations is not activated by default. We have to activate them manually and configure them according to our needs.
We will open the Package Manager Console from the Tools menu within Visual Studio.Then we will activate the EF Code First Migration Features by writing the command “Enable-Migrations”.
Have a look at the picture below.

This adds a new folder Migrations in our project. A new auto-generated class Configuration.cs is created.Another class is also created[CURRENTDATE]_InitialCreate.cs and added to our project.
The Configuration.cs is shown in the picture below.

6) Now we need to update the database.
In the Configurations.cs I change the AutomaticMigrationsEnabled value to true
public Configuration()
{
AutomaticMigrationsEnabled = true;
}
Then in the Package Manager Console, we write the following
Update-Database -Verbose
This will fail because EF understands that we take a column that was nvarchar(max) and make it nvarchar(50) e.t.c
Then in the Package Manager Console, we write the following
Update-Database -Verbose -Force
This statement will succeed.
That will force the changes to the database.
Have a look at the picture below

As you can see all the changes were made to the database.
Now if we run again our application and test it (try to violate the 1-10 values allowed in the rating field) I will get the error shown in the picture below
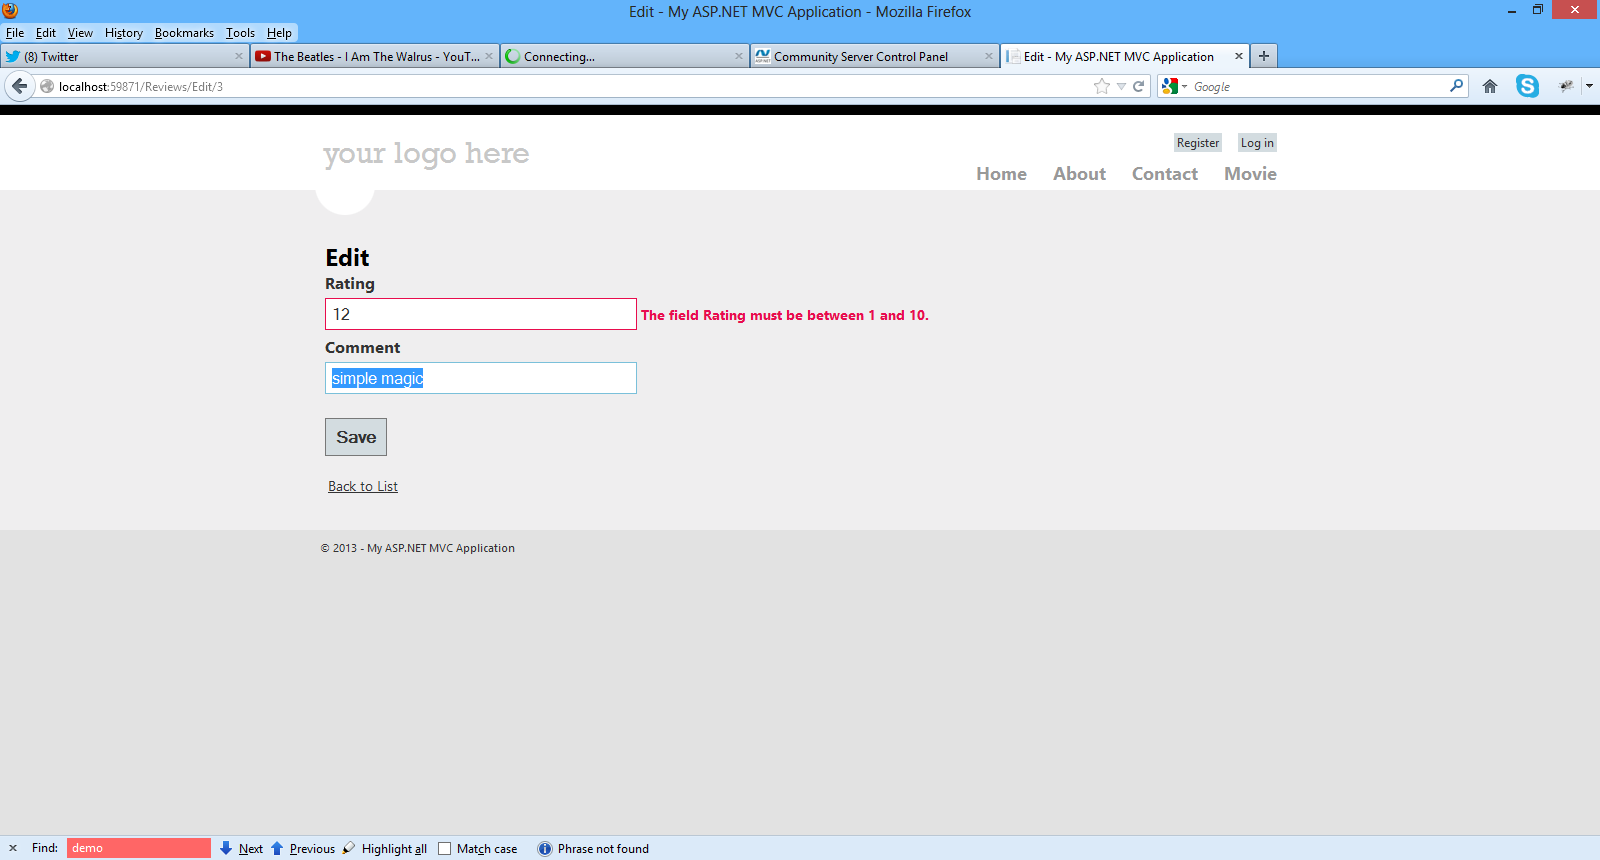
I know we covered a lot in this post but you must understand it, if you want to master EF Code First.
Hope it helps!!!

I have decided to write a series of posts on how to write a small ASP.Net MVC 4.0 application.I will develop this application step by step and I will explain everything that you need to know in order to develop ASP.Net MVC 4.0 applications. This is the fourth post in this series. You can find the first one here , the second one here the third one here and the fourth one here. Make sure you read and understand those posts.
In this post I will add Search functionality to my application and
1) Launch Visual Studio and open the application
2) We must add code to the _Layout.cshtml view in the Shared folder and more specifically to the menu. We must add an entry so someone can navigate to the Movie View.
The nav section becomes like this
<nav>
<ul id="menu">
<li>@Html.ActionLink("Home", "Index", "Home")</li>
<li>@Html.ActionLink("About", "About", "Home")</li>
<li>@Html.ActionLink("Contact", "Contact", "Home")</li>
<li>@Html.ActionLink("Movie", "Index", "Movie")</li>
</ul>
</nav>
3) Now we must delete the [Authorize] Action Filter attribute from the public ActionResult Index() , that we previously entered. Now if we run the application we will see a new link in the menu, Movie.
Have a look at the picture below
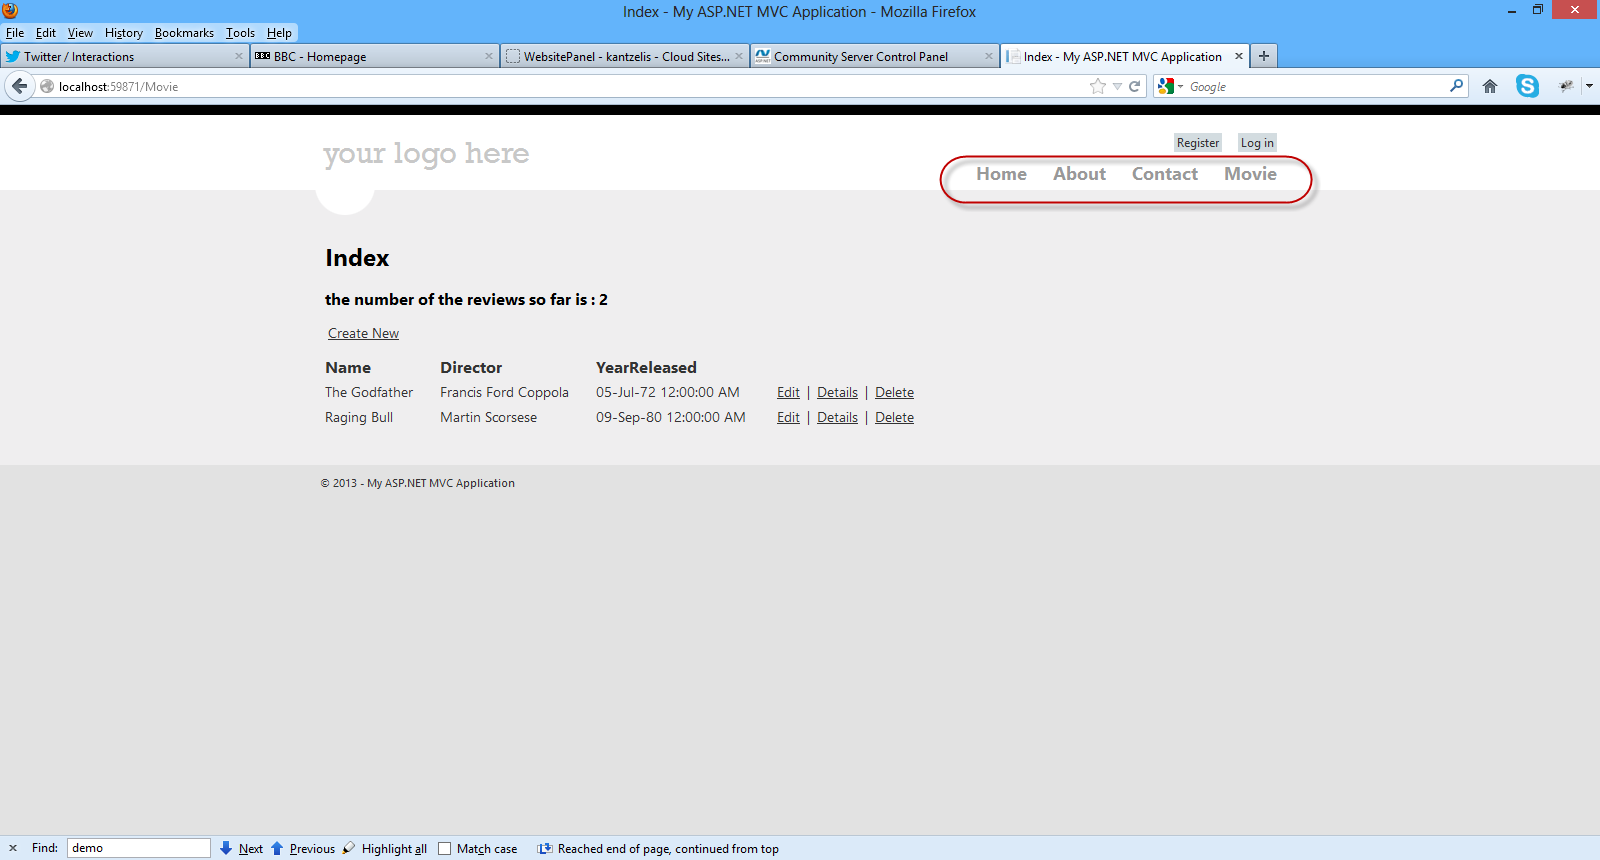
5) Now we will add search functionality in our application.We need to add some code to the MovieController.cs file.We will add another public method (Search) that gets an input parameter(looks for name of the movie).The code is very easy to follow.I just use standard LINQ syntax.
public ActionResult Search(string searchString)
{
var movies = from movie in db.Movies
select movie;
if (!String.IsNullOrEmpty(searchString))
{
movies = movies.Where(m => m.Name.Contains(searchString));
}
return View(movies);
}
Now we need to implement the corresponding view.Right-click on the public ActionResult Search(string searchString) and select Add View.
Have a look at the picture below to see the settings you must add in the popup window (Add View)
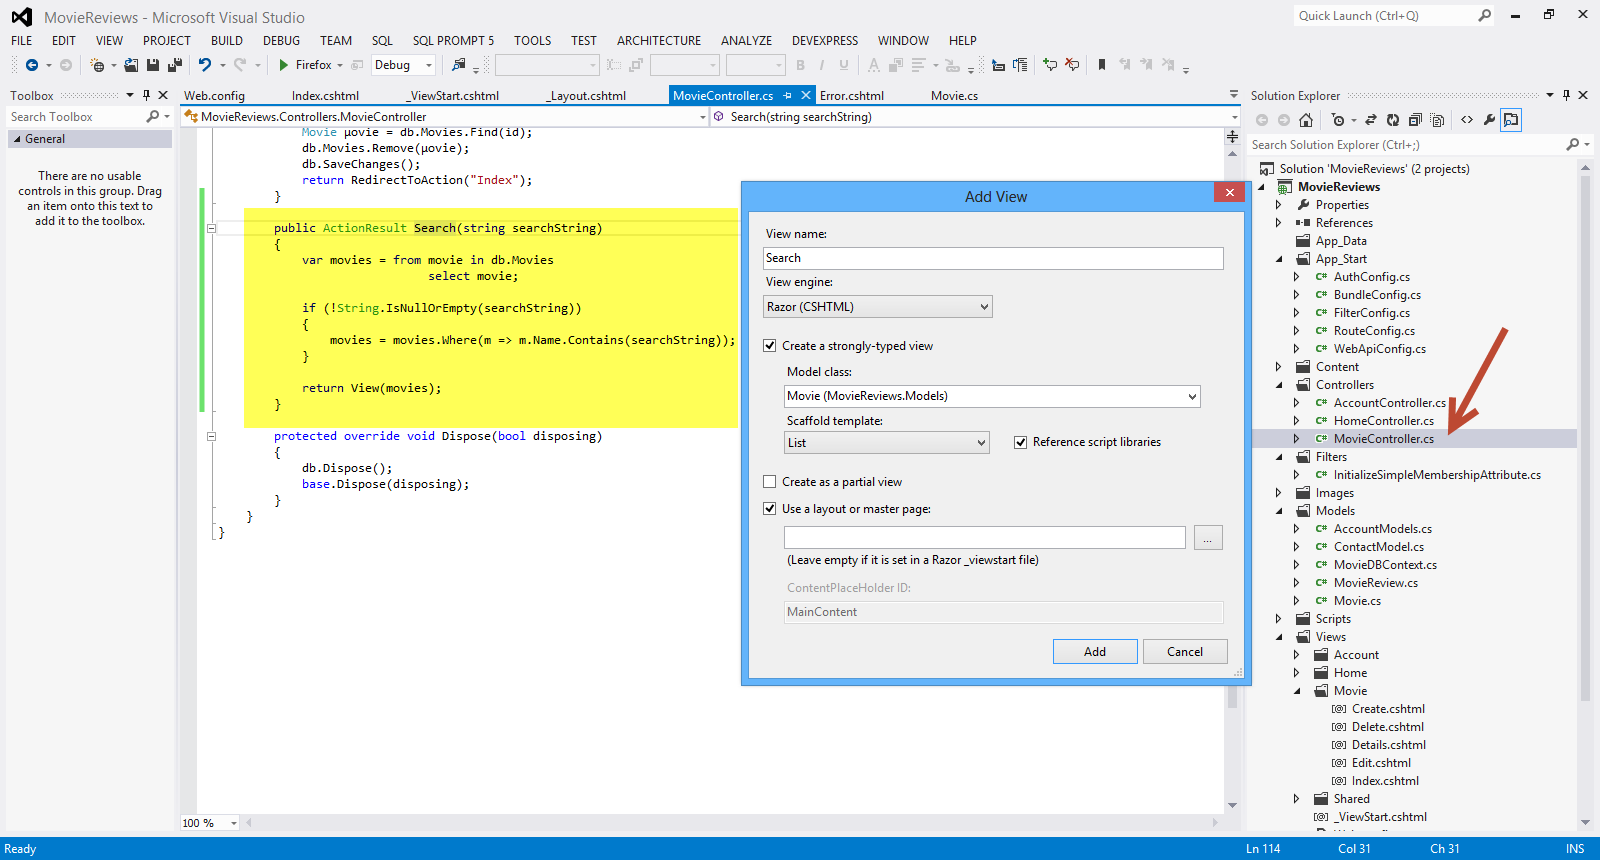
Click Add.Have a look at the Search.cshtml file that was created inside theViews/Movie folder.Have a look at the generated code.You will see HTML helper objects and methods.Run your application and navigate to /Movie/Search. Append a query string such as ?searchString=godfather to the URL. The filtered entries(y) are displayed.
Have a look at the picture below

6) Now we need some sort of user interface,so that the user can enter the search string.I am going to make some changes to the Views\Movie\Search.cshtml view.
Open the file and under the
<p>
@Html.ActionLink("Create New", "Create")
add the following lines
@using (Html.BeginForm()){
<p> Title: @Html.TextBox("SearchString") <br />
<input type="submit" value="Search" /></p>
}
</p>
We have the Html.BeginForm helper method that creates an opening <form> tag. The helper method causes the form to post to itself when the user submits the form by clicking the Search button. Have a look at the picture below
Have a look at the picture below

Up to this point, we have an application that one can add movies (name,director and the year released) edit and delete movies, search for movies by entering the name of the movie. Well me must move on and build the Reviews functionality, the ability for someone to write and edit a review for a particular movie.
7) When I click on the Details link on the http://localhost:59871/Movie , I get the following screen.
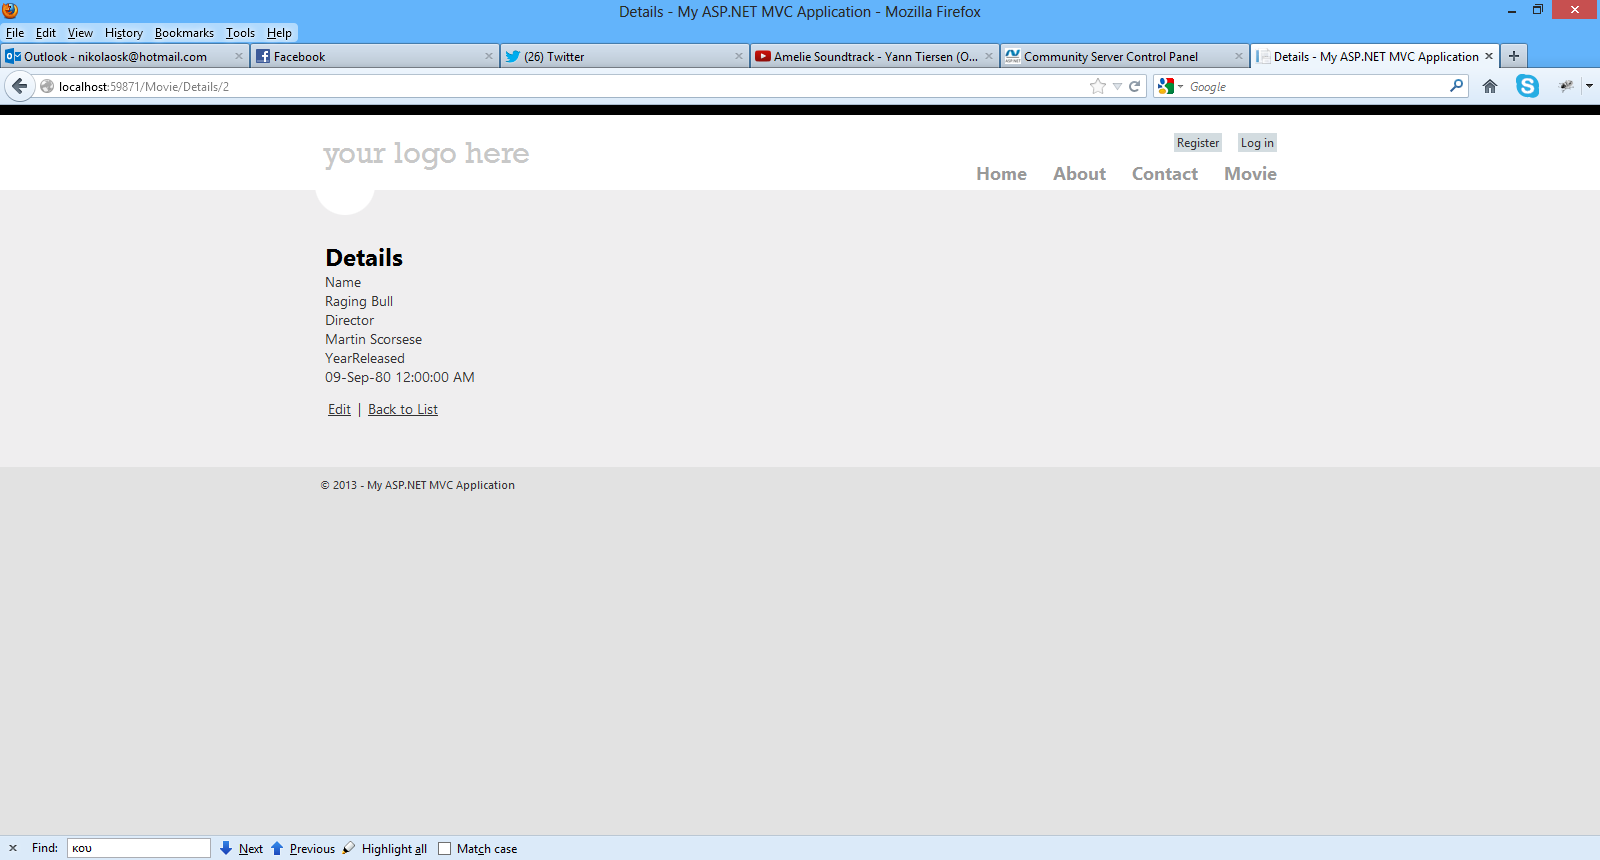
This is not very useful so I will delete the Details View in the Movie folder.
I will also comment out the Details method in the MovieController.cs
// GET: /Movie/Details/5
//public ActionResult Details(int id = 0)
//{
// Μovie movie = db.Movies.Find(id);
// if (movie == null)
// {
// return HttpNotFound();
// }
// return View(movie);
//}
I will also change the Index.cshtml in the Movie folder. I will replace the Details with the Reviews in the HTML.ActionLink
<td>
@Html.ActionLink("Edit", "Edit", new { id=item.Id }) |
@Html.ActionLink("Reviews", "Index", "Reviews", new { id=item.Id },null) |
@Html.ActionLink("Delete", "Delete", new { id=item.Id })
</td>
8) Now we need to implement the ReviewsController controller so we can begin creating,editing,deleting reviews and associating them with movies.
Right-click the Controllers folder and create a new ReviewsController controller. Have a look at the picture below to set the appropriate settings

Click Add. Visual Studio will create the following
A ReviewsController.cs file in the project's Controllers folder.
A Reviews folder in the project's Views folder.
Create.cshtml, Delete.cshtml, Details.cshtml, Edit.cshtml, and Index.cshtml in the new Views\Reviews folder.
9) Now we must change some of the code that was generated by the scaffolding.I will open the ReviewsController.cs and change the Index() method.
public class ReviewsController : Controller
{
private MovieDBContext db = new MovieDBContext();
//
// GET: /Reviews/
public ActionResult Index([Bind(Prefix="id")] int movieid)
{
var movie = db.Movies.Find(movieid);
if (movie != null)
{
return View(movie);
}
return HttpNotFound();
}
As you can see this Action method must receive a parameter. This parameter represents a movie so we pass a movieid to this method. By using this [Bind(Prefix="id")] I just alias id with movieid.
10) Now we need to make some changes in the Index.cshtml in the Views/Reviews folder since we pass a movieid and not a reviewid
We must delete most of the code. The contents of the Index.cshtml should be
@model MovieReviews.Models.Μovie
@{
ViewBag.Title = "Index";
}
<h2>Reviews for @Model.Name</h2>
<p>
@Html.ActionLink("Create New", "Create")
</p>
That should be all.Now I am going to create a partial view(_Reviews)
Have a look at the picture below
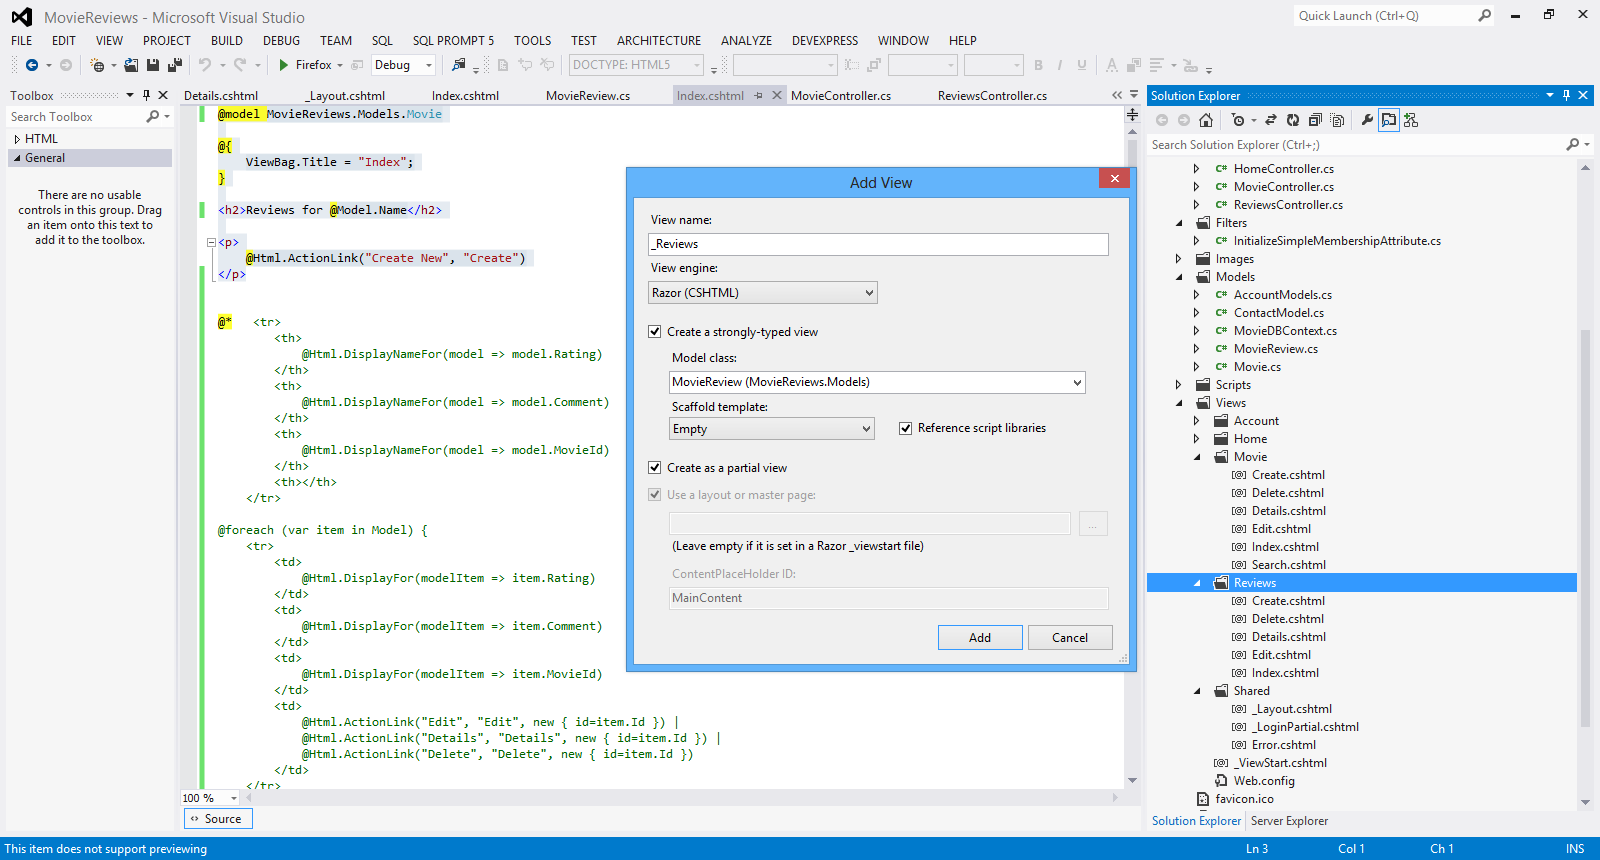
Click Add.
11) Now we must change the code in the partial view , _Reviews.
Have a look at the picture below to see the complete implementation
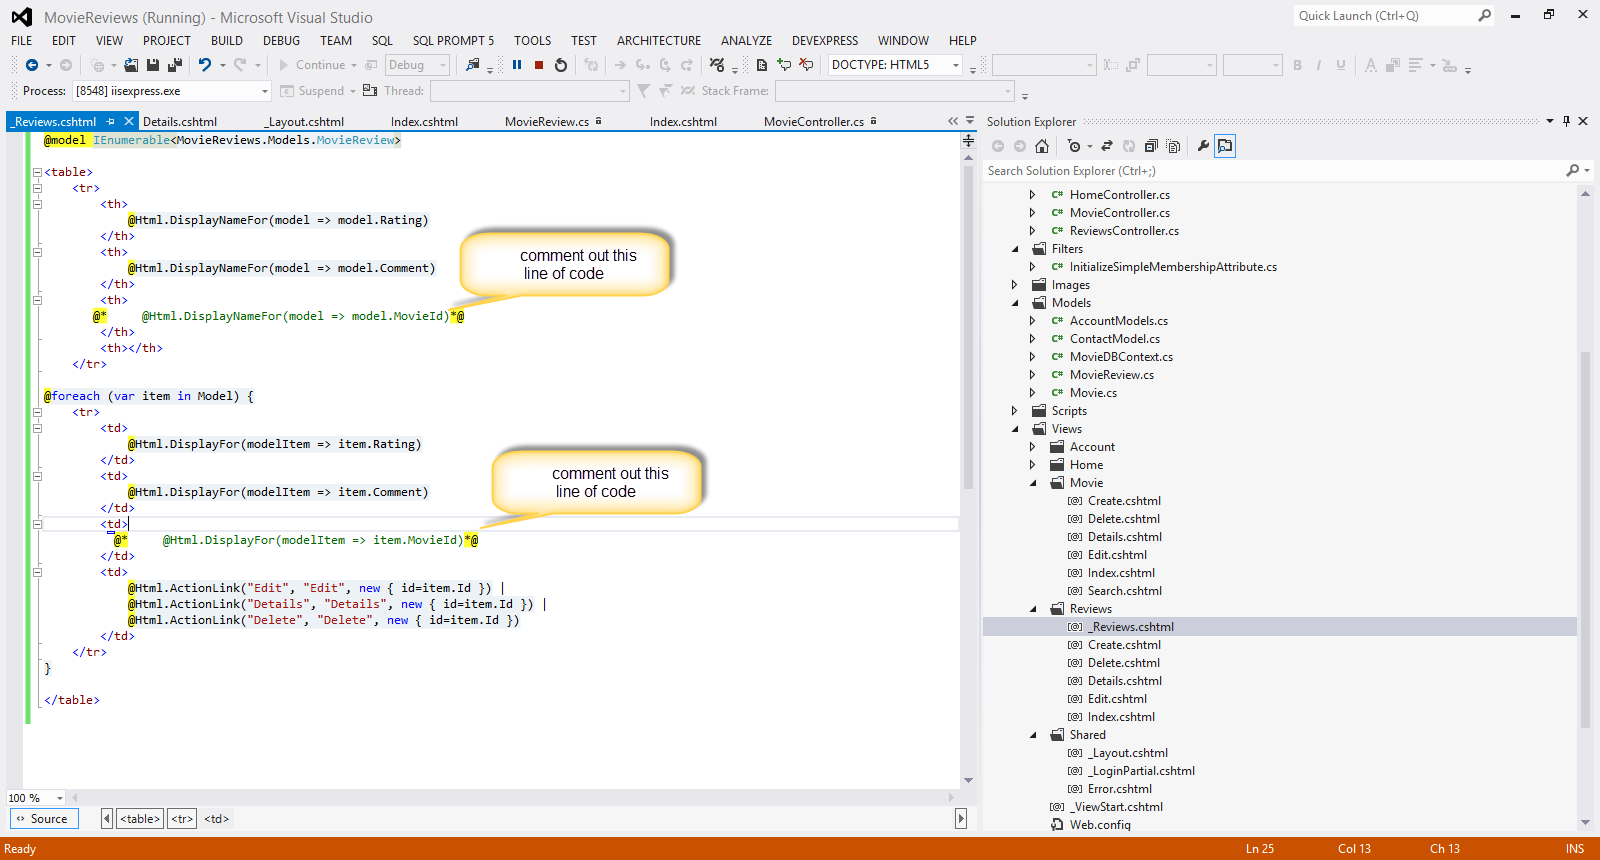
The code inside the <table> </table> tags, is the code I commented out in the Index.cshtml in the Reviews folder.
Now I must call this partial view from the Index.cshtml in the Reviews folder.
I add the code in bold
<h2>Reviews for @Model.Name</h2>
@Html.Partial("_Reviews",@Model.Reviews);
12) Now we need a way to associate the review to a movie when clicking on the link "Create New" for the review
<p>
@Html.ActionLink("Create New", "Create",new { movieid=Model.Id})
</p>
Now we build and run the application again.When I click on the Movie link (http://localhost:59871/Movie) in the menu , I see the Reviews link for both my movies.I choose to click on the Reviews link for the first movie (The GodFather) and when I click on it, I see the following screen, where I can enter my review (after hitting Create New).

Finally I hit the Create button and my review for that movie has been entered.
Have a look at the picture below
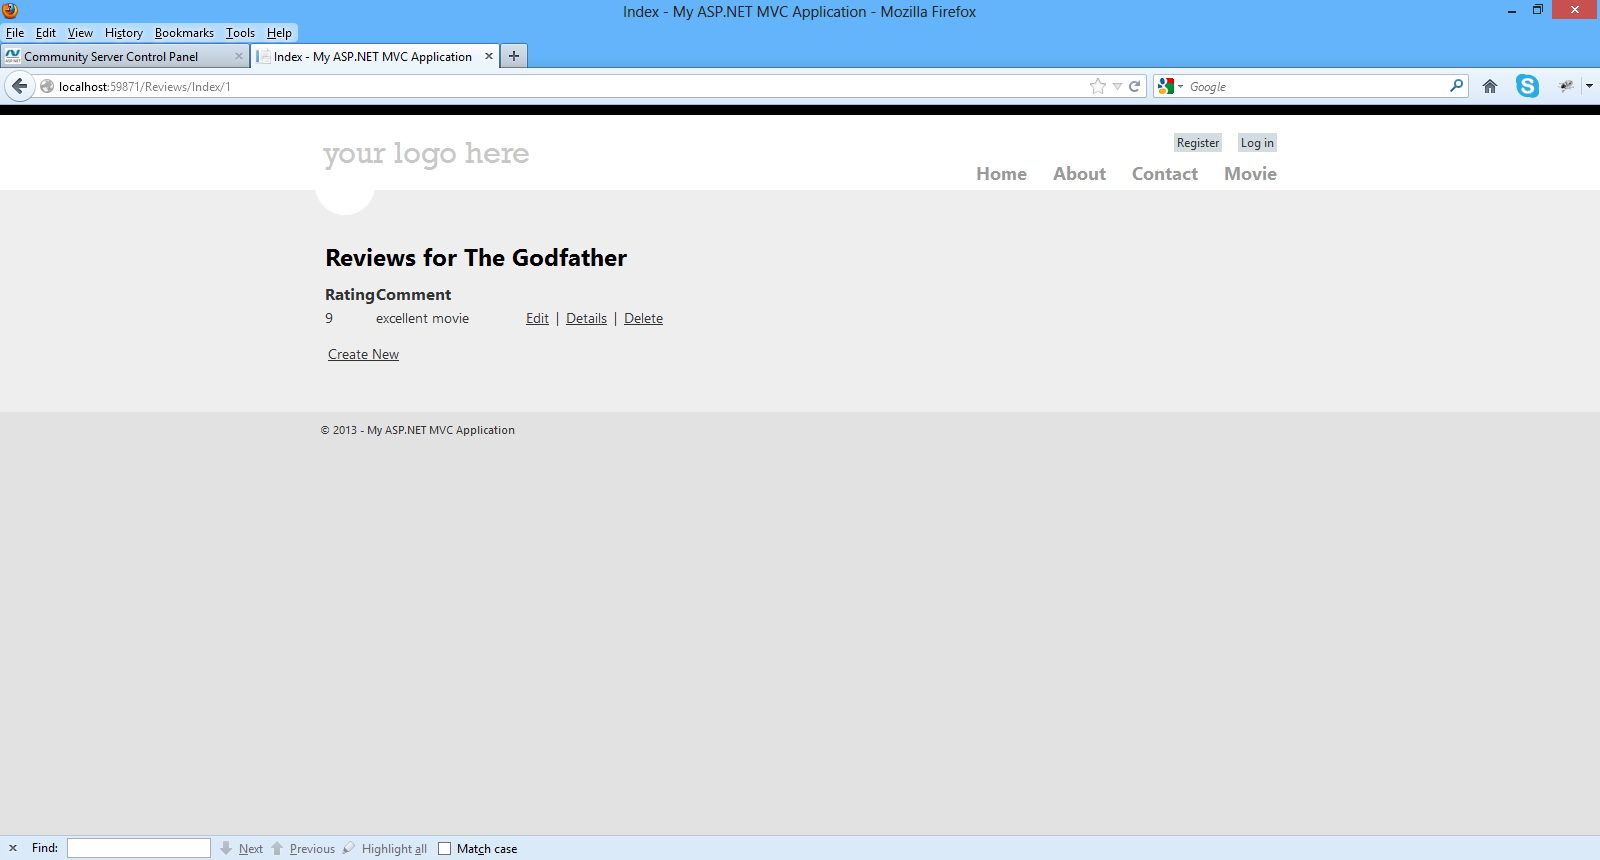
This is the code for the Create (HTTPGet) action inside the ReviewsController.cs
// GET: /Reviews/Create
[HttpGet]
public ActionResult Create(int movieid)
{
return View();
}
We pass it the movieid for that movie as a parameter.
This is the code for the Create (HttpPost) action inside the ReviewsController.cs
//POST: /Reviews/Create
[HttpPost]
public ActionResult Create(MovieReview moviereview)
{
if (ModelState.IsValid)
{
db.Reviews.Add(moviereview);
db.SaveChanges();
return RedirectToAction("Index", new { id = moviereview.MovieId});
}
return View(moviereview);
}
This method will post back the form to the same url it came from.
13) Now let's see how to change slightly the code generated for the Edit method in the ReviewsController.cs
public ActionResult Edit(int id)
{
MovieReview moviereview = db.Reviews.Find(id);
if (moviereview == null)
{
return HttpNotFound();
}
return View(moviereview);
}
//
// POST: /Reviews/Edit/5
[HttpPost]
public ActionResult Edit(MovieReview moviereview)
{
if (ModelState.IsValid)
{
db.Entry(moviereview).State = EntityState.Modified;
db.SaveChanges();
return RedirectToAction("Index", new { id = moviereview.MovieId });
}
return View(moviereview);
}
This method will post back the form to the same url it came from.
Now we build and run the application again.When I click on the Movie link (http://localhost:59871/Movie) in the menu , I see the Reviews link for both my movies.I choose to click on the Reviews link for the first movie (The GodFather) and when I click on it, I can see the reviews and hit the Edit link.
Have a look at the picture below
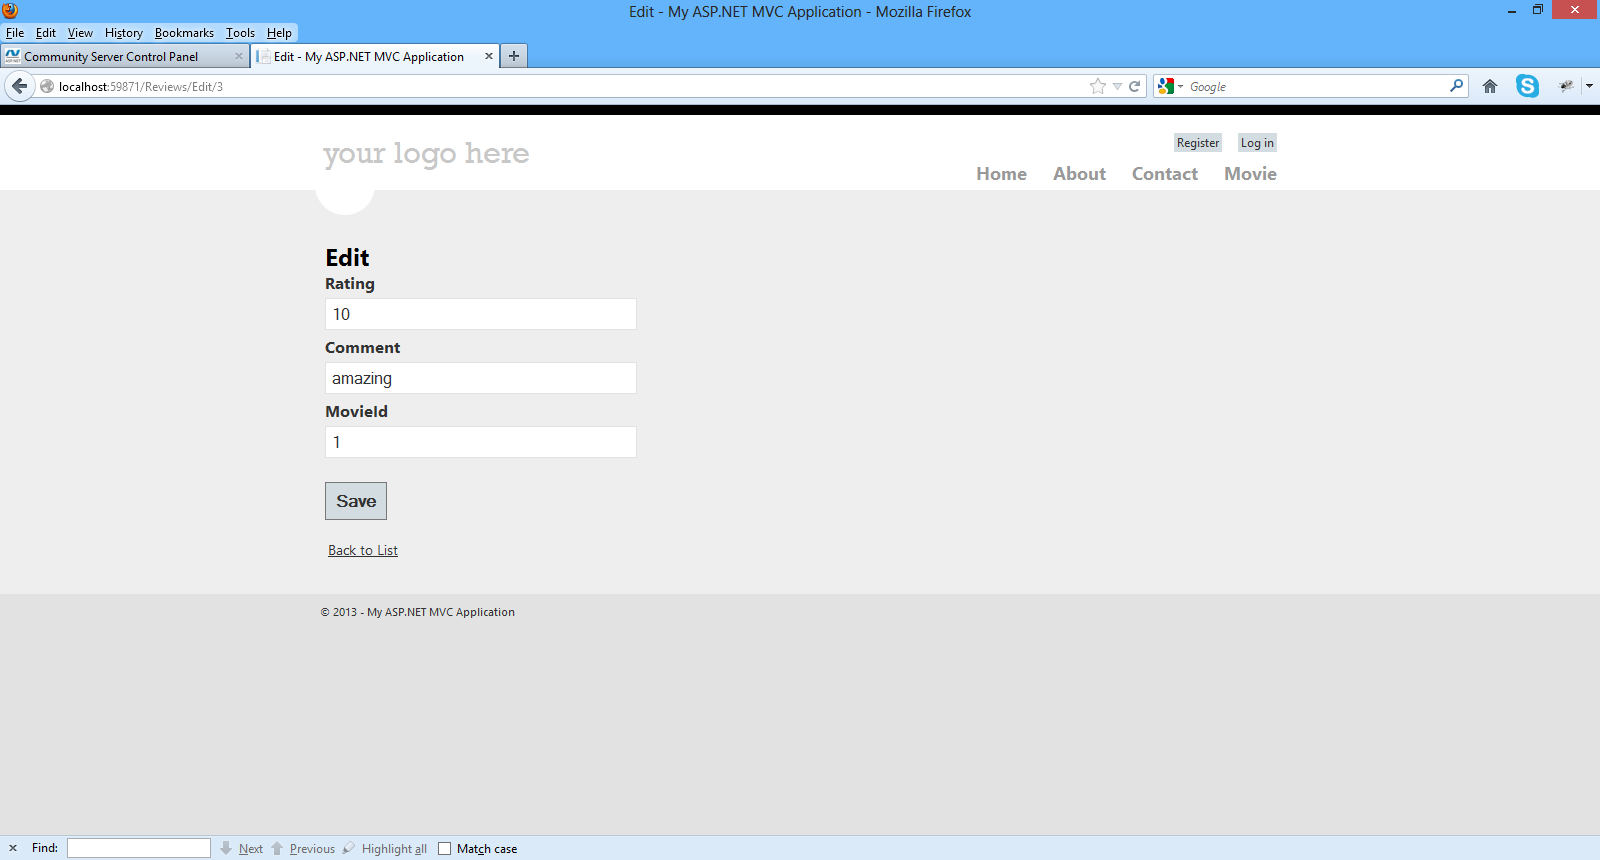
Finally I hit the Save button and my review for that movie has been edited.
14) Now let's see how to change slightly the code generated for the Delete method in the ReviewsController.cs
// GET: /Reviews/Delete/5
public ActionResult Delete(int id)
{
MovieReview moviereview = db.Reviews.Find(id);
if (moviereview == null)
{
return HttpNotFound();
}
return View(moviereview);
}
//
// POST: /Reviews/Delete/5
[HttpPost, ActionName("Delete")]
public ActionResult DeleteConfirmed(int id)
{
MovieReview moviereview = db.Reviews.Find(id);
db.Reviews.Remove(moviereview);
db.SaveChanges();
return RedirectToAction("Index", new { id = moviereview.MovieId });
}
This method will post back the form to the same url it came from.
Now we build and run the application again.When I click on the Movie link (http://localhost:59871/Movie) in the menu , I see the Reviews link for both my movies.I choose to click on the Reviews link for the first movie (The GodFather) and when I click on it, I can see the reviews and hit the Delete link.
Have a look at the picture below

Finally I hit the Delete button and my review for that movie has been deleted.
Do not underestimate what we have accomplished so far. We have managed to develop an ASP.Net MVC 4.0 application where one can create,edit,delete,view and search for movies.
He can also create,edit,delete,view reviews for a particular movie.
In the next post I will talk about validation through data annotations and database migrations within the context of the Entity Framework Code First Paradigm.
Hope it helps!!!!

I have decided to write a series of posts on how to write a small ASP.Net MVC 4.0 application.I will develop this application step by step and I will explain everything that you need to know in order to develop ASP.Net MVC 4.0 applications. This is the fourth post in this series. You can find the first one here , the second one here and the third one here. Make sure you read and understand those posts.
I am building an ASP.Net MVC application where users can enter movies and rate them. As we develop our application I will change the requirements and add more features. My goal is to have a working application and at the same time show you the building blocks of ASP.Net MVC. In the last post we have created the entities needed in order to store and retrieve data (models,views and the database).
Now I would like to talk about Code Blocks and Code Expressions in Razor Views.
1) Launch Visual Studio and open the ASP.Net MVC application
2) Open the Index.cshtml from the Views/Movie folder.These are the contents of the view
@model IEnumerable<MovieReviews.Models.Μovie>
@{
ViewBag.Title = "Index";
}
<h2>Index</h2>
<p>
@Html.ActionLink("Create New", "Create")
</p>
<table>
<tr>
<th>
@Html.DisplayNameFor(model => model.Name)
</th>
<th>
@Html.DisplayNameFor(model => model.Director)
</th>
<th>
@Html.DisplayNameFor(model => model.YearReleased)
</th>
<th></th>
</tr>
@foreach (var item in Model) {
<tr>
<td>
@Html.DisplayFor(modelItem => item.Name)
</td>
<td>
@Html.DisplayFor(modelItem => item.Director)
</td>
<td>
@Html.DisplayFor(modelItem => item.YearReleased)
</td>
<td>
@Html.ActionLink("Edit", "Edit", new { id=item.Id }) |
@Html.ActionLink("Details", "Details", new { id=item.Id }) |
@Html.ActionLink("Delete", "Delete", new { id=item.Id })
</td>
</tr>
}
</table>
The responsibility of this view is to take the model passed by the controller and present the data to the users through the template. The View is nothing more than a template where the data passed from the model is presented.We combine literal text (e.g <h2></h2>) with pieces of data from the model through C# code (@).
Code Expressions
An example of code expressions from the view above
<td>
@Html.DisplayFor(modelItem => item.Name)
</td>
The code in bold is a code expression.The code expression will be evaluated by the Razor engine and the output (which will be displayed in a column of an html table) will be presented to the client.
Code blocks
An example of code block from the view above
@
{
ViewBag.Title = "Index";
}
Between the curly braces we can add as much C# code as we want.Let me modify a little bit the View above
@{
ViewBag.Title = "Index";
var reviewscount = Model.Count();
}
<h2>Index</h2>
<h3> the number of the reviews so far is : @reviewscount </h3>
The code I changed is in bold.Run your application again http://localhost:59871/movie (http://localhost:yourport/movie) in your case.
I added a new variable inside the code block and then used the variable (reviewscount) in a place I wanted inside the view as a code expression. Hope all makes sense so far.
3) Now I would like to point out at this point are HTML Helpers that are part of any View in the ASP.Net MVC applications.Their purpose is to create small blocks of HTML.There are helpers like to create links,inputs,labels,forms,validation messages and much more.
Think of them like traditional ASP.NET Web Form controls.
We use HTML helpers are used to modify HTML. HTML helpers
do not have an event model and a view state.
In most cases, an HTML helper is just a method that returns a string.
Let's have a look at the
@Html.ActionLink("Edit", "Edit", new { id=item.Id }) |
This is the easiest way to render an HTML link
The Html.ActionLink() does not link to a view. It creates a link to
a controller action.
You also can see more HTML Helpers in the View
- Html.DisplayNameFor() - which Gets the display name for the model
- Html.DisplayFor() will render the DisplayTemplate that matches the property's type
There are more HTML helpers can be used to render (modify and output) HTML
form elements:
- BeginForm()
- EndForm()
- TextArea()
- TextBox()
- ValidationMessageFor()
We will see more of those as we move on.
3) When you run your application and navigate to the http://localhost:59871/movie you see HTML elements that are not in the current view (Index view).
I mean the navigation system (menu) the header,logo and the footer.Where does this markup come from? It comes form the Layout View.Υοu can think of this as the master pages in web forms applications.
Have a look at the picture below to see what I mean

Have a look in the Shared folder in the Solution Explorer. You will see the_Layout.cshtml.
<!DOCTYPE html>
<html lang="en">
<head>
<meta charset="utf-8" />
<title>@ViewBag.Title - My ASP.NET MVC Application</title>
<link href="~/favicon.ico" rel="shortcut icon" type="image/x-icon" />
<meta name="viewport" content="width=device-width" />
@Styles.Render("~/Content/css")
@Scripts.Render("~/bundles/modernizr")
</head>
<body>
<header>
<div class="content-wrapper">
<div class="float-left">
<p class="site-title">@Html.ActionLink("your logo here", "Index", "Home")</p>
</div>
<div class="float-right">
<section id="login">
@Html.Partial("_LoginPartial")
</section>
<nav>
<ul id="menu">
<li>@Html.ActionLink("Home", "Index", "Home")</li>
<li>@Html.ActionLink("About", "About", "Home")</li>
<li>@Html.ActionLink("Contact", "Contact", "Home")</li>
</ul>
</nav>
</div>
</div>
</header>
<div id="body">
@RenderSection("featured", required: false)
<section class="content-wrapper main-content clear-fix">
@RenderBody()
</section>
</div>
<footer>
<div class="content-wrapper">
<div class="float-left">
<p>© @DateTime.Now.Year - My ASP.NET MVC Application</p>
</div>
</div>
</footer>
@Scripts.Render("~/bundles/jquery")
@RenderSection("scripts", required: false)
</body>
</html>
We have the head section that will be present in all pages
<head>
<meta charset="utf-8" />
<title>@ViewBag.Title - My ASP.NET MVC Application</title>
<link href="~/favicon.ico" rel="shortcut icon" type="image/x-icon" />
<meta name="viewport" content="width=device-width" />
@Styles.Render("~/Content/css")
@Scripts.Render("~/bundles/modernizr")
</head>
Then you have the header section that will appear in all pages
<header>
<div class="content-wrapper">
<div class="float-left">
<p class="site-title">@Html.ActionLink("your logo here", "Index", "Home")</p>
</div>
<div class="float-right">
<section id="login">
@Html.Partial("_LoginPartial")
</section>
<nav>
<ul id="menu">
<li>@Html.ActionLink("Home", "Index", "Home")</li>
<li>@Html.ActionLink("About", "About", "Home")</li>
<li>@Html.ActionLink("Contact", "Contact", "Home")</li>
</ul>
</nav>
</div>
</div>
</header>
Then you have the header section that will appear in all pages
<footer>
<div class="content-wrapper">
<div class="float-left">
<p>© @DateTime.Now.Year - My ASP.NET MVC Application</p>
</div>
</div>
</footer>
At one point we see a call to the RenderBody()
<div id="body">
@RenderSection("featured", required: false)
<section class="content-wrapper main-content clear-fix">
@RenderBody()
</section>
When the Layout View calls RenderBody(), that is when the content View (index.cshtml) will be inserted and rendered at this exact point in the HTML markup.
How does ASP.Net MVC to call the Layout View before our content View? It is because of this file _ViewStart.cshtml
The contents of the _ViewStart.cshtml follow
@{
Layout = "~/Views/Shared/_Layout.cshtml";
}
ASP.Net MVC runtime knows to render first the Layout View (because the _ViewStart.cshtml runs first before any other view ) and then the Content View.
4) Another important topic in ASP.Net MVC applications are Partial Views.At some point in the _Layout.cshtml view there is a call to the _LoginPartial partial view.
<section id="login">
@Html.Partial("_LoginPartial")
</section>
A partial view is a view that we place code (HTML & C#) that we will often reuse in other views..
Have a look at the contents of the _LoginPartial.cshtml
@if (Request.IsAuthenticated) {
<text>
Hello, @Html.ActionLink(User.Identity.Name, "Manage", "Account", routeValues: null, htmlAttributes: new { @class = "username", title = "Manage" })!
@using (Html.BeginForm("LogOff", "Account", FormMethod.Post, new { id = "logoutForm" })) {
@Html.AntiForgeryToken()
<a href="BLOCKED SCRIPTdocument.getElementById('logoutForm').submit()">Log off</a>
}
</text>
} else {
<ul>
<li>@Html.ActionLink("Register", "Register", "Account", routeValues: null, htmlAttributes: new { id = "registerLink" })</li>
<li>@Html.ActionLink("Log in", "Login", "Account", routeValues: null, htmlAttributes: new { id = "loginLink" })</li>
</ul>
}
So this is a type of special View that we must know and use so we make our application easier to maintain.
5) Now it is time to have a look at some important topics that are related with Controllers.Open the MovieController.cs file.
I would like to talk a bit about ActionResults and what thet are
The ActionResult is an abstract base class for other types of actions.
Other classes inheriting from the ActionResult :
- ContentResult
- EmptyResult
- FileResult
- HttpStatusCodeResult
- JavaScriptResult
- RedirectResult
- RedirectToRouteResult
- ViewResult
The ViewResult renders a specifed view to the client.
The
RedirectResult performs an HTTP redirection to a specified URL
The ContentResult writes content to the client without requiring a view.
In this method Index() the result of this method is ActionResult , which means we will call the Index.cshtml (passing the model to it) in the Views/Movie folder.
So the results of this view will be displayed to the client.
private MovieDBContext db = new MovieDBContext();
//
// GET: /Movie/
public ActionResult Index()
{
return View(db.Movies.ToList());
}
Another very important topic is Action Selectors.Some of them are ActionName, AcceptVerbs.
An ActionSelector dictates which action method is triggered.They come with the form of attributes.
Have a look at the MovieController.cs file and the Delete method
[HttpPost, ActionName("Delete")]
public ActionResult DeleteConfirmed(int id)
{
Μovie μovie = db.Movies.Find(id);
db.Movies.Remove(μovie);
db.SaveChanges();
return RedirectToAction("Index");
}
ActionName will specify the name of this method. It can be reached by Delete and not DeleteConfirmed
AcceptVerbs (HttpPost,HttpGet) represent attributes that specify which HTTP verbs (Get , Post) an action method will respond to.
In the example above we have an HTTP Post - [HttpPost, ActionName("Delete")]
The final topic I would like to talk about is Action Filters. They are applied to methods and classes in the form of attributes.An ActionFilter provides some methods that are run before and after request and response processing.
Some of them are
- OutputCache, which caches the output of the controller
- Authorize, that restricts an action to authorized users or roles
If I open the MovieController.cs file and then apply the [Authorize] (see below) to the Index() method
private MovieDBContext db = new MovieDBContext();
//
// GET: /Movie/
[Authorize]
public ActionResult Index()
{
return View(db.Movies.ToList());
}
and then navigate to the http://localhost:59871/movie, this is what I will get the following as a result (redirect to the login page)
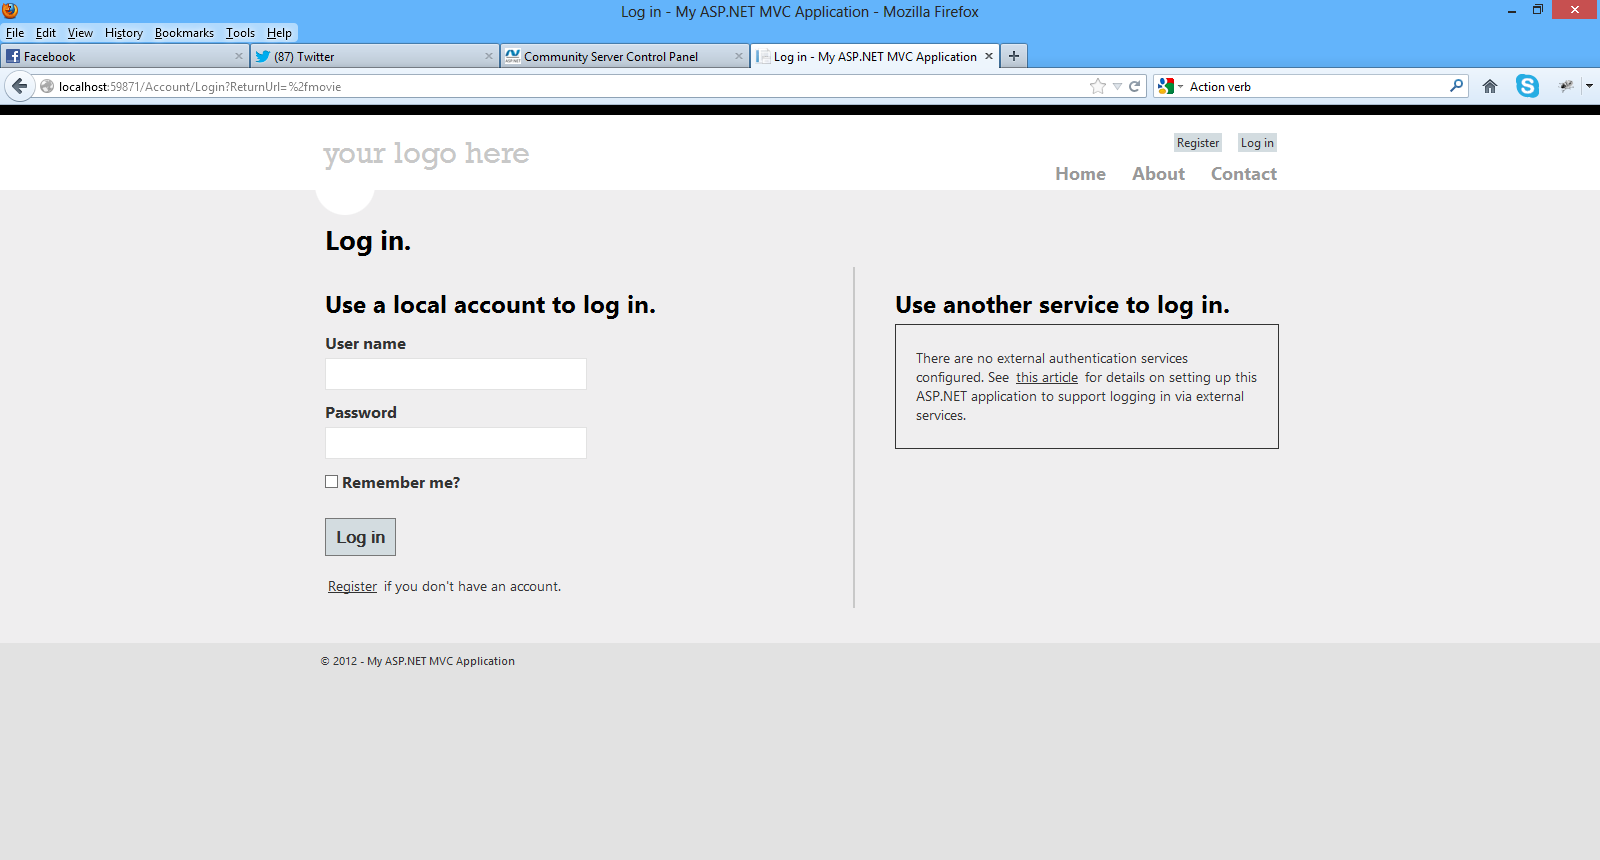
The ASP.Net MVC runtime will pick up the [Authorize] attribute and redirect me to the Login page.
Hope you have followed along and mastered the topics presented here as they are absolutely necessary for building ASP.Net MVC applications.
In the next post we will continue building our application.
Hope it helps!!!

I have decided to write a series of posts on how to write a small ASP.Net MVC 4.0 application.I will develop this application step by step and I will explain everything that you need to know in order to develop ASP.Net MVC 4.0 applications. This is the third post in this series. You can find the first one here and the second one here. Make sure you read and understand the first post and the second post.
As I design and develop the application I will explain some of the most common building blocks of ASP.Net MVC like Code blocks,Code expressions,Action Results,Action Selectors,Action Filters, Layout Views and Partial Views.
Now we have to think about the data access technology that we will use in our sample application. I am going to build an ASP.Net MVC application where users can search through a collection of movies and rate them.
I will not use traditional ADO.Net data access techniques. I will use Entity Framework (EF) which is part of the .Net framework.
Obviously I cannot go into much detail on what EF is and what it does. I
will give again a short introduction.The .Net framework provides support
for Object Relational Mapping through EF. So EF is a an ORM tool and
it is now the main data access technology that microsoft works on. I
use it quite extensively in my projects. Through EF we have many things
out of the box provided for us. We have the automatic generation of SQL
code.It maps relational data to strongly types objects.All the changes made to the objects in the memory are persisted in a transactional way back to the data store.
You can search in my blog, because I have posted many posts regarding ASP.Net and EF.
There are different approaches (paradigms) available using the Entity Framework, namely Database First, Code First, Model First.
You can find in this post an example on how to use the Entity Framework to retrieve data from an SQL Server Database using the "Database/Schema First" approach.
In this approach we make all the changes at the database level and then we update the model with those changes.
In this post you can see an example on how to use the "Model First" approach when working with ASP.Net and the Entity Framework.
This model was firstly introduced in EF version 4.0 and we could start with a blank model and then create a database from that model.When we made changes to the model , we could recreate the database from the new model.
The Code First approach is the more code-centric than the other two. Basically we write POCO classes and then we persist to a database using something called DBContext.
In this application we will us the Code First approach when building our data-centric application with EF.
Code First relies on DbContext. We create 2,3 classes (e.g Movie,Review) with properties and then these classes interact with the DbContext class.Then we can create a new database based upon our POCOS classes and have tables generated from those classes.We do not have an .edmx file in this approach.By using this approach we can write much easier unit tests.
DbContext is a new context class and is smaller,lightweight wrapper for the main context class which is ObjectContext (Schema First and Model First).
When building an application the most important thing is to understand the domain and the domain-business objects. These should be the objects that should drive the application and not e.g the database schema. So I like to design my entities very carefully and
1) Launch Visual Studio and open your application.
2) We will add the 2 entities I am going to show you below in the Models folder. Add a new class file named Movie.cs inside the Models folder.The Movie.cs entity is as follows
public class Μovie
{
public int Id { get; set; }
public string Name { get; set; }
public string Director { get; set; }
public DateTime YearReleased { get; set; }
public ICollection<MovieReview> Reviews { get; set; }
}
We have added some properties in this entity. Now we need to add the MovieReview entity. Add a new class file named MovieReview.cs inside the Models folder.The MovieReview.cs entity is as follows.
public class MovieReview
{
public int Id { get; set; }
public int Rating { get; set; }
public string Comment { get; set; }
public int MovieId { get; set; }
}
So we have our entities ready. We have one movie and many reviews. That should be clear by now.
I will instantiate these objects store them and retrieve them in my database. My database will be an SQL Server database where I will create from the entities!!!!
Then we need to create a context class that inherits from DbContext.Add a new class to the Models folder.Name it MovieDBContext.cs .Now that we have the entity classes created, we must let the model know.I will have to use the DbSet<T> property.The code for this class follows
public class MovieDBContext:DbContext
{
public DbSet<Μovie> Movies { get; set; }
public DbSet<MovieReview> Reviews { get; set; }
}
The MovieDBContext is a database context class.This class is responsible for talking to the underlying database,storing and updating the data to the database.
We need to add this reference to the file
using System.Data.Entity;
Now we need to create the connection string.The only place we can do that is by opening the web.config file and adding the following lines of code (inside the <connectionStrings> section)
<connectionStrings>
<add name="FootballerDBContext"
connectionString="Data Source=(LocalDb)\v11.0;AttachDbFilename=|DataDirectory|\MovieReviews.mdf;Integrated Security=True"
providerName="System.Data.SqlClient" />
</connectionStrings>
3) Now we need to access our model from a controller.This is going to be a simple class that retrieves the footballers data.
Right-click the Controllers folder and create a new MovieController controller. Have a look at the picture below to set the appropriate settings and then click Add
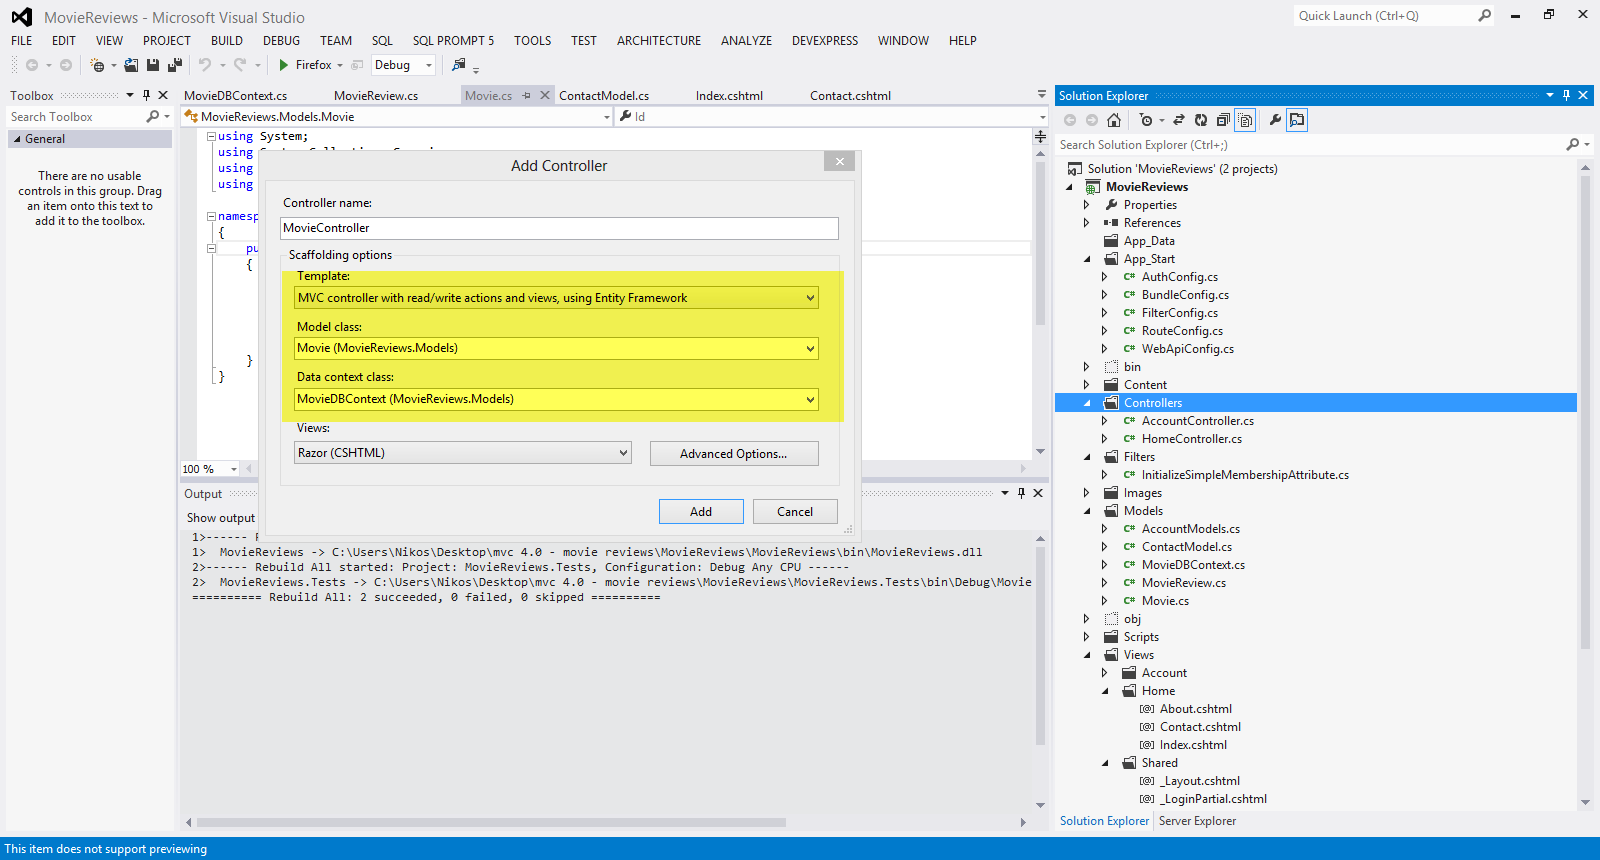
Visual Studio will create the following
A MovieController.cs file in the project's Controllers folder.
A Movie folder in the project's Views folder.
Create.cshtml, Delete.cshtml, Details.cshtml, Edit.cshtml, and Index.cshtml in the new Views\Footballer folder.
Have a look at the picture below
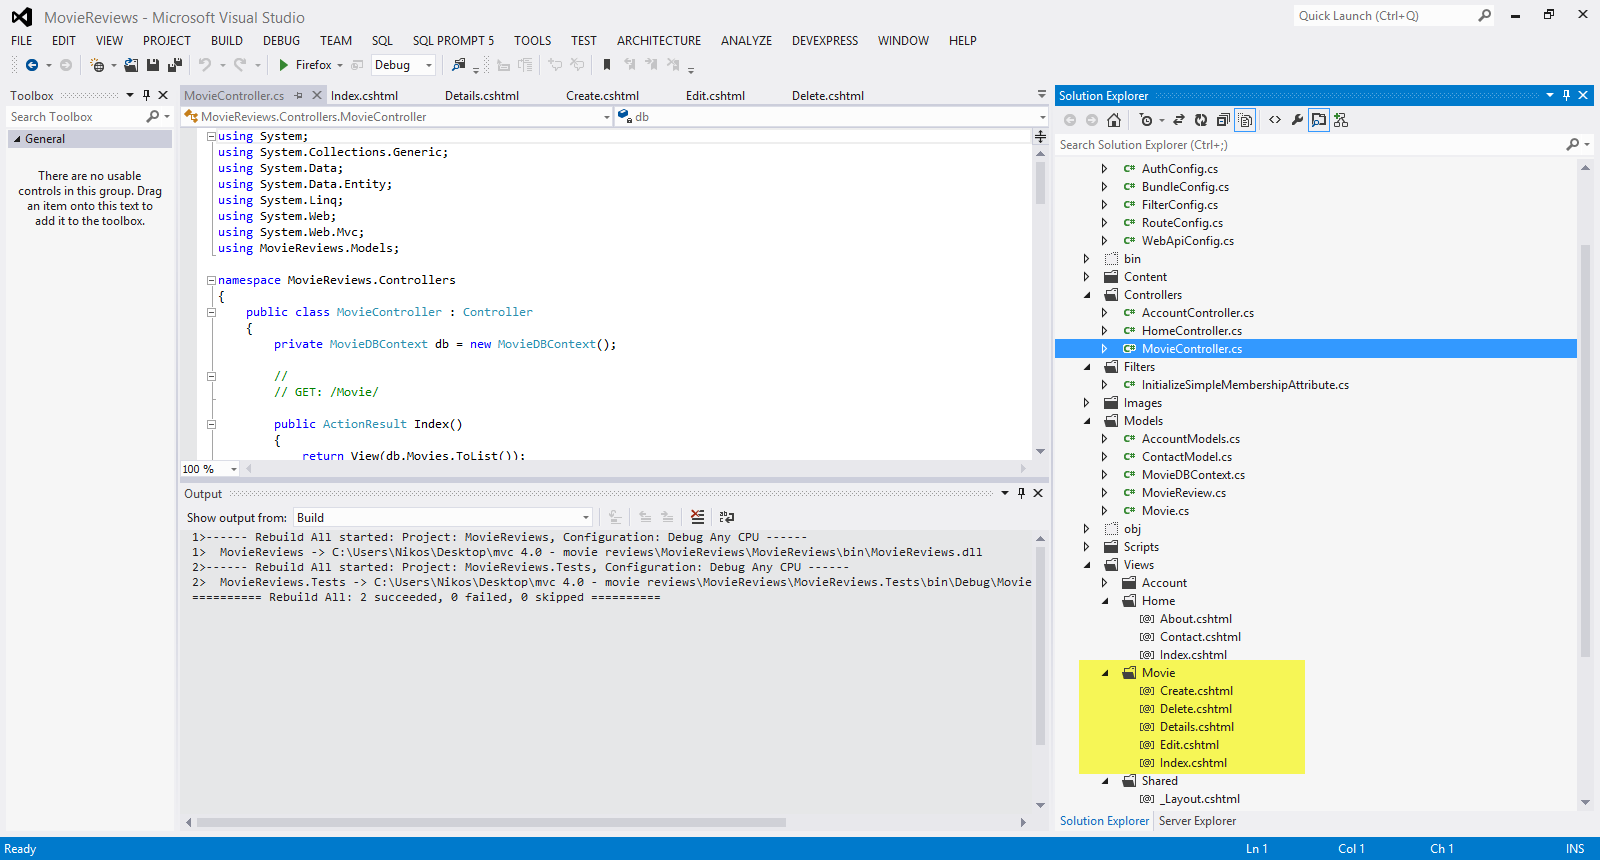
The
ASP.NET MVC 4 framework automatically creates the CRUD (create, read,
update, and delete) action methods and views.This is know as
scaffolding. We have a fully functional web application that lets you
create, list, edit, and delete records.
4) Build and run your application.Navigate to the localhost/youport/movie
Have a look at the picture below
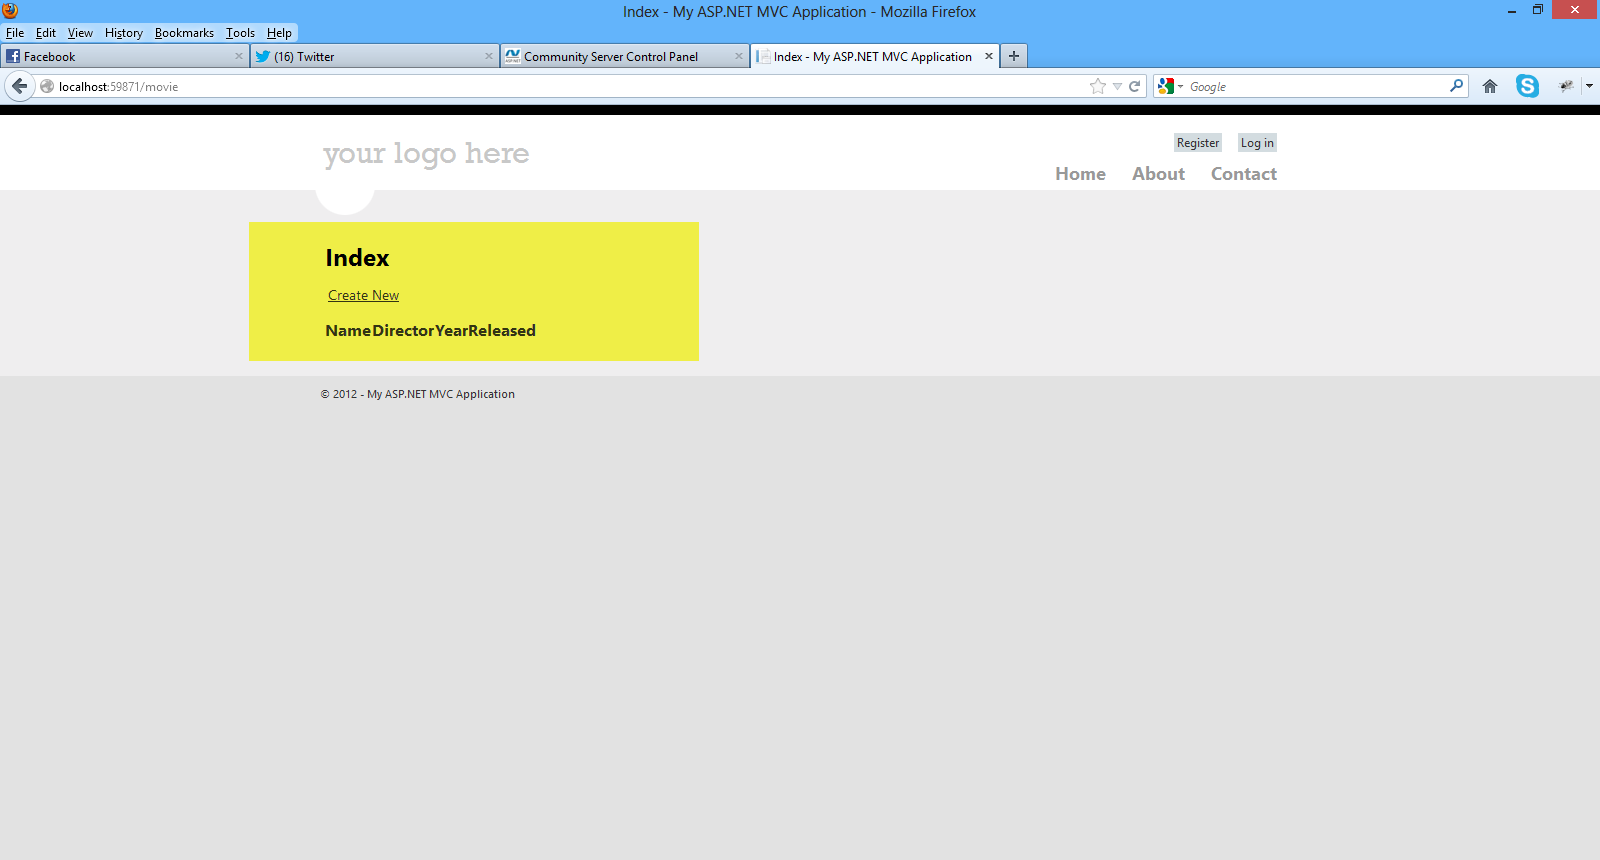
I will create two entries for two of my favorite movies
I click on the Create New link and insert the data.Finally I click Create.The data is saved in the database.
I know exactly what you are thinking right now. You did not create any database.
Entity Framework Code First created the database for us. EF detected that the database connection string provided, pointing to a database didn’t exist, so Code First created the database automatically.
Have a look at the picture below
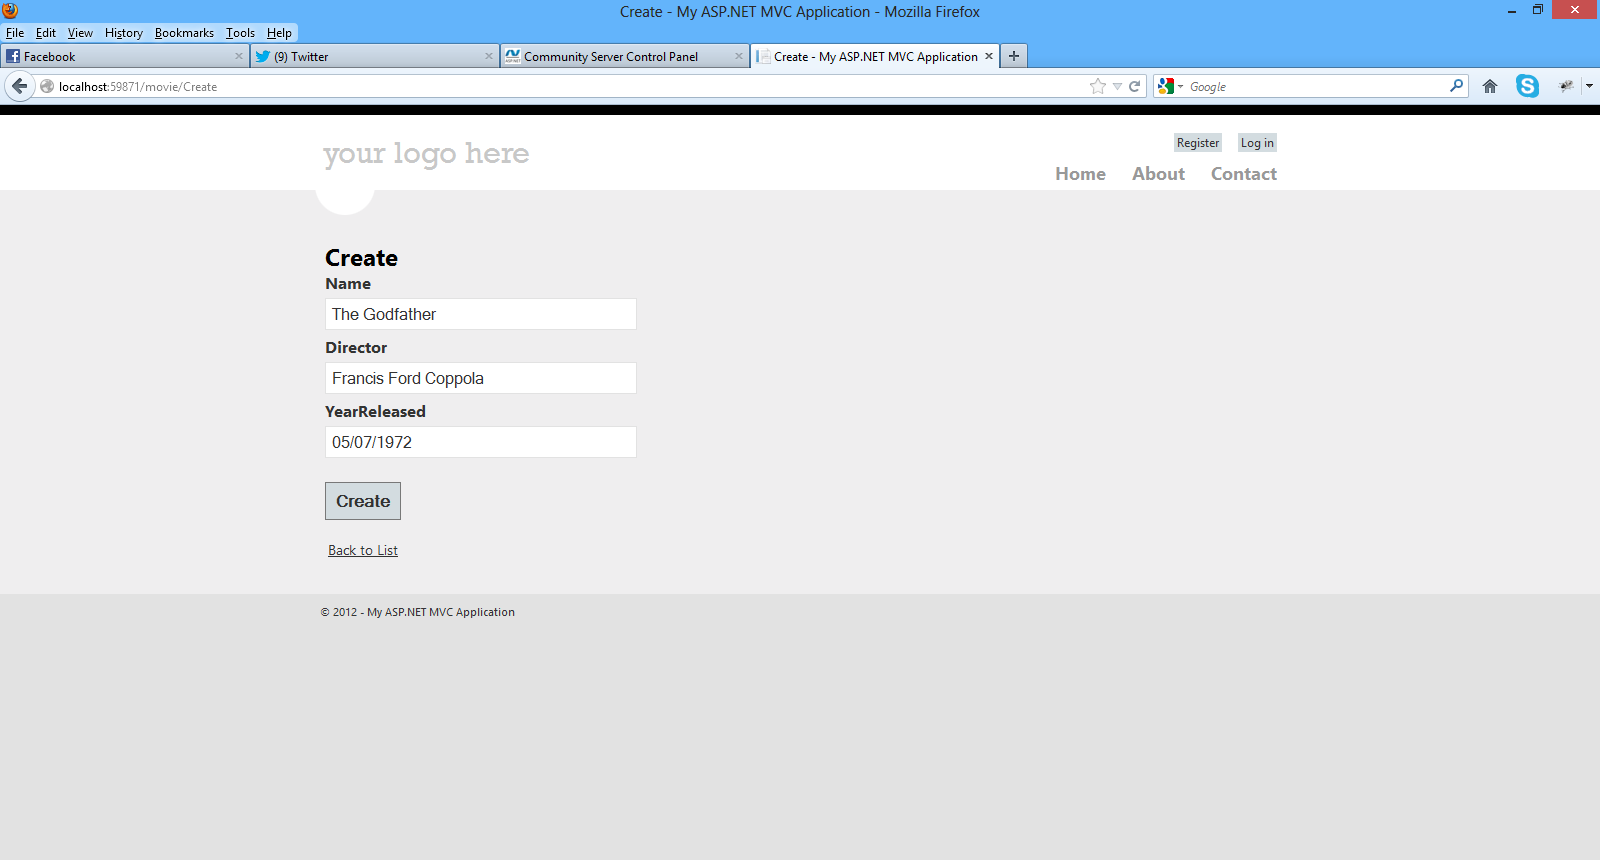
Make sure you add your entries to the database through the view.
We have created two new records and stored it in the database.Click the Edit,Details and Delete links.We have all this functionality out of the box through the magic of scaffolding.
I urge you to have a look (place breakpoints as well) in the MovieController.cs class file and notice the flow of the execution.
We pass a strongly typed object (Movie) to the various views.
Have a look again in the views inside the Views/Movie folder.
In the Create.cshtml, Delete.cshtml, Details.cshtml, Edit.cshtml, and Index.cshtml Views , at the beginning of these files, you will see this line of code.
@model MovieReviews.Models.Μovie
By adding a @model statement at the top of the view file, we tell the view the type of object that the view should render.
This is how we pass a model through a controller to the appropriate view.I am sure you can clearly see the separation of concerns.
5) Now we can see our database and the data that was saved. We go to View->Server Explorer or Database Explorer and connect to the instance of SQL Server
Have a a look at the picture below to see what I mean.Click OK
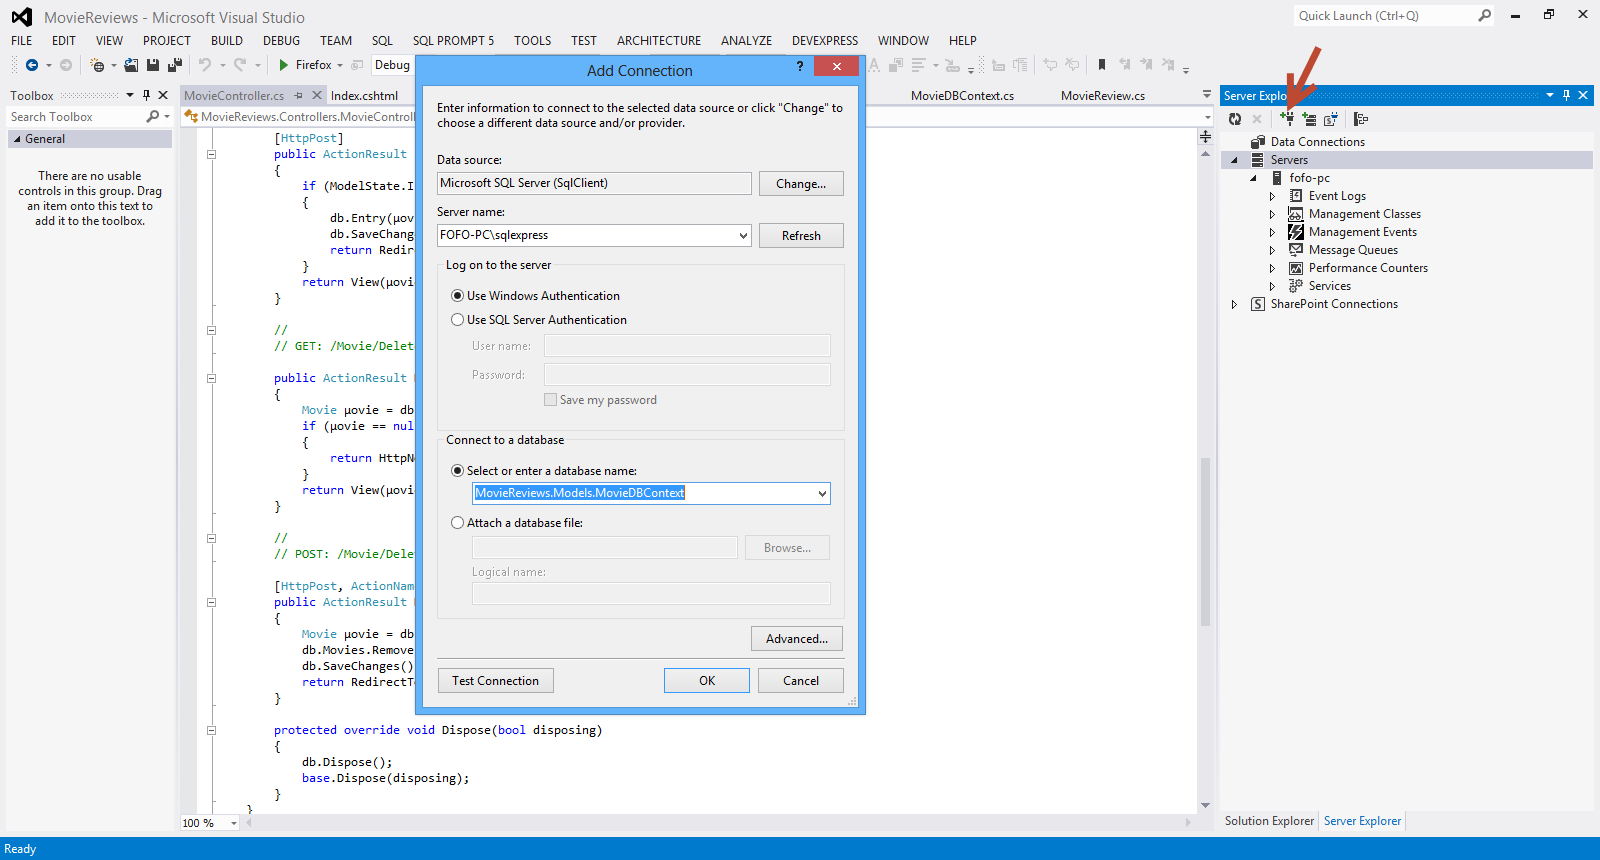
Have a look at the picture below to see the database and the tables

Now I can see the data that was inserted through my ASP.Net MVC application to the database.

I am sure you know have a feeling about the application we are about to build. I will explain more about ASP.Net MVC as we go on building the application
Hope it helps!!!

I have decided to write a series of posts on how to write a small ASP.Net MVC 4.0 application.I will develop this application step by step and I will explain everything that you need to know in order to develop ASP.Net MVC 4.0 applications. This is the second posts in this series. You can find the first one here. Make sure you read and understand the first post.
In this post I would like to look into the internals of ASP.Net MVC and what happens when an incoming HTTP request comes in from the browser. Bear in mind that the local web server is IIS Express .This is the web server that will handle the incoming request.IIS Express will take that request and deliver it to my application.Let's run our application again and click on the Contact link on the top right hand corner of the page. When I click that link the URL in my browser becomes http://localhost:59871/Home/Contact. As mentioned earlier the local web server will take this request and deliver it to my ASP.Net MVC application.Inside the ASP.Net MVC application there is a Routing Engine that takes requests and delivers them to the proper component. In this case the request will end up in the HomeController.cs class file. Remember that the Controller is the component in the MVC pattern that orchestrates everything.
A request for /Home/Something will always come to the HomeController.cs class.A request (in our case) http://localhost:59871/Home/Contact, will end up in the Contact method inside the HomeController.cs class file.
Have a look at the picture below

I am sure you can see the naming conventions applied here.This action method public ActionResult Contact() does not do anything else but to return a View.No Model is build on this occasion.So how can we reach the appropriate view to display? There are more naming conventions. Τhe ASP.Net MVC application will look in the Views Folder and then in the Home folder.The name Home matches the name of the Home controller and then it will pick the Contact.cshtml.Inside this view there is all the markup that is rendered by the browser.
Have a look at the picture below
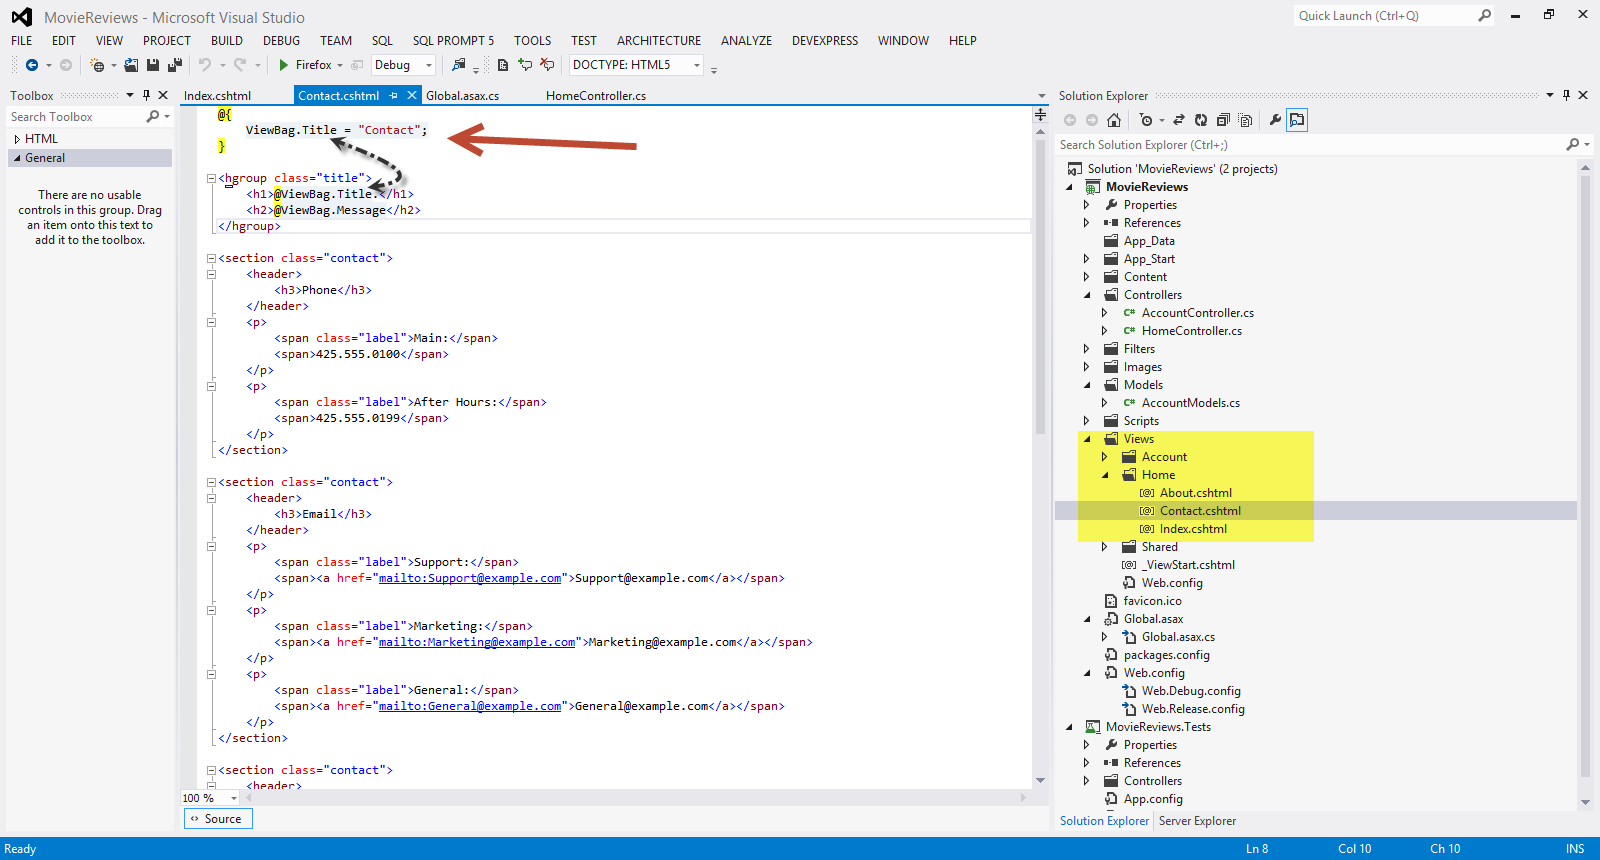
I would like to explain a bit more the ViewBag property.
The ViewBag allows data to be added to it which is then
available in the View.It is similar to how a session variable works, when
you assign a value to a ViewBag property, such as ViewBag.
Have a look at the HomeController.cs file and the Contact method. It passes the ViewBag.Message = "Your contact page."; to the Contact View.
Open the Contact.cshtml file in the Solution Explorer
<hgroup class="title">
<h1>@ViewBag.Title.</h1>
<h2>@ViewBag.Message</h2>
</hgroup>
As you can see in the bold line above, this is the way we get the contents of the ViewBag.Message in the our view.
Let's add another ViewBag property
Have a look at the code below
public ActionResult Contact()
{
ViewBag.Message = "Your contact page.";
ViewBag.AdminEmail = "[email protected]";
return View();
}
I have added ViewBag.AdminEmail to the Contact method. Now I am going to retrieve the value inside the ViewBag.AdminEmail from the Contact.cshtml view.
<p>
<span class="label">WebMaster:</span>
<span><a href="mailto:@ViewBag.AdminEmail">@ViewBag.AdminEmail</a></span>
</p>
Obviously this is not the best way to pass data from our controller to the View. Let's add a model to our application. In the Models folder add a new class file and name it ContactModel.cs
The contents of this class follow
namespace MovieReviews.Models
{
public class ContactModel
{
public string Name { get; set; }
public string Surname { get; set; }
public string Email { get; set; }
}
}
I add three properties in my class. Now I need to change the code inside the Contact method in the HomeController.cs class
This is how Contact method looks now.
public ActionResult Contact()
{
//ViewBag.Message = "Your contact page.";
//ViewBag.AdminEmail = "[email protected]";
var contact = new ContactModel();
contact.Name = "Nick";
contact.Surname = "kantzelis";
contact.Email = "[email protected]";
return View(contact);
}
With this line of code return View(contact); ,we say that we want to pass this model-contact to the appropriate View.
We need to modify the Contact.cshtml view
<p>
<span class="label">Name:@Model.Name</span><br />
<span class="label">Surname:@Model.Surname</span><br />
<span class="label">Email:@Model.Email</span>
</p>
We use the @Model property (represents the model object - ContactModel object passed to the view ). This is a strongly typed property as opposed to the ViewBag.
In the beginning of the Contact.cshtml we must add this line of code.
@model MovieReviews.Models.ContactModel
By this line of code I inform the View about the model and what kind of model (ContactModel object) it has.
The razor engine now knows how to display this information to the user. We just have to place the @Model property in the appropriate place in the View.
Now when I run the application I see the following results.

Hope all makes sense now.I mean how the MVC pattern works and what the Controller, Model and the View do.
I know that we have not build the actual application yet. We will do that step by step in the next posts but it is of vital significance to understand the basic components of the MVC pattern and its internals.
Hope it helps!!

I have been using ASP.Net MVC, Visual Studio, C# , Entity Framework, JQuery, CSS to build web sites and applications. I have been teaching ASP.Net MVC to people from all walks of life with different experience in Web development. I have decided to write a series of posts on how to write a small ASP.Net MVC 4.0 application.I will develop this application step by step and I will explain everything that you need to know in order to develop ASP.Net MVC 4.0 applications.
There are some other posts in my blog, regarding ASP.Net MVC. You can find them here, here . Please have a look at those posts to get a feeling for ASP.Net MVC.I will repeat some of the content found in those posts in the posts that will be part of this series. If you are an experienced ASP.NET MVC developer, maybe you mus go on and read something more advanced. I will talk about advanced things later on though.This series is aimed at developers that start learning ASP.Net MVC.I assume that you have some working knowledge of HTML,CSS. It will be great if you programmed before with C# or used Visual Studio.Αs I said earlier I will try to explain everything in detail so beginners can benefit from that.
I am going to build a web application where users can post reviews about movies. The user can list the reviews,edit the reviews and obviously create a review. The administrator will be able to post movies so other users can review it.Users can also search for movies to review. This is the general overview of the application.
I will explain more about the application as we move on. I will also show you how to deploy the application to IIS and Windows Azure towards the end.
The most important thing right now is to download and install all the tools,libary,software in your computer so you can follow along. You can download all the necessary software (tools-Visual Studio 2012 Web Edition along with a web server- , a Sql Server instance, libraries,binaries) if you download Web Platform Installer.You can download this tool from this link.
After you install it, you must search for Visual Studio Express 2012 for Web
Have a look at the picture below
Then click Add and then Install.Everything you need will be installed. Maybe you need to reboot the machine so do not worry if you will have to do this.
So now you have an IDE, Visual Studio 2012 that you can write, test and debug your code. SQL Server is also installed. We need SQL Server to persist our data back to the database. A lightweight web server IIS Express is also installed so it can execute (host our web application) our code during development.
I have installed Visual Studio 2012 Ultimate edition in my machine which is Windows 8 by the way. I have also installed the latest version of .Net Framework and I will show you later how to download more libraries when needed.I have installed SQL Server 2012 Enterprise Edition in my machine. As a Microsoft Certified Trainer I have access to this software but as explained earlier you need only to download Web Platform Installer and then download the Visual Studio Express 2012 for Web and install it.
Before we move on to the actual hands-on demo I would like to say a few words on how I understand ASP.Net MVC and what its main benefits/design goals are.
Obviously the first paradigm on bulding web applications on the web is Web Forms.
Web forms was the first and only way to build web application when ASP.Net was introduced to the world, ten years ago.
It replaced the classic ASP model by providing us with a strongly typed code that replaced scripting.We had/have languages that are compiled.Web forms feels like a form that you programmed with VB 6.0 for the desktop.
The main idea was to abstract the WEB.By that I mean HTML is abstracted in a way.Click events replaced "Post" operations.Since that time, web standards have strengthened and client side programming is on the rise. Developers wanted to have more control on the HTML.Web forms , as I said before handles HTML in an abstract way and is not the best paradigm for allowing full control on the HTML rendering.
ASP.Net MVC provide us with a new way of writing ASP.Net applications.It does not replace Web Forms. It is just an alternative project type.It still runs on ASP.Net and supports caching, sesions and master pages.In ASP.Net MVC applications we have no viewstate or page lifecycle. For more information on understanding the MVC application execution process have a look at this link .It is a highly extensible and testable model.
In order to see what features of ASP.Net are compatible in both Models have a look here.
MVC pattern has been around for decades and it has been used across many technologies as a design pattern to use when building UI. It is based on an architecture model that embraces the so called "seperation of concern pattern".
There are three main building blocks in the MVC pattern. The View talks to the Model. The Model has the data that the View needs to display.The View does not have much logic in them at all.
The Controller orchestrates everything.When we have an HTTP request coming in, that request is routed to the Controller . It is up to the Controller to talk to the file system,database and build the model.The routing mechanism in MVC is implemented through the System.Web.Routing assembly. Routes are defined during application startup.Have a look at the Global.asax file,when building an MVC application.
The Controller will select which View to use to display the Model to the client.It is clear that we have now a model that fully supports "seperation of concerns".The Controller is responsible for building the Model and selecting the View.
The Controller does not save any data or state. The Model is responsible for that.The Controller selects the View but has nothing to do with displaying data to the client.This is the View's job.
The Controller component is basically a class file that we can write VB.Net or C# code. We do not have Page_Load event handler routines, just simple methods which are easy to test.No code behind files are associated with the Controller classes.All these classes should be under the Controllers folder in your application.Controller type name must end with Controller (e.g ProductController).
In the Views folder we should place the files responsible for displaying content to the client.Create subfolders for every Controller. Shared folder contains views used by multiple controllers.
In this post I will use the Razor View engine rather than the WebForms View. Razor View engine is designed with MVC in mind and it is the way (as far as I am concerned) to work with ASP.Net MVC.
ASP.Net MVC does not dictate what kind of data access architecture we will use in our application. It does not also dictate how to build our business layer (domain classes and objects).
Finally ASP.Net MVC is very extensible and easy to test
Let's start building our web application
1) I am launching VS 2012 and I will Visual C# as the programming language. I will also select ASP.NET MVC 4 Web Application from the available templates.Have a look at the picture below
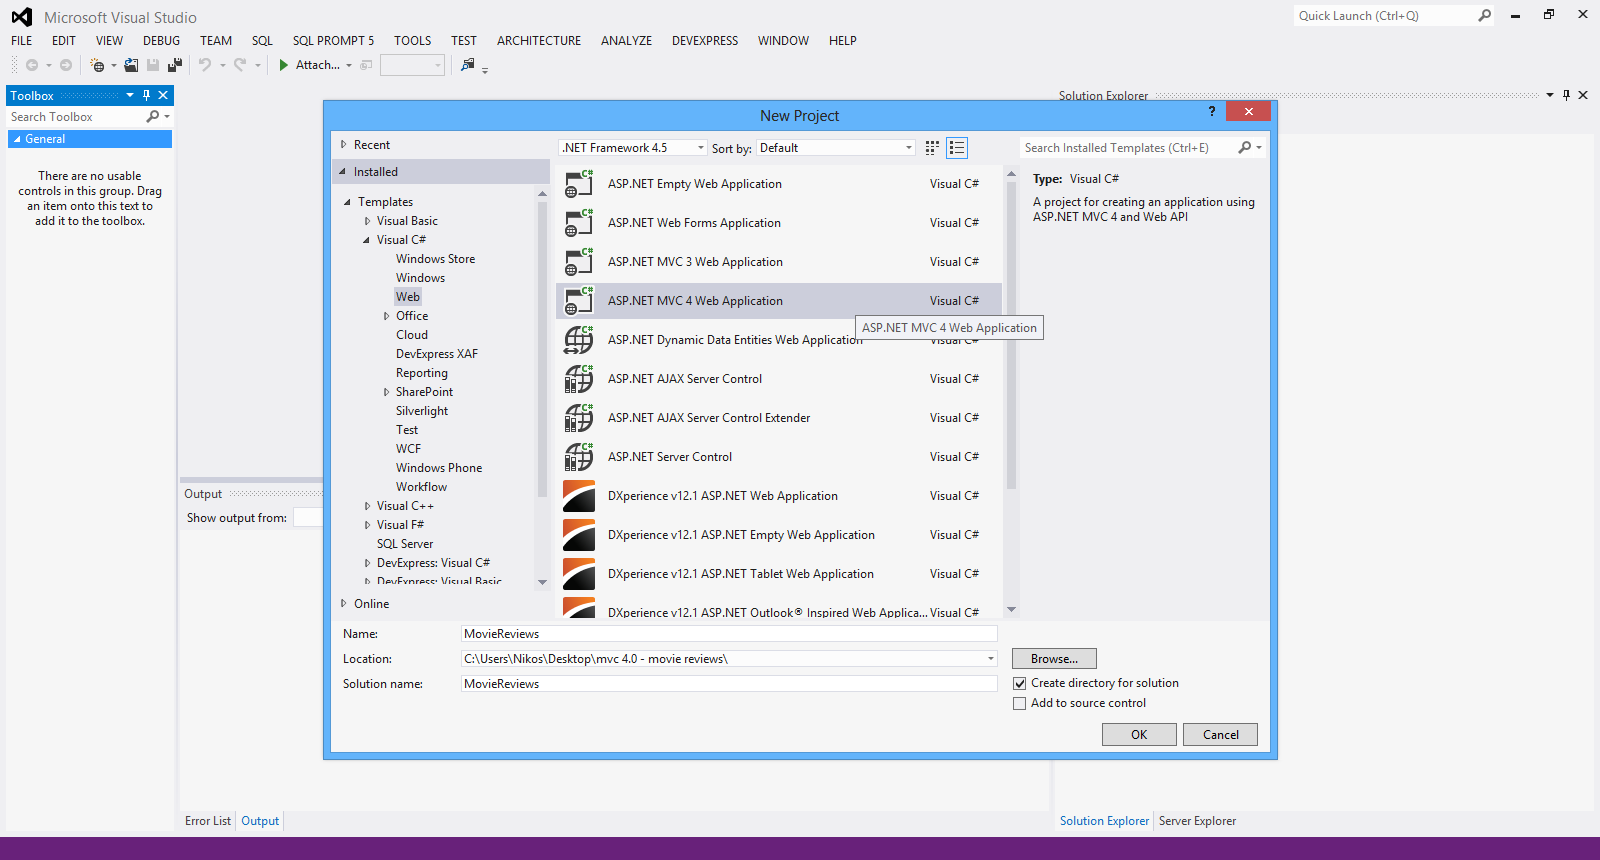
I have named my application "MovieReviews" and then clicked OK.
2) From the available templates in the next screen I select Internet Application. This template will create all the necessary files in order to build the application. Click OK.
Have a look at the picture below.

3) Have a look at the Solution Explorer to get a feeling of the files being created and the structure of the web application. Have a look at the picture below

4) Now we can build and run the application. You can do that by pressing F5 in the Visual Studio IDE. Have a look at the picture below to see the homepage of the web application

Now we can right-click (View->Page Source) to see the pure HTML 5 code. Have a look at the picture below
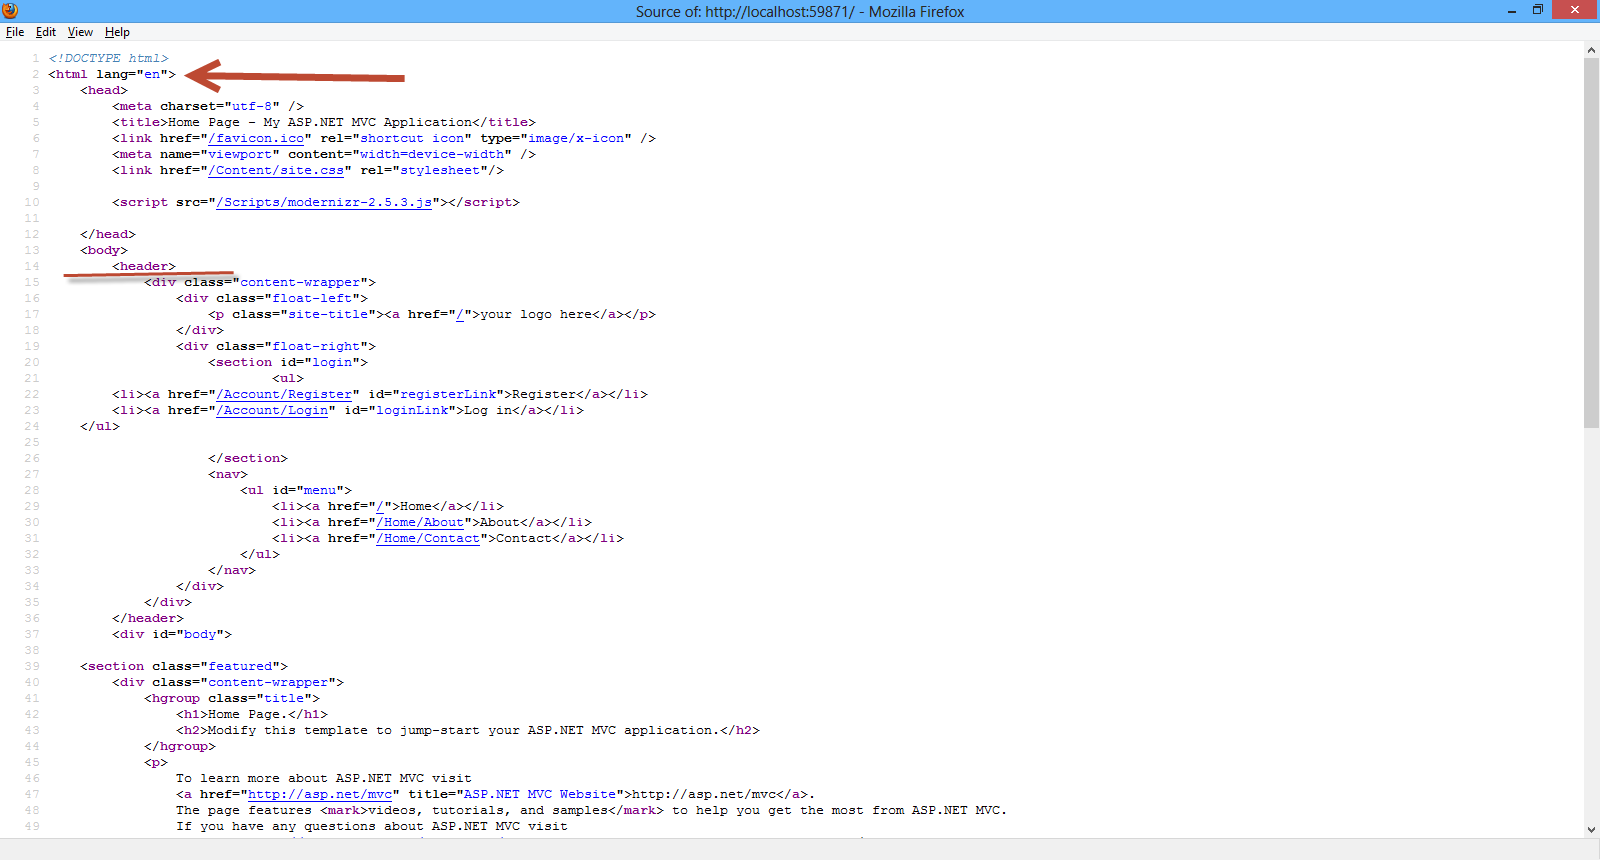
You can also see that there is ViewPort meta tag and this is very important for mobile devices.With this tag we tell the mobile browser that our site will adapt to the width of the device.
There also links to Javascript and CSS files. There is a link to the modernizer library.This Javascript library makes sure our site works with older browsers before HTML 5 existed.
So far we have talked about MVC pattern. We have talked about the application we want to build. I have explained what kind of tools we need and how to get them. Finally we have created our sample ASP.Net MVC application. The template we have chosen (Internet Application) provides us with all the necessary files in order to have a working ASP.Net MVC application out of the box.
Hope it helps !!!

In this post I will be looking into a great feature in CSS3 called multiple backgrounds.With CSS3 ourselves as web designers we can specify multiple background images for box
elements, using nothing more than a simple comma-separated list.
This is a very nice feature that can be useful in many websites.
In this hands-on example I will be using Expression Web 4.0.This application is not a free application. You can use any HTML editor you like.You can use Visual Studio 2012 Express edition. You can download it here.
Before I go on with the actual demo I will use the (http://www.caniuse.com) to see the support for CSS 3 Multiple backgrounds from the latest versions of modern browsers.
Please have a look in this link
All modern browsers support this feature. I am typing this very simple HTML 5 markup with an internal CSS style.
<!DOCTYPE html>
<html lang="en">
<head>
<title>Sold items</title>
<style>
#box{
border:1px solid #afafaf;
width:260px;
height:290px;
background-image:url(shirt.png), url(sold.jpg);
background-position: center bottom, right top;
background-repeat: no-repeat, no-repeat;
</style>
</head>
<body>
<header>
<h1>CSS3 Multiple backgrounds</h1>
</header>
<div id="box">
</div>
<footer>
<p>All Rights Reserved</p>
</footer>
</body>
</html>
Let me explain what I do here, multiple background images are specified using a comma-separated list of values for the background-image property.
A comma separated list is also used for the other background properties such as background-repeat, background-position .
So in the next three lines of CSS code
background-image:url(shirt.png), url(sold.jpg);
background-position: center bottom, right top;
background-repeat: no-repeat, no-repeat;
we have 2 images placed in the div element. The first is placed center bottom in the div element and the second is placed at right top position inside the div element.Both images do not get repeated.
I view the page in IE 10 and all the latest versions of Opera,Chrome and Firefox.
Have a look at the picture below.

Hope it helps!!!!

I
have been using JQuery for a couple of years now and it has helped me
to solve many problems on the client side of web development.
You can find all my posts about JQuery in this link. In this post I will be providing you with a hands-on example on the JQuery LazyLoad Plugin.If you want you can have a look at this post, where I describe the JQuery Cycle Plugin.You can find another post of mine talking about the JQuery Carousel Lite Plugin here. Another post of mine regarding the JQuery Image Zoom Plugin can be found here. You can have a look at the JQuery Overlays Plugin here .
There are times when when I am asked to create a very long page with lots of images.My first thought is to enable paging on the proposed page. Imagine that we have 60 images on a page. There are performance concerns when we have so many images on a page. Paging can solve that problem if I am allowed to place only 5 images on a page.Sometimes the customer does not like the idea of the paging.Believe it or not some people find the idea of paging not attractive at all.
In that case I need a way to only load the initial set of images and as the user scrolls down the page to load the rest.So as someone scrolls down new requests are made to the server and more images are fetched.
I can accomplish that with the jQuery LazyLoad Plugin.This is just a plugin that delays loading of images in long web pages.
The images that are outside of the viewport (visible part of web page) won't be loaded before the user scrolls to them.
Using jQuery LazyLoad Plugin on long web pages containing many large images makes the page load faster.
In
this hands-on example I will be using Expression Web 4.0.This
application is not a free application. You can use any HTML editor you
like.
You can use Visual Studio 2012 Express edition. You can download it here.
You can download this plugin from this link.
I launch Expression Web 4.0 and then I type the following HTML markup (I am using HTML 5)
<!DOCTYPE html>
<html lang="en">
<head>
<title>Liverpool Legends</title>
<script type="text/javascript" src="jquery-1.8.3.min.js"></script>
<script type="text/javascript" src="jquery.lazyload.min.js" ></script>
</head>
<body>
<header>
<h1>Liverpool Legends</h1>
</header>
<div id="main">
<img src="barnes.JPG" width="800" height="1100" /><p />
<img src="dalglish.JPG" width="800" height="1100" /><p />
<img class="LiverpoolImage" src="loader.gif" data-original="fans.JPG" width="1200" height="900" /><p />
<img class="LiverpoolImage" src="loader.gif" data-original="lfc.JPG" width="1000" height="700" /><p />
<img class="LiverpoolImage" src="loader.gif" data-original="Liverpool-players.JPG" width="1100" height="900" /><p />
<img class="LiverpoolImage" src="loader.gif" data-original="steven_gerrard.JPG" width="1110" height="1000" /><p />
<img class="LiverpoolImage" src="loader.gif" data-original="robbie.JPG" width="1200" height="1000" /><p />
</div>
<footer>
<p>All Rights Reserved</p>
</footer>
<script type="text/javascript">
$(function () {
$("img.LiverpoolImage").lazyload();
});
</script>
</body>
</html>
This is a very simple markup. I have added references to the JQuery library (current version is 1.8.3) and the JQuery LazyLoad Plugin.
Firstly, I add two images
<img src="barnes.JPG" width="800" height="1100" /><p />
<img src="dalglish.JPG" width="800" height="1100" /><p />
that will load immediately as soon as the page loads.
Then I add the images that will not load unless they become active in the viewport. I have all my img tags pointing the src attribute towards a placeholder image. I’m using a blank 1×1 px grey image,loader.gif.
The five images that will load as the user scrolls down the page follow.
<img class="LiverpoolImage" src="loader.gif" data-original="fans.JPG" width="1200" height="900" /><p />
<img class="LiverpoolImage" src="loader.gif" data-original="lfc.JPG" width="1000" height="700" /><p />
<img class="LiverpoolImage" src="loader.gif"
data-original="Liverpool-players.JPG" width="1100" height="900"
/><p />
<img class="LiverpoolImage" src="loader.gif" data-original="steven_gerrard.JPG" width="1110"
height="1000" /><p />
<img class="LiverpoolImage" src="loader.gif" data-original="robbie.JPG" width="1200" height="1000" /><p />
Then we need to rename the image src to point towards the proper image placeholder. The full image URL goes into the data-original attribute.
The Javascript code that makes it all happen follows. We need to make a call to the JQuery LazyLoad Plugin. We add the script just before we close the body element.
<script type="text/javascript">
$(function () {
$("img.LiverpoolImage").lazyload();
});
</script>
We can change the code above to incorporate some effects.
<script type="text/javascript">
$("img.LiverpoolImage").lazyload({
effect: "fadeIn"
});
</script>
That is all I need to write to achieve lazy loading. It it true that you can do so much with less!!
I view my simple page in Internet Explorer 10 and it works as expected.
I have tested this simple solution in all major browsers and it works fine.
You can test it yourself and see the results in your favorite browser.
Hope it helps!!!

I
have been using JQuery for a couple of years now and it has helped me
to solve many problems on the client side of web development.
You can find all my posts about JQuery in this link. In this post I will be providing you with a hands-on example on the JQuery Overlays Plugin.If you want you can have a look at this post, where I describe the JQuery Cycle Plugin.You can find another post of mine talking about the JQuery Carousel Lite Plugin here. Another post of mine regarding the JQuery Image Zoom Plugin can be found here.
I will be writing more posts regarding the most commonly used JQuery Plugins.
With the JQuery Overlays Plugin we can provide the user (overlay) with more information about an image when the user hovers over the image.
I
have been using extensively this plugin in my websites.
In
this hands-on example I will be using Expression Web 4.0.This
application is not a free application. You can use any HTML editor you
like.
You can use Visual Studio 2012 Express edition. You can download it here.
You can download this plugin from this link.
I launch Expression Web 4.0 and then I type the following HTML markup (I am using HTML 5)
<html lang="en">
<head>
<link rel="stylesheet" href="ImageOverlay.css" type="text/css" media="screen" />
<script type="text/javascript" src="jquery-1.8.3.min.js"></script>
<script type="text/javascript" src="jquery.ImageOverlay.min.js"></script>
<script type="text/javascript">
$(function () {
$("#Liverpool").ImageOverlay();
});
</script>
</head>
<body>
<ul id="Liverpool" class="image-overlay">
<li>
<a href="www.liverpoolfc.com">
<img alt="Liverpool" src="championsofeurope.jpg" />
<div class="caption">
<h3>Liverpool Football club</h3>
<p>The greatest club in the world</p>
</div>
</a>
</li>
</ul>
</body>
</html>
This is a very simple markup.
I have added references to the JQuery library (current version is 1.8.3) and the JQuery Overlays Plugin. Then I add 1 image in the element with "id=Liverpool". There is a caption class as well, where I place the text I want to show when the mouse hovers over the image. The caption class and the Liverpool id element are styled in the ImageOverlay.css file that can also be downloaded with the plugin.You can style the various elements of the html markup in the .css file.
The Javascript code that makes it all happen follows.
<script type="text/javascript">
$(function () {
$("#Liverpool").ImageOverlay();
});
</script>
I am just calling the ImageOverlay function for the Liverpool ID element.
The contents of ImageOverlay.css file follow.Feel free to change this file.
.image-overlay { list-style: none; text-align: left; }
.image-overlay li { display: inline; }
.image-overlay a:link, .image-overlay a:visited, .image-overlay a:hover, .image-overlay a:active { text-decoration: none; }
.image-overlay a:link img, .image-overlay a:visited img, .image-overlay a:hover img, .image-overlay a:active img { border: none; }
.image-overlay a
{
margin: 9px;
float: left;
background: #fff;
border: solid 2px;
overflow: hidden;
position: relative;
}
.image-overlay img
{
position: absolute;
top: 0;
left: 0;
border: 0;
}
.image-overlay .caption
{
float: left;
position: absolute;
background-color: #000;
width: 100%;
cursor: pointer;
/* The way to change overlay opacity is the follow properties. Opacity is a tricky issue due to
longtime IE abuse of it, so opacity is not offically supported - use at your own risk.
To play it safe, disable overlay opacity in IE. */
/* For Firefox/Opera/Safari/Chrome */
opacity: .8;
/* For IE 5-7 */
filter: progid:DXImageTransform.Microsoft.Alpha(Opacity=80);
/* For IE 8 */
-MS-filter: "progid:DXImageTransform.Microsoft.Alpha(Opacity=80)";
}
.image-overlay .caption h1, .image-overlay .caption h2, .image-overlay .caption h3,
.image-overlay .caption h4, .image-overlay .caption h5, .image-overlay .caption h6
{
margin: 10px 0 10px 2px;
font-size: 26px;
font-weight: bold;
padding: 0 0 0 5px;
color:#92171a;
}
.image-overlay p
{
text-indent: 0;
margin: 10px;
font-size: 1.2em;
}
It couldn't be any simpler than that. I view my simple page in Internet Explorer 10 and it works as expected.
I have tested this simple solution in all major browsers and it works fine.
Have
a look at the picture below.
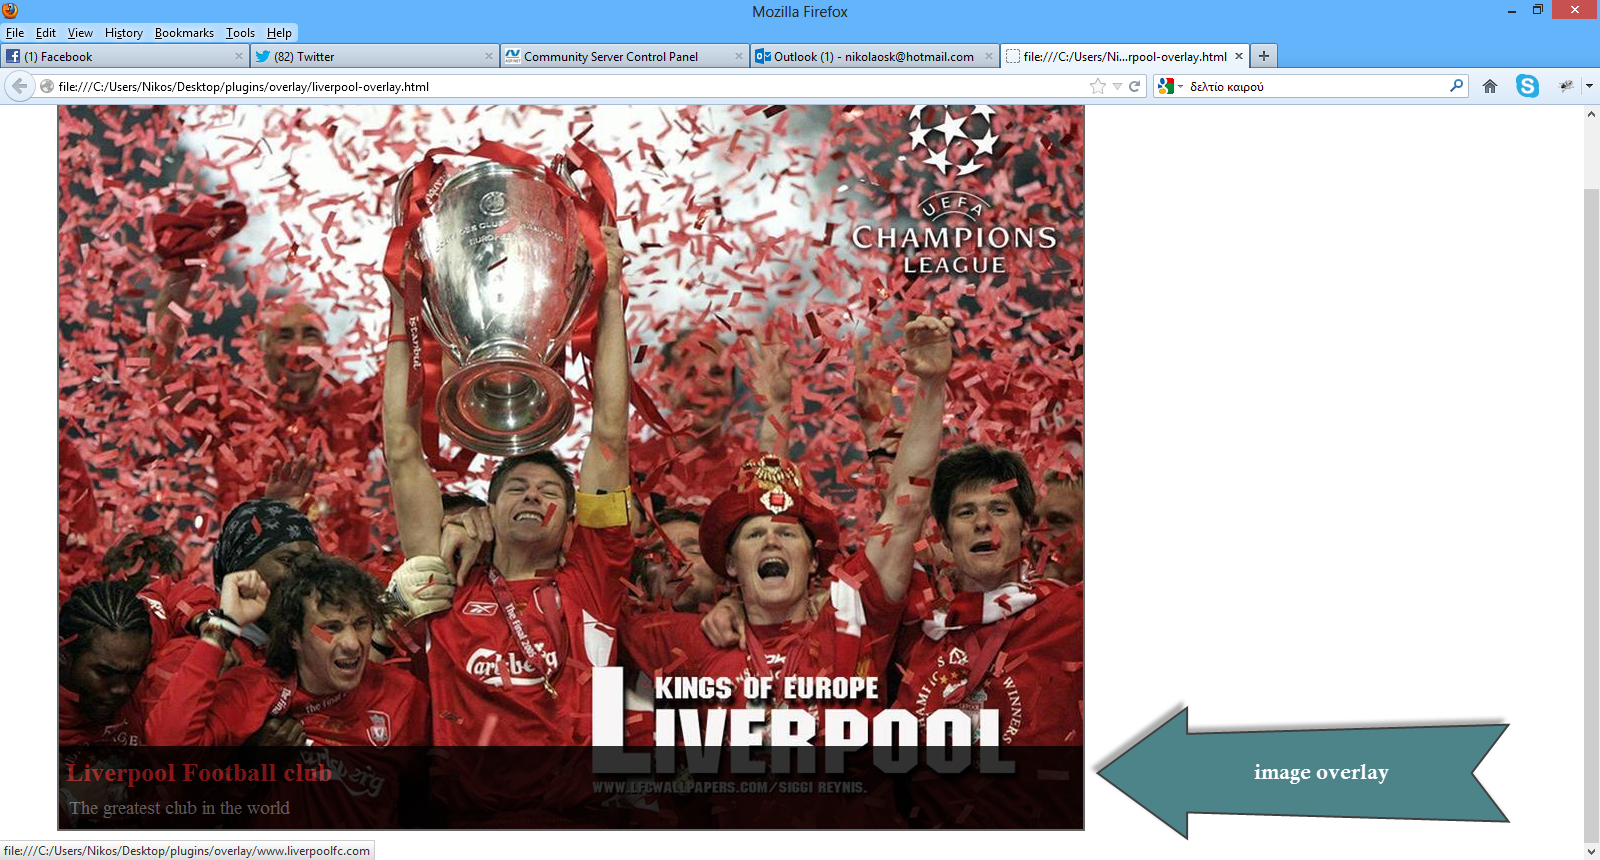
You can test it yourself and see the results in your favorite browser.
Hope it helps!!!

I have been using JQuery for a couple of years now and it has helped me to solve many problems on the client side of web development.
You can find all my posts about JQuery in this link. In this post I will be providing you with a hands-on example on the JQuery Image Zoom Plugin.If you want you can have a look at this post, where I describe the JQuery Cycle Plugin.You can find another post of mine talking about the JQuery Carousel Lite Plugin here.
I will be writing more posts regarding the most commonly used JQuery Plugins.
I have been using extensively this plugin in my websites.You can use this plugin to move mouse around an image and see a zoomed in version of a portion of it.
In this hands-on example I will be using Expression Web 4.0.This application is not a free application. You can use any HTML editor you like.
You can use Visual Studio 2012 Express edition. You can download it here.
You can download this plugin from this link
I launch Expression Web 4.0 and then I type the following HTML markup (I am using HTML 5)
<html lang="en">
<head>
<title>Liverpool Legends</title>
<meta http-equiv="Content-Type" content="text/html;charset=utf-8" >
<link rel="stylesheet" type="text/css" href="style.css">
<script type="text/javascript" src="jquery-1.8.3.min.js"> </script>
<script type="text/javascript" src="jqzoom.pack.1.0.1.js"></script>
<script type="text/javascript">
$(function () {
$(".nicezoom").jqzoom();
});
</script>
</head>
<body>
<header>
<h1>Liverpool Legends</h1>
</header>
<div id="main">
<a href="championsofeurope-large.jpg" class="nicezoom" title="Champions">
<img src="championsofeurope.jpg" title="Champions">
</a>
</div>
<footer>
<p>All Rights Reserved</p>
</footer>
</body>
</html>
This is a very simple markup. I have added one large and one small image (make sure you use your own when trying this example)
I have added references to the JQuery library (current version is 1.8.3) and the JQuery Image Zoom Plugin. Then I add 2 images in the main div element.Note the class nicezoom inside the href element.
The Javascript code that makes it all happen follows.
<script type="text/javascript">
$(function () {
$(".nicezoom").jqzoom();
});
</script> It couldn't be any simpler than that. I view my simple in Internet Explorer 10 and it works as expected.
I have tested this simple solution in all major browsers and it works fine.
Inside the head section we can add another Javascript script utilising some more options regarding the zoom plugin.
<script type="text/javascript">
$(function () {
var options = {
zoomType: 'standard',
lens:true,
preloadImages: true,
alwaysOn:false,
zoomWidth: 400,
zoomHeight: 350,
xOffset:190,
yOffset:80,
position:'right'
};
$('.nicezoom').jqzoom(options);
});
</script>
I would like to explain briefly what some of those options mean.
-
zoomType - Other admitted option values are 'reverse','drag','innerzoom'
-
zoomWidth - The popup window width showing the zoomed area
-
zoomHeight - The popup window height showing the zoomed area
-
xOffset - The popup window x offset from the small image.
-
yOffset - The popup window y offset from the small image.
-
position - The popup window position.Admitted values:'right' ,'left' ,'top' ,'bottom'
-
preloadImages - if set to true,jqzoom will preload large images.
You can test it yourself and see the results in your favorite browser.
Hope it helps!!!

I have been using JQuery for a couple of years now and it has helped me to solve many problems on the client side of web development.
You can find all my posts about JQuery in this link. In this post I will be providing you with a hands-on example on the JQuery Carousel Lite Plugin.If you want you can have a look at this post, where I describe the JQuery Cycle Plugin. I will be writing more posts regarding the most commonly used JQuery Plugins.
I have been using extensively this plugin in my websites.You can show a portion of a set of images with previous and next navigation.
In this hands-on example I will be using Expression Web 4.0.This application is not a free application. You can use any HTML editor you like.
You can use Visual Studio 2012 Express edition. You can download it here.
You can download this plugin from this link
I launch Expression Web 4.0 and then I type the following HTML markup (I am using HTML 5)
<html lang="en">
<head>
<title>Liverpool Legends</title>
<meta http-equiv="Content-Type" content="text/html;charset=utf-8" >
<link rel="stylesheet" type="text/css" href="style.css">
<script type="text/javascript" src="jquery-1.8.3.min.js"> </script>
<script type="text/javascript" src="jcarousellite_1.0.1.min.js"></script>
<script type="text/javascript">
$(function () {
$(".theImages").jCarouselLite({
btnNext: "#Nextbtn",
btnPrev: "#Previousbtn"
});
});
</script>
</head>
<body>
<header>
<h1>Liverpool Legends</h1>
</header>
<div id="main">
<img id="Previousbtn" src="previous.png" />
<div class="theImages">
<ul>
<li><img src="championsofeurope.jpg"></li>
<li><img src="steven_gerrard.jpg"></li>
<li><img src="ynwa.jpg"></li>
<li><img src="dalglish.jpg"></li>
<li><img src="Souness.jpg"></li>
</ul>
</div>
<img id="Nextbtn" src="next.png" />
</div>
<footer>
<p>All Rights Reserved</p>
</footer>
</body>
</html>
This is a very simple markup. I have added my photos (make sure you use your own when trying this example)
I have added references to the JQuery library (current version is 1.8.3) and the JQuery Carousel Lite Plugin. Then I add 5 images in the theImages div element.
The Javascript code that makes it all happen follows.
<script type="text/javascript">
$(function () {
$(".theImages").jCarouselLite({
btnNext: "#Nextbtn",
btnPrev: "#Previousbtn"
});
});
</script>
I also have added some basic CSS style rules in the style.css file.
body{
background-color:#efefef;
color:#791d22;
}
#Previousbtn{position:absolute; left:5px; top:100px;}
#Nextbtn {position:absolute; left:812px; top:100px;}
.theImages {margin-left:145px;margin-top:10px;}
It couldn't be any simpler than that. I view my simple in Internet Explorer 10 and it works as expected.
I have tested this simple solution in all major browsers and it works fine.
Hope it helps!!!

I have been using JQuery for a couple of years now and it has helped me to solve many problems on the client.
You can find all my posts about JQuery in this link. In this post I will be providing you with a hands-on example on the JQuery Cycle Plugin.
I have been using extensively this plugin in my websites.You can rotate a series of images using various transitions with this plugin.It is a slideshow type of experience.
I will be writing more posts regarding the most commonly used JQuery Plugins.
In this hands-on example I will be using Expression Web 4.0.This application is not a free application. You can use any HTML editor you like.
You can use Visual Studio 2012 Express edition. You can download it here.
You can download this plugin from this link
I launch Expression Web 4.0 and then I type the following HTML markup (I am using HTML 5)
<!DOCTYPE html>
<html lang="en">
<head>
<title>Liverpool Legends</title>
<meta http-equiv="Content-Type" content="text/html;charset=utf-8" >
<script type="text/javascript" src="jquery-1.8.3.min.js"> </script>
<script type="text/javascript" src="jquery.cycle.all.js"></script>
<script type="text/javascript">
$(function() {
$('#main').cycle({ fx: 'fade'});
});
</script>
</head>
<body>
<header>
<h1>Liverpool Legends</h1>
</header>
<div id="main">
<img src="championsofeurope.jpg" alt="Champions of Europe">
<img src="steven_gerrard.jpg" alt="Steven Gerrard">
<img src="ynwa.jpg" alt="You will never walk alone">
</div>
<footer>
<p>All Rights Reserved</p>
</footer>
</body>
</html>
This is a very simple markup. I have added three photos (make sure you use your own when trying this example)
I have added references to the JQuery library (current version is 1.8.3) and the JQuery Cycle Plugin. Then I have added 3 images in the main div element.
The Javascript code that makes it all happen follows.
<script type="text/javascript">
$(function() {
$('#main').cycle({ fx: 'fade'});
});
</script>
It couldn't be any simpler than that. I view my simple in Internet Explorer 10 and it works as expected.
I have this series of images transitioning one after the other using the "fade" effect.
I have tested this simple solution in all major browsers and it works fine.
We can have a different transition effect by changing the JS code. Have a look at the code below
<script type="text/javascript">
$(function() {
$('#main').cycle({
fx: 'cover',
speed: 500,
timeout: 2000
});
});
</script>
We set the speed to 500 milliseconds, that is the speed we want to have for the ‘cover’ transition.The timeout is set to two seconds which is the time the photo will show until the next transition will take place.
We can customise this plugin further but this is a short introduction to the plugin.
Hope it helps!!!

In this post I will introduce you to Code First Migrations, an Entity Framework feature introduced in version 4.3 back in February of 2012.
I have extensively covered Entity Framework in this blog. Please find my other Entity Framework posts here .
Before the addition of Code First Migrations (4.1,4.2 versions), Code First database initialisation meant that Code First would create the database if it does not exist (the default behaviour - CreateDatabaseIfNotExists).
The other pattern we could use is DropCreateDatabaseIfModelChanges which means that Entity Framework, will drop the database if it realises that model has changes since the last time it created the database.
The final pattern is DropCreateDatabaseAlways which means that Code First will recreate the database every time one runs the application.
That is of course fine for the development database but totally unacceptable and catastrophic when you have a production database. We cannot lose our data because of the work that Code First works.
Migrations solve this problem.With migrations we can modify the database without completely dropping it.We can modify the database schema to reflect the changes to the model without losing data.
In version EF 5.0 migrations are fully included and supported. I will demonstrate migrations with a hands-on example.
Let me say a few words first about Entity Framework first. The .Net framework provides support for Object Relational Mappingthrough EF. So EF is a an ORM tool and it is now the main data access technology that microsoft works on. I use it quite extensively in my projects. Through EF we have many things out of the box provided for us. We have the automatic generation of SQL code.It maps relational data to strongly types objects.All the changes made to the objects in the memory are persisted in a transactional way back to the data store.
You can find in this post an example on how to use the Entity Framework to retrieve data from an SQL Server Database using the "Database/Schema First" approach.
In this approach we make all the changes at the database level and then we update the model with those changes.
In this post you can see an example on how to use the "Model First" approach when working with ASP.Net and the Entity Framework.
This model was firstly introduced in EF version 4.0 and we could start with a blank model and then create a database from that model.When we made changes to the model , we could recreate the database from the new model.
The Code First approach is the more code-centric than the other two. Basically we write POCO classes and then we persist to a database using something called DBContext.
Code First relies on DbContext. We create 2,3 classes (e.g Person,Product) with properties and then these classes interact with the DbContext class we can create a new database based upon our POCOS classes and have tables generated from those classes.We do not have an .edmx file in this approach.By using this approach we can write much easier unit tests.
DbContext is a new context class and is smaller,lightweight wrapper for the main context class which is ObjectContext (Schema First and Model First).
Let's move on to our hands-on example.
I have installed VS 2012 Ultimate edition in my Windows 8 machine.
1) Create an empty asp.net web application. Give your application a suitable name. Choose C# as the development language
2) Add a new web form item in your application. Leave the default name.
3) Create a new folder. Name it CodeFirst .
4) Add a new item in your application, a class file. Name it Footballer.cs. This is going to be a simple POCO class.Place this class file in the CodeFirst folder.
The code follows
    public class Footballer
    {
        public int FootballerID { get; set; }
        public string FirstName { get; set; }
        public string LastName { get; set; }
        public double Weight { get; set; }
        public double Height { get; set; }


    }
5) We will have to add EF 5.0 to our project. Right-click on the project in the Solution Explorer and select Manage NuGet Packages... for it.In the window that will pop up search for Entity Framework and install it.
Have a look at the picture below
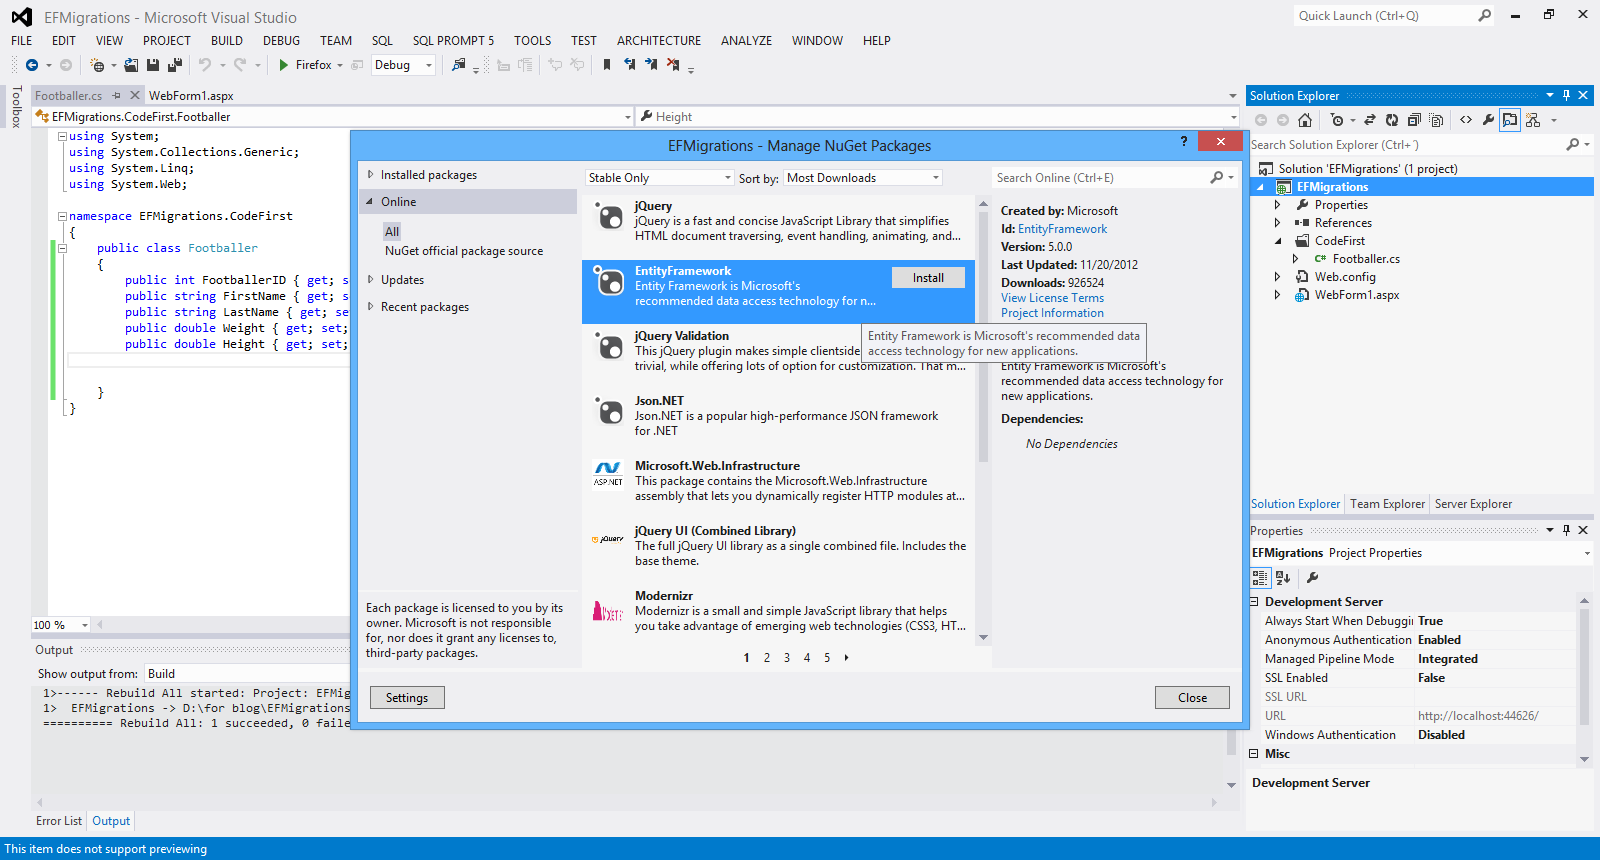
If you want to find out if indeed EF version is 5.0 version is installed have a look at the References. Have a look at the picture below to see what you will see if you have installed everything correctly.
Have a look at the picture below
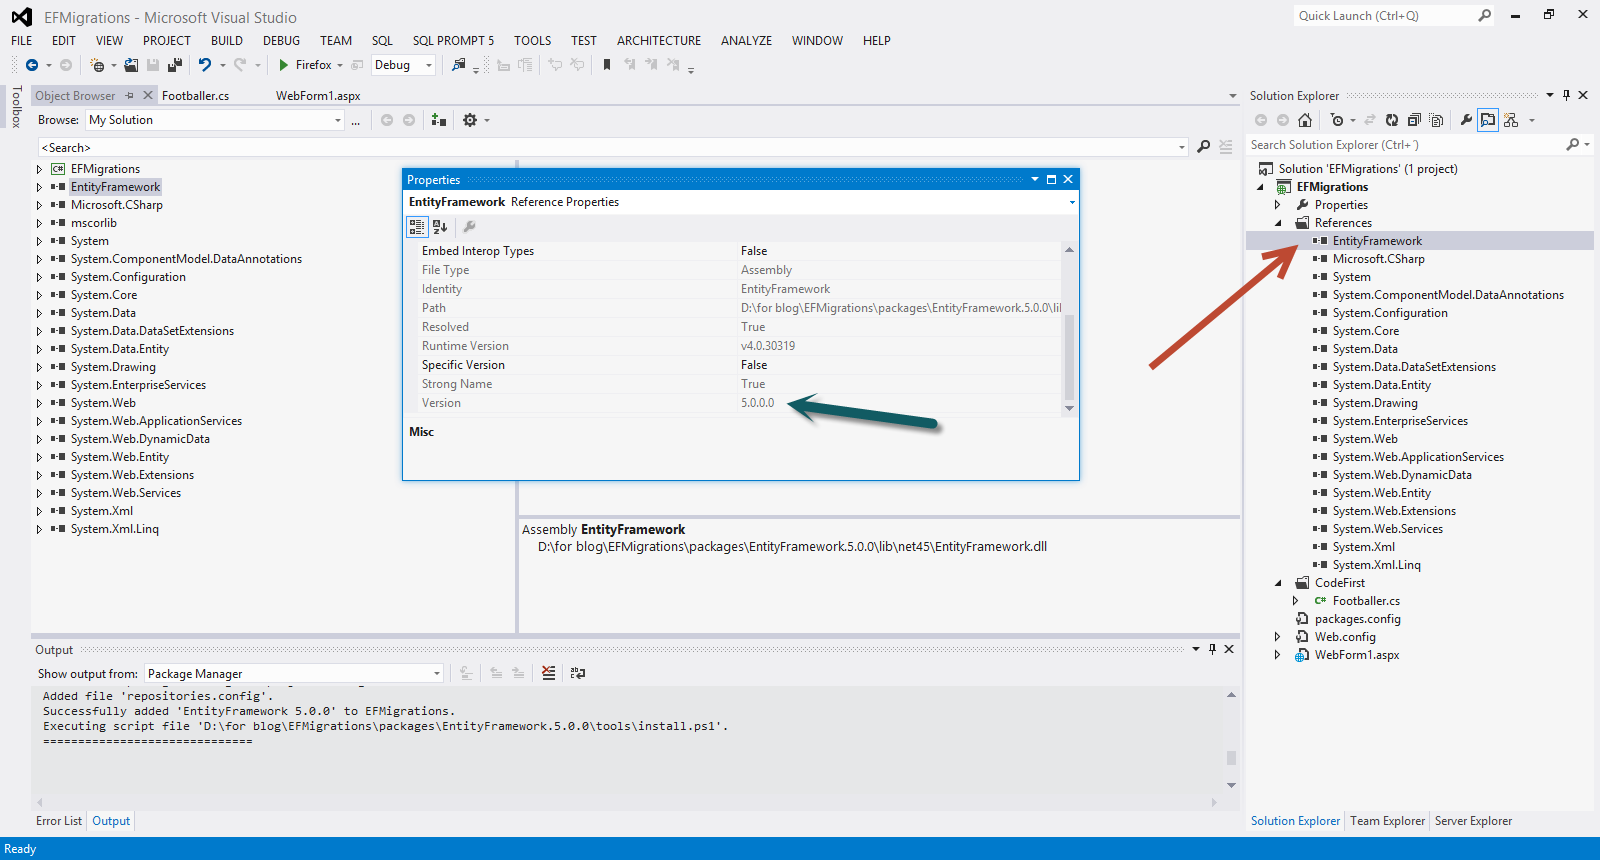
6) Then we need to create a context class that inherits from DbContext.Add a new class to the CodeFirst folder.Name it FootballerDBContext.Now that we have the entity classes created, we must let the model know.I will have to use the DbSet<T> property.The code for this class follows
    public class FootballerDBContext:DbContext
    {
        public DbSet<Footballer> Footballers { get; set; }


    }
Do not forget to add (using System.Data.Entity;) in the beginning of the class file
7) We must take care of the connection string. It is very easy to create one in the web.config.It does not matter that we do not have a database yet.When we run the DbContext and query against it , it will use a connection string in the web.config and will create the database based on the classes.I will use the name "FootballTraining" for the database.
In my case the connection string inside the web.config, looks like this
   <connectionStrings>

   <add name="CodeFirstDBContext"
connectionString="server=.;integrated security=true;
  database=FootballTraining" providerName="System.Data.SqlClient"/>


    </connectionStrings>
8) Now it is time to create Linq to Entities queries to retrieve data from the database . Add a new class to your application in the CodeFirst folder.Name the file DALfootballer.cs
We will create a simple public method to retrieve the footballers. The code for the class follows
public class DALfootballer
    {


        FootballerDBContext ctx = new FootballerDBContext();

        public List<Footballer> GetFootballers()
        {

            var query = from player in ctx.Footballers select player;

            return query.ToList();


        }

    }
9) Place a GridView control on the Default.aspx page and leave the default name.Add an ObjectDataSource control on the Default.aspx page and leave the default name. Set the DatasourceID property of the GridView control to the ID of the ObjectDataSource control.(DataSourceID="ObjectDataSource1" ). Let's configure the ObjectDataSource control. Click on the smart tag item of the ObjectDataSource control and select Configure Data Source. In the Wizzard that pops up select the DALFootballer class and then in the next step choose the GetFootballers() method.Click Finish to complete the steps of the wizzard.
Build and Run your application.
10) Obviously you will not see any records coming back from your database, because we have not inserted anything. The database is created, though.
Have a look at the picture below.
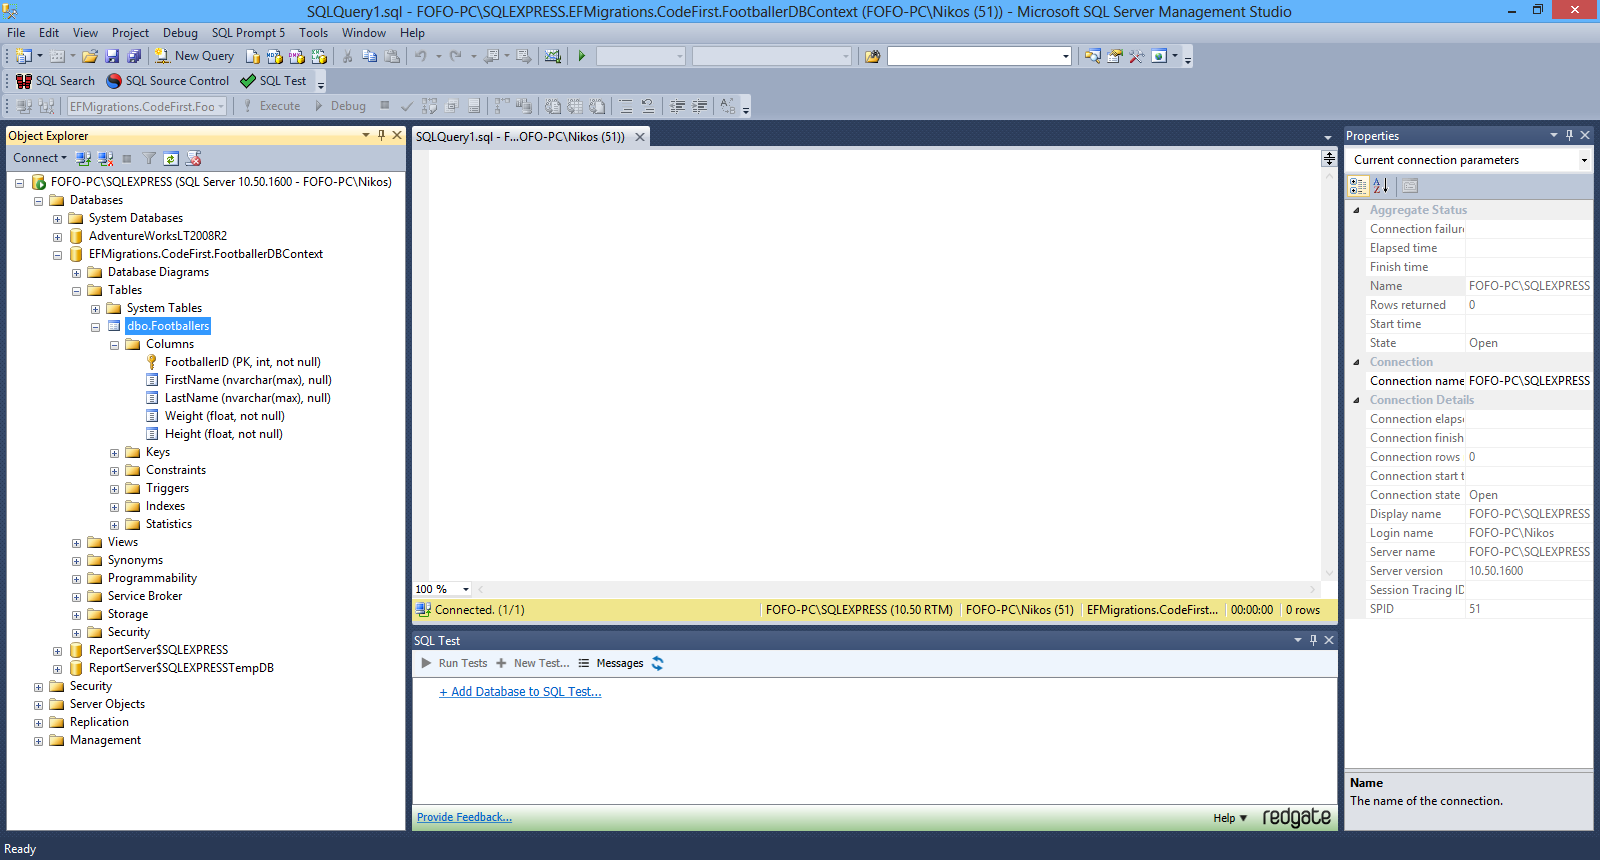
11) Now let's change the POCO class. Let's add a new property to the Footballer.cs class.
public int Age { get; set; }
Build and run your application again. You will receive an error. Have a look at the picture below
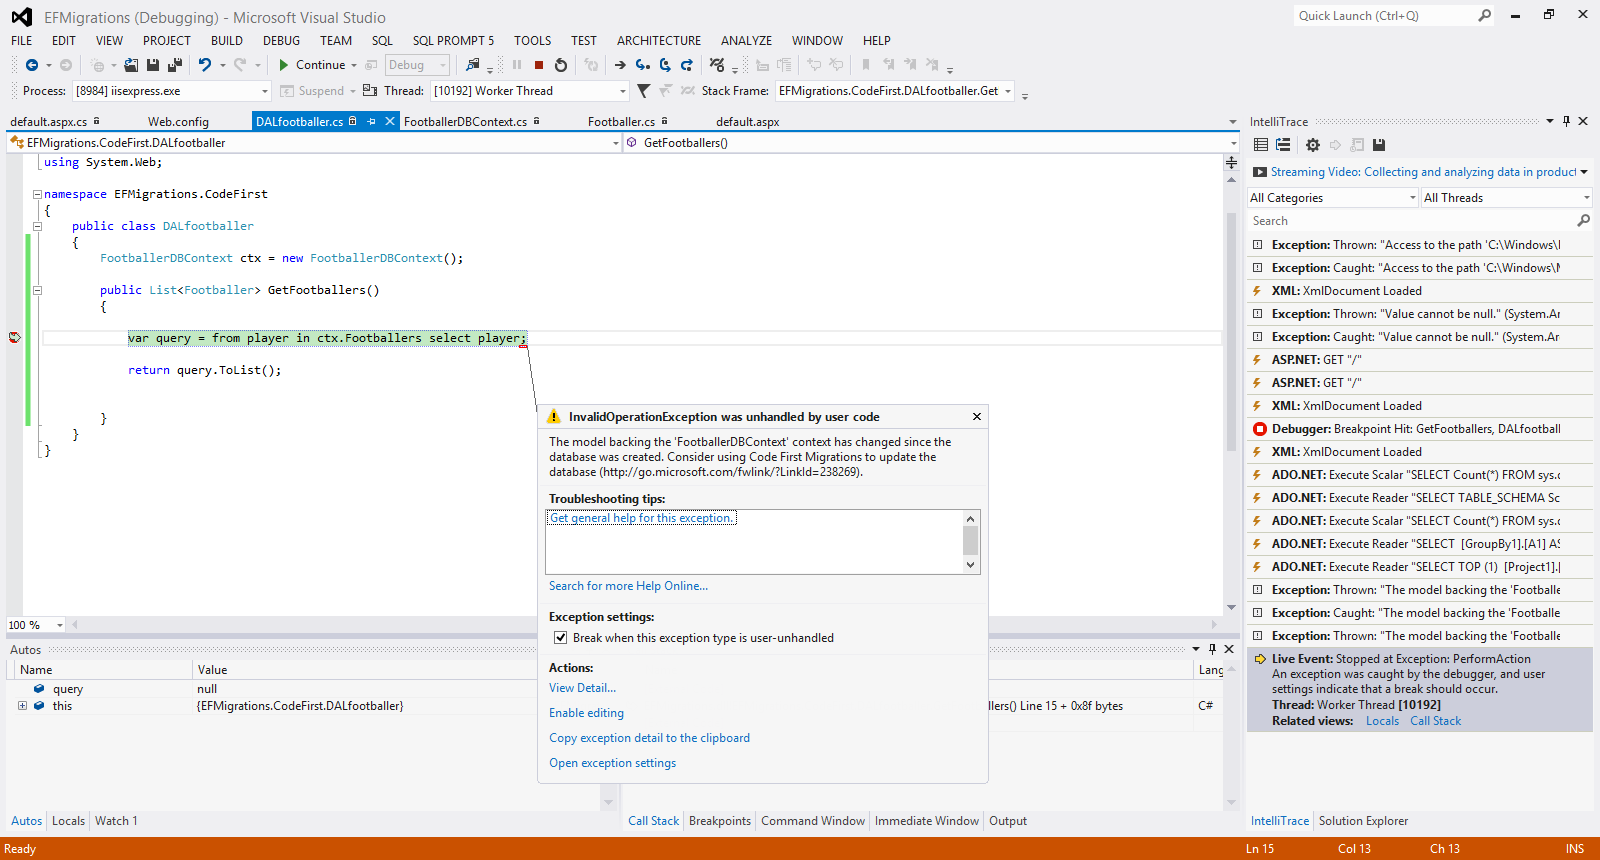
12) That was to be expected.EF Code First Migrations is not activated by default. We have to activate them
manually and configure them according to your needs.
We will open the Package Manager Console from the Tools menu within Visual
Studio 2012.Then we will activate the EF Code First Migration Features by writing the command “Enable-Migrations”.
Have a look at the picture below.

This adds a new folder Migrations in our project. A new auto-generated class
Configuration.cs is created.Another class is also created [CURRENTDATE]_InitialCreate.cs and added to our project.
The
Configuration.cs is shown in the picture below.
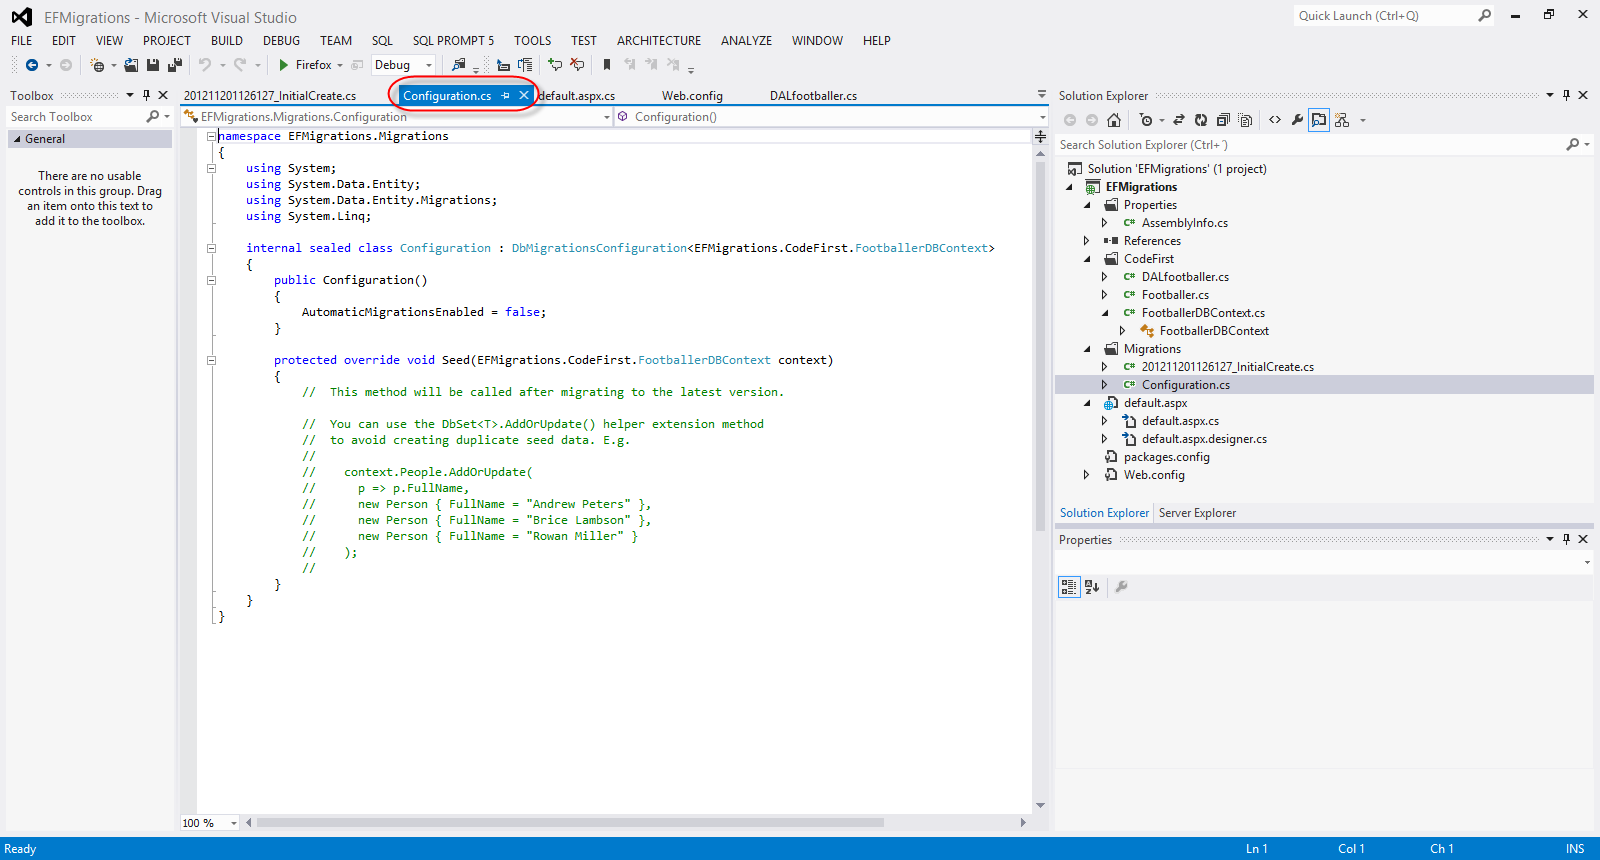
The [CURRENTDATE]_InitialCreate.cs is shown in the picture below
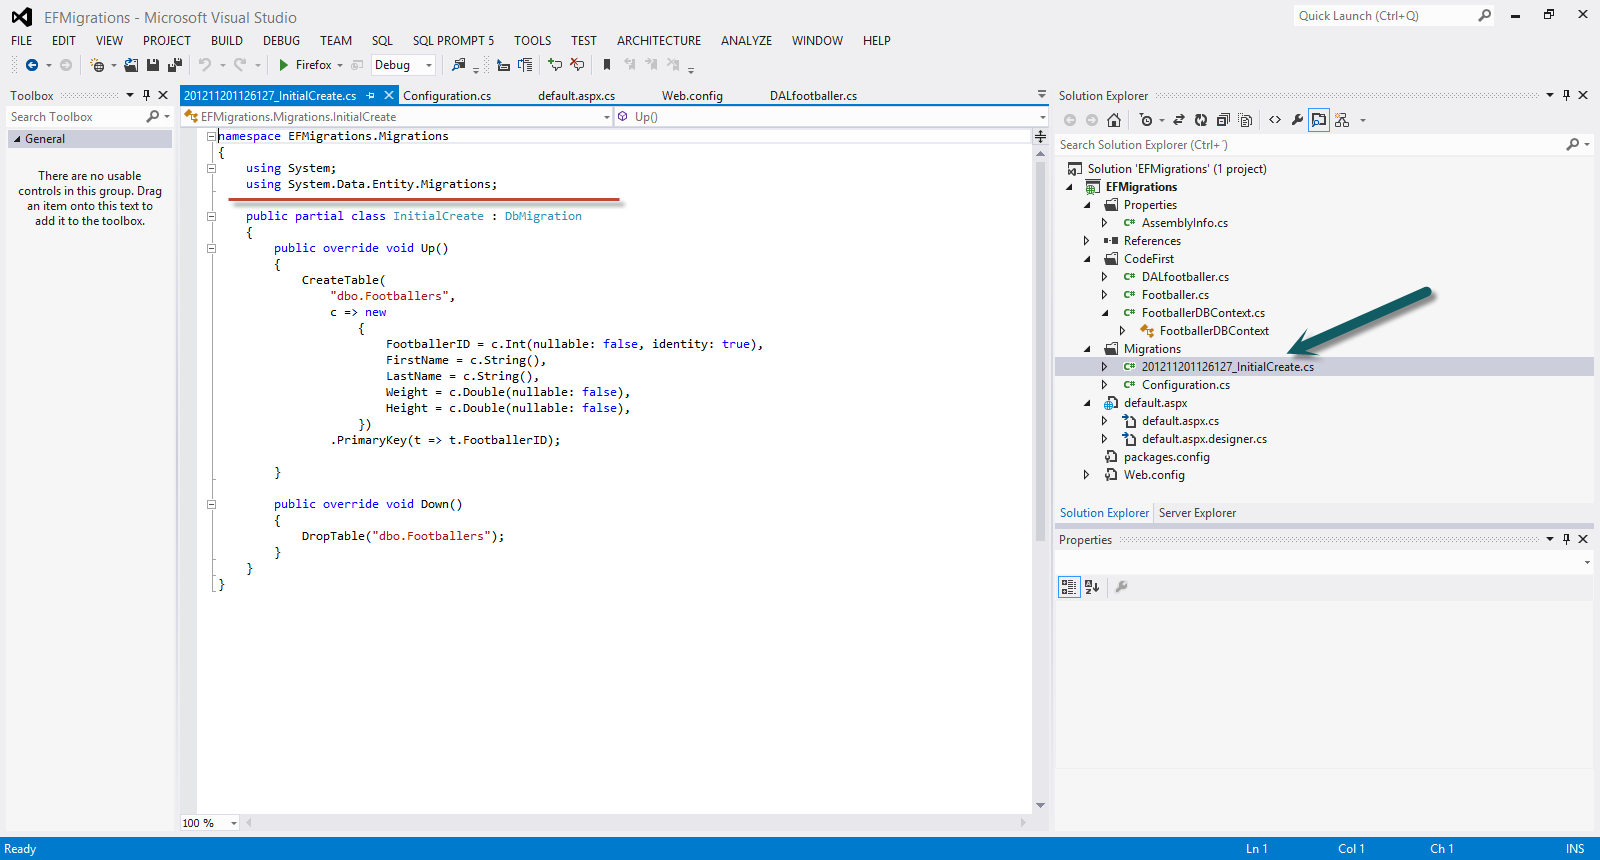
13) Νοw we are ready to migrate the changes in the database. We need to run the Add-Migration Age command in Package Manager Console
Add-Migration will scaffold the next migration based on changes you have made to your model since the last migration was created.
In the Migrations folder, the file 201211201231066_Age.cs is created.
Have a look at the picture below to see the newly generated file and its contents.
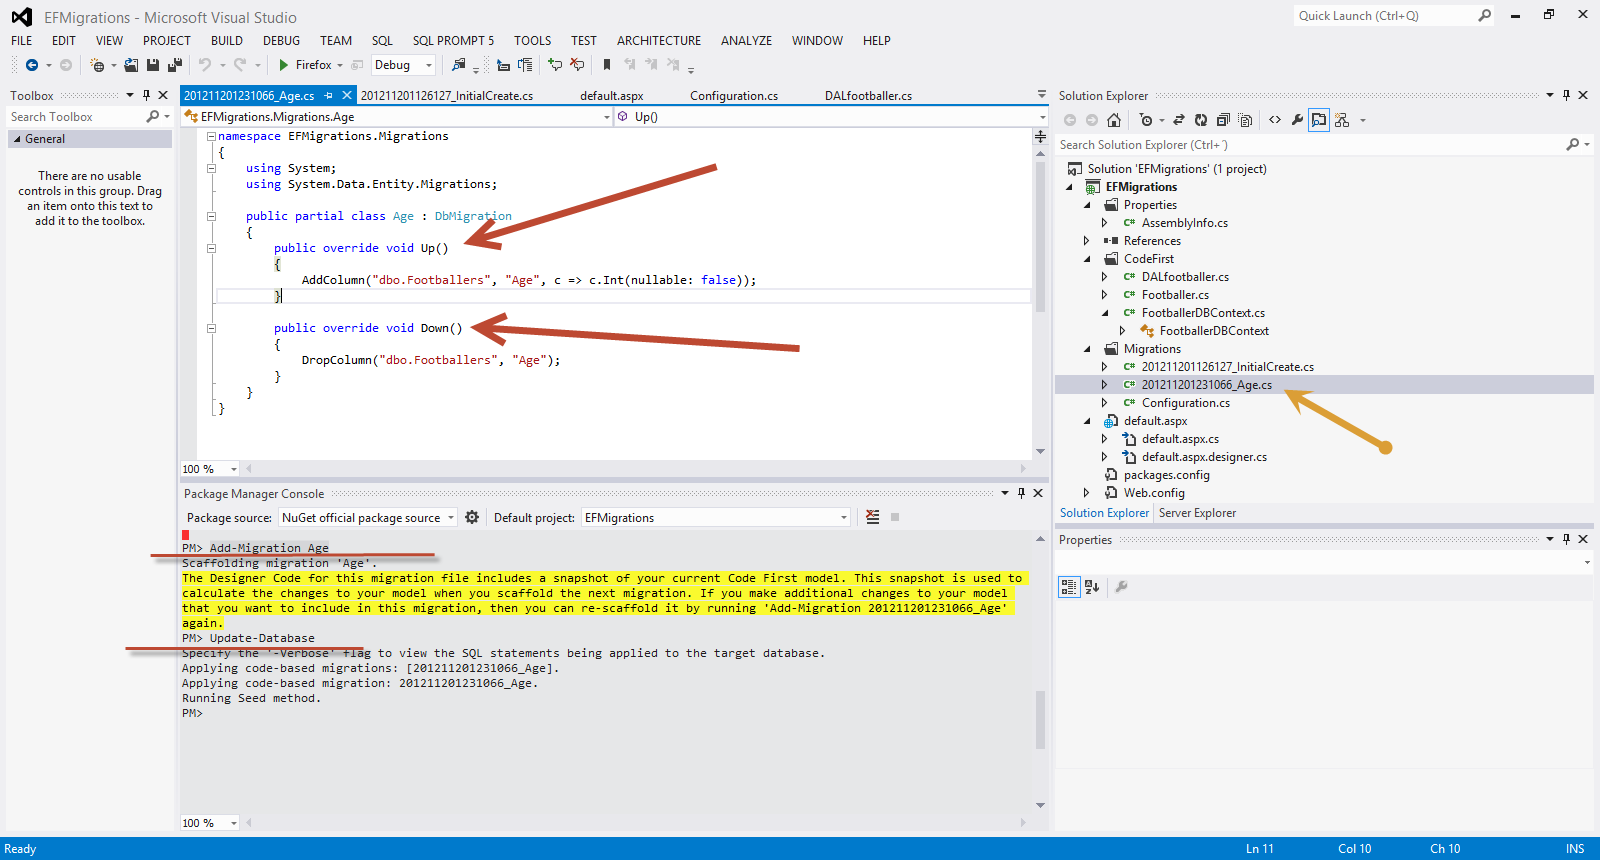
Now we can run the Update-Database command in Package Manager Console .See the picture above.
Code First Migrations will compare the migrations in our Migrations folder with the ones that have been applied to the database. It will see that the Age migration needs to be applied, and run it.
The EFMigrations.CodeFirst.FootballeDBContext database is now updated to include the Age column in the Footballers table.
Build and run your application.Everything will work fine now.
Have a look at the picture below to see the migrations applied to our table.

14) We may want it to automatically
upgrade the database (by applying any pending migrations) when the
application launches.Let's add another property to our Poco class.
public string TShirtNo { get; set; }
We want this change to migrate automatically to the database.
We go to the Configuration.cs we enable automatic migrations.
public Configuration()
{
AutomaticMigrationsEnabled = true;
}
In the Page_Load event handling routine we have to register the MigrateDatabaseToLatestVersion database
initializer.
A database initializer simply contains some logic that is
used to make sure the database is setup correctly.
protected void Page_Load(object sender, EventArgs e)
{
Database.SetInitializer(new MigrateDatabaseToLatestVersion<FootballerDBContext, Configuration>());
}
Build and run your application. It will work fine.
Have a look at the picture below to see the migrations applied to our table in the database.

Hope it helps!!!

In this post I will be continuing my discussion on ASP.Net MVC 4.0 mobile development.
You can have a look at my first post on the subject here . Make sure you read it and understand it well before you move one reading the remaining of this post.
I will not be writing any code in this post. I will try to explain a few concepts related to the MVC 4.0 mobile functionality.
In this post I will be looking into the Browser Overriding feature in ASP.Net MVC 4.0. By that I mean that we override the user agent for a given user session.
This is very useful feature for people who visit a site through a device and they experience the mobile version of the site, but what they really want is the option to be able to switch to the desktop view.
"Why they might want to do that?", you might wonder.Well first of all the users of our ASP.Net MVC 4.0 application will appreciate that they have the option to switch views while some others will think that they will enjoy more the contents of our website with the "desktop view" since the mobile device they view our site has a quite large display.
Obviously this is only one site. These are just different views that are rendered.To put it simply, browser overriding lets our application treat requests as if they were coming from a different browser rather than the one they are actually from.
In order to do that programmatically we must have a look at the System.Web.WebPages namespace and the classes in it. Most specifically the class BrowserHelpers.
Have a look at the picture below

In this class we see some extension methods for HttpContext class.These methods are called extensions-helpers methods and we use them to switch to one browser from another thus overriding the current/actual browser.
These APIs have effect on layout,views and partial views and will not affect any other ASP.Net Request.Browser related functionality.The overridden browser is stored in a cookie.
Let me explain what some of these methods do.
SetOverriddenBrowser() - let us set the user agent string to specific value
GetOverriddenBrowser() - let us get the overridden value
ClearOverriddenBrowser() - let us remove any overridden user agent for the current request
To recap, in our ASP.Net MVC 4.0 applications when our application is viewed in our mobile devices, we can have a link like "Desktop View" for all those who desperately want to see the site with in full desktop-browser version.We then can specify a browser type override.
My controller class (snippet of code) that is responsible for handling the switching could be something like that.
public class SwitchViewController : Controller
{

 public RedirectResult SwitchView(bool mobile, string returnUrl)

{

if (Request.Browser.IsMobileDevice == mobile)

HttpContext.ClearOverriddenBrowser();

else

HttpContext.SetOverriddenBrowser(mobile ? BrowserOverride.Mobile : BrowserOverride.Desktop);

return Redirect(returnUrl);

}

}
Hope it helps!!!!

In this post I will be looking how ASP.Net MVC 4.0 helps us to create web solutions that target mobile devices.
We all experience the magic that is the World Wide Web through mobile devices. Millions of people around the world, use tablets and smartphones to view the contents of websites,e-shops and portals.
ASP.Net MVC 4.0 includes a new mobile project template and the ability to render a different set of views for different types of devices.There is a new feature that is called browser overriding which allows us to control exactly what a user is going to see from your web application regardless of what type of device he is using.
In order to follow along this post you must have Visual Studio 2012 and .Net Framework 4.5 installed in your machine.Download and install VS 2012 using this link.
My machine runs on Windows 8 and Visual Studio 2012 works just fine.It will work fine in Windows 7 as well so do not worry if you do not have the latest Microsoft operating system.
1) Launch VS 2012 and create a new Web Forms application by going to File - >New Project - > ASP.Net MVC 4 Web Application and then click OK
Have a look at the picture below

2) From the available templates select Mobile Application and then click OK.
Have a look at the picture below

3) When I run the application I get the mobile view of the page.
I would like to show you what a typical ASP.Net MVC 4.0 application looks like. So I will create a new simple ASP.Net MVC 4.0 Web Application. When I run the application I get the normal page view.
Have a look at the picture below.On the left is the mobile view and on the right the normal view.

As you can see we have more or less the same content in our mobile application (log in,register) compared with the normal ASP.Net MVC 4.0 application but it is optimised for mobile devices.
4) Let me explain how and when the mobile view is selected and finally rendered.There is a feature in MVC 4.0 that is called Display Modes and with this feature the runtime will select a view.
If we have 2 views e.g contact.mobile.cshtml and contact.cshtml in our application the Controller at some point will instruct the runtime to select and render a view named contact.
The runtime will look at the browser making the request and will determine if it is a mobile browser or a desktop browser. So if there is a request from my IPhone Safari browser for a particular site, if there is a mobile view the MVC 4.0 will select it and render it. If there is not a mobile view, the normal view will be rendered.
5) In the ASP.Net MVC 4.0 (Internet application) I created earlier (not the first project which was a mobile one) I can run it once more and see how it looks on the browser. If I want to view it with a mobile browser I must download one emulator like Opera Mobile.You can download Opera Mobile here
When I run the application I get the same view in both the desktop and the mobile browser. That was to be expected. Have a look at the picture below

6) Then I create another version of the _Layout.mobile.cshtml view in the Shared folder.I simply copy and paste the _Layout.cshtml into the same folder and then rename it to _Layout.mobile.cshtml and then just alter the contents of the _Layout.mobile.cshtml.
When I run again the application I get a different view on the desktop browser and a different one on the Opera mobile browser.
Have a look at the picture below

Τhe Controller will instruct the ASP.Net runtime to select and render a view named _Layout.mobile.cshtml when the request will come from a mobile browser.
Τhe runtime knows that a browser is a mobile one through the ASP.Net browser capability provider.
Hope it helps!!!
